Cutting neon strip lights might seem daunting, but with the right guidance, it’s entirely manageable. We’ll guide you through the process, ensuring you make the perfect cut without compromising the functionality of your neon strip lights.
You can cut neon strip lights but must be done at designated cut points to maintain functionality. Always follow the manufacturer’s guidelines, use the right tools, and seal the ends properly to avoid any electrical issues.
There’s more to cutting neon strip lights than finding the cut points. Read on to learn about the tools, techniques, and safety precautions for the best results.
Introduction to Neon Strip Lights
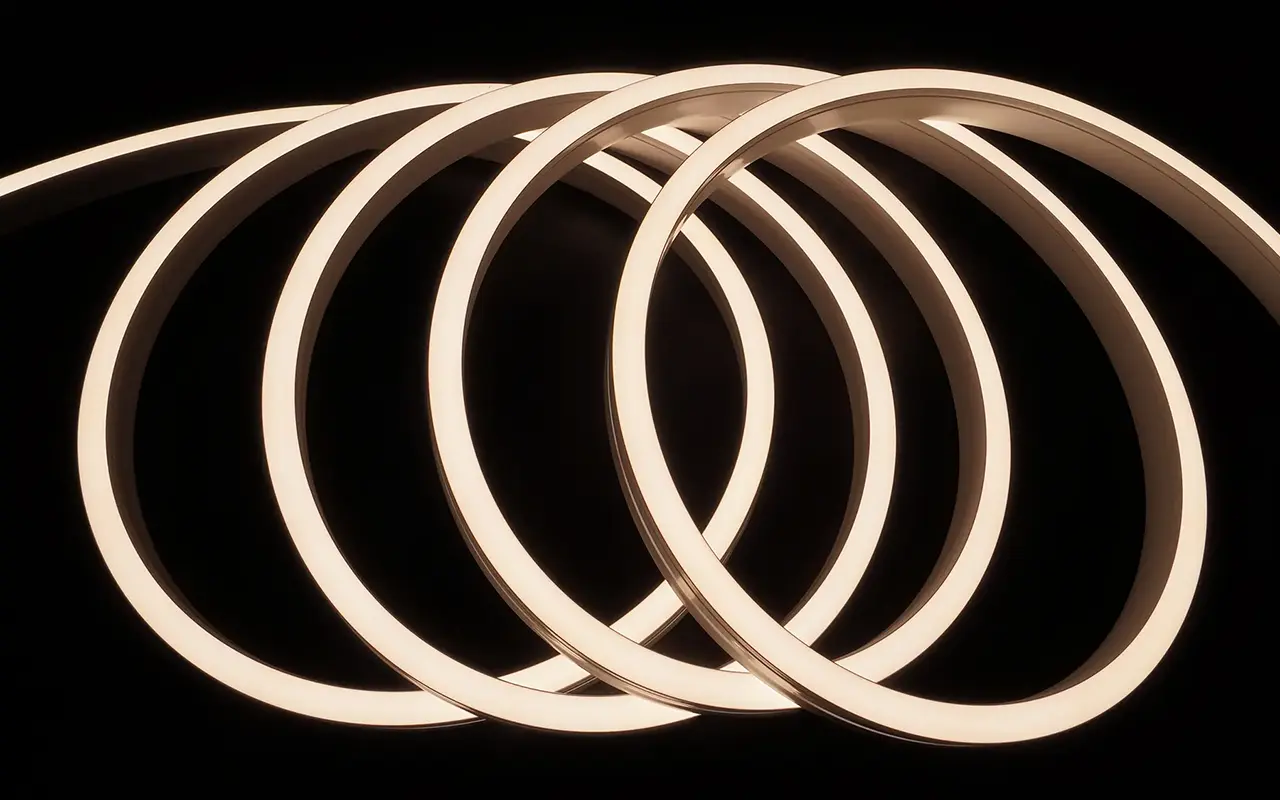
Neon strip lights are the modern incarnation of traditional neon lighting, offering flexibility, durability, and energy efficiency. Constructed from flexible LED circuits housed in a silicone or PVC jacket, these lights replicate the vibrant glow of glass neon tubes without fragility. Unlike their glass counterparts, neon strip lights can bend and curve, allowing them to adapt to various shapes and spaces. This flexibility and robustness make them ideal for indoor and outdoor applications, revolutionizing how we use neon lighting.
How Do Neon Strip Lights Work?
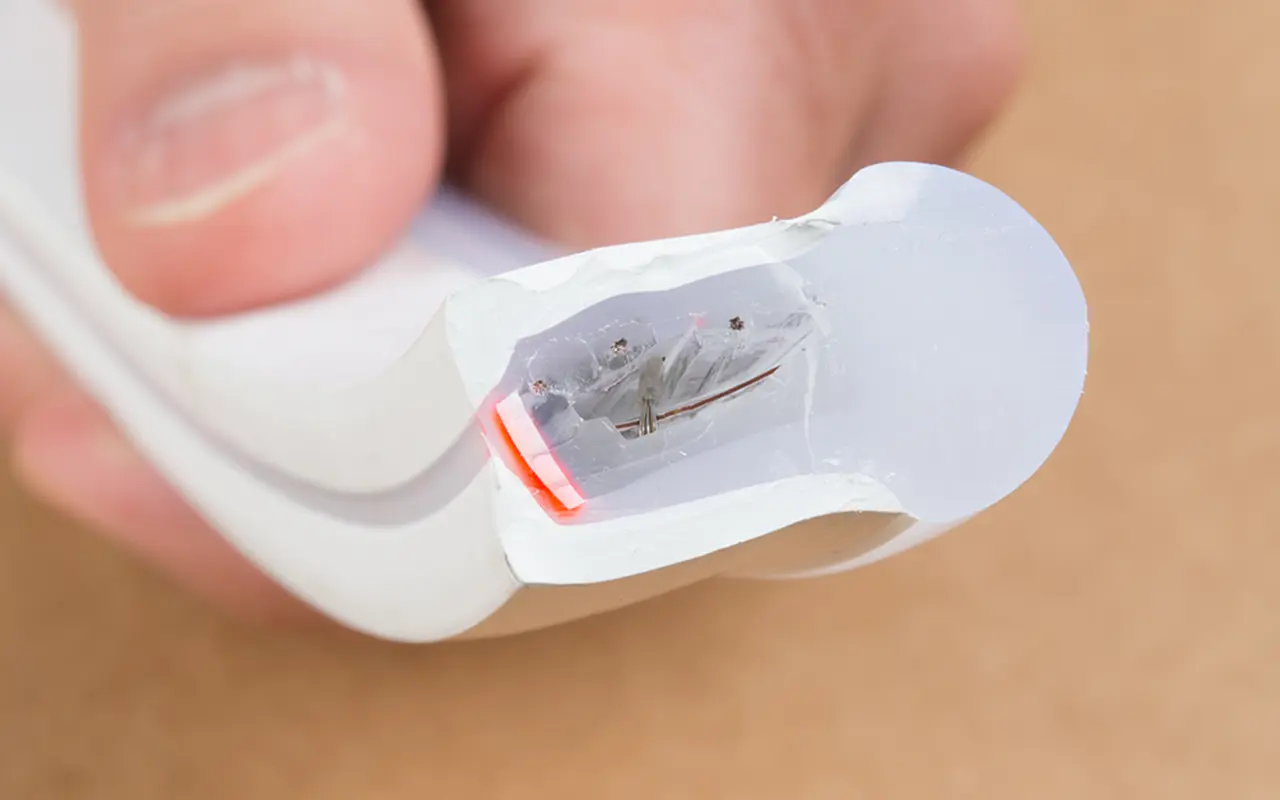
The technology behind neon strip lights is straightforward yet innovative. LED (Light Emitting Diode) technology is at the heart of these lights, where tiny LEDs are embedded along a flexible circuit board. This board is encased in a diffusive silicone or PVC layer, ensuring an even light distribution. The flexibility of the circuit allows the strip to bend without breaking, making it versatile for various installations. Power is typically supplied through a low-voltage DC source, making these lights energy-efficient and safe for use in diverse environments.
Popular Uses of Neon Strip Lights
Neon strip lights have found their place in numerous applications thanks to their versatility and ease of use. They are commonly used for decorative purposes, such as accent lighting in residential spaces, under-cabinet lighting in kitchens, and ambient lighting in living rooms. Commercially, they are favored for signage, where their ability to form intricate shapes and letters is invaluable. Outdoor applications include building outlines, pathways, and landscape lighting, where their durability and waterproof properties shine. Whether for functional or decorative purposes, neon strip lights offer endless possibilities.
Why Cutting Neon Strip Lights Matters
Customizing Length for Specific Installations
One of the primary reasons to cut neon strip lights is customization. Every space has unique dimensions and design needs, and pre-fabricated lengths might only sometimes fit perfectly. Cutting the strip to the exact length ensures a tailored installation, whether for a small nook in your home or a large commercial sign. This customization allows you to achieve a seamless look that enhances the overall aesthetic and functionality of the space.
Avoiding Excess Light and Power Consumption
Precision in cutting ensures a perfect fit and optimizes energy use. Unnecessary lengths of neon strip lights can lead to wasted energy in terms of electricity consumption and the light output itself. Trimming the strips to the required length reduces excess light that could overpower the intended ambiance. It helps keep energy consumption in check, making your lighting installation more sustainable and cost-effective.
Potential Risks of Cutting Neon Strip Lights
While cutting neon strip lights is often necessary, it does come with risks if not done correctly. Cutting at the wrong point can sever the internal wiring, rendering the strip unusable. Additionally, improper sealing of the cut ends can lead to moisture ingress and electrical shorts, damaging the lights and creating safety hazards. Understanding these risks is crucial to ensure the longevity and safety of your installation.
Understanding the Designated Cut Points
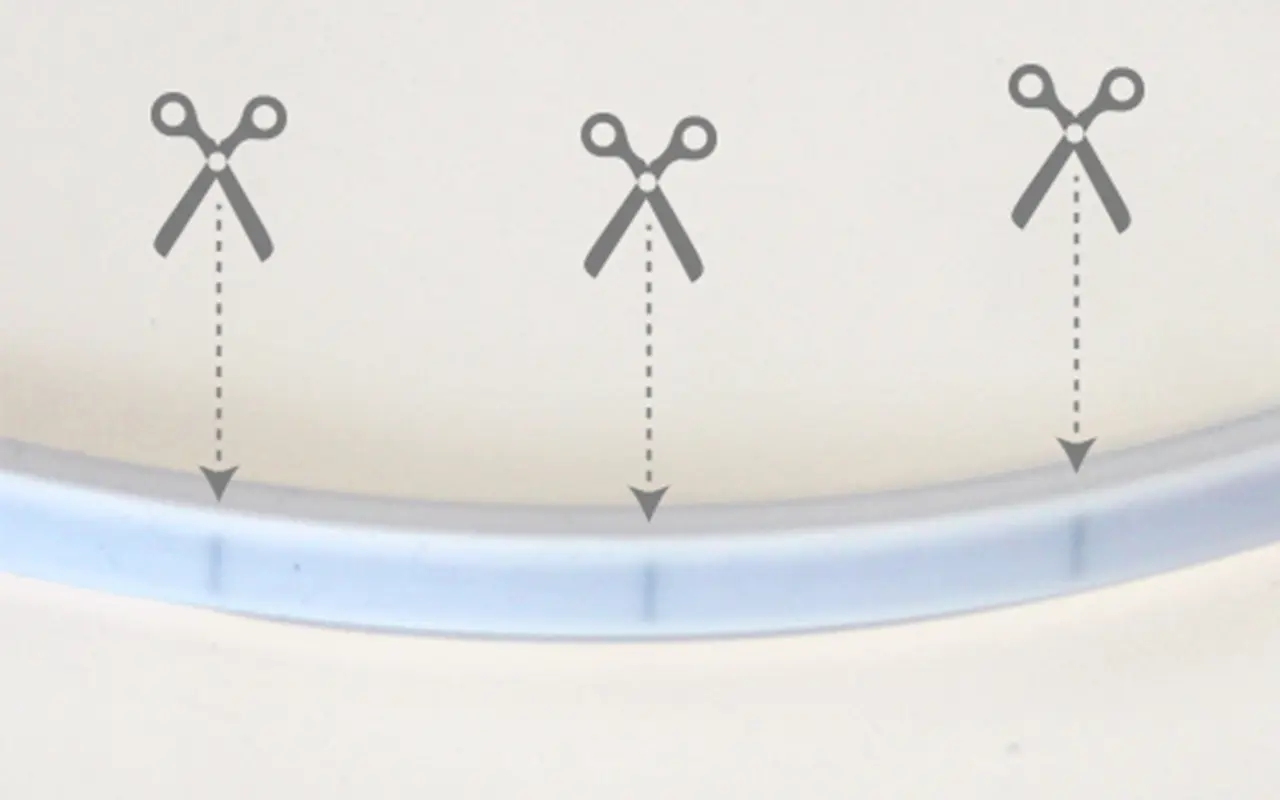
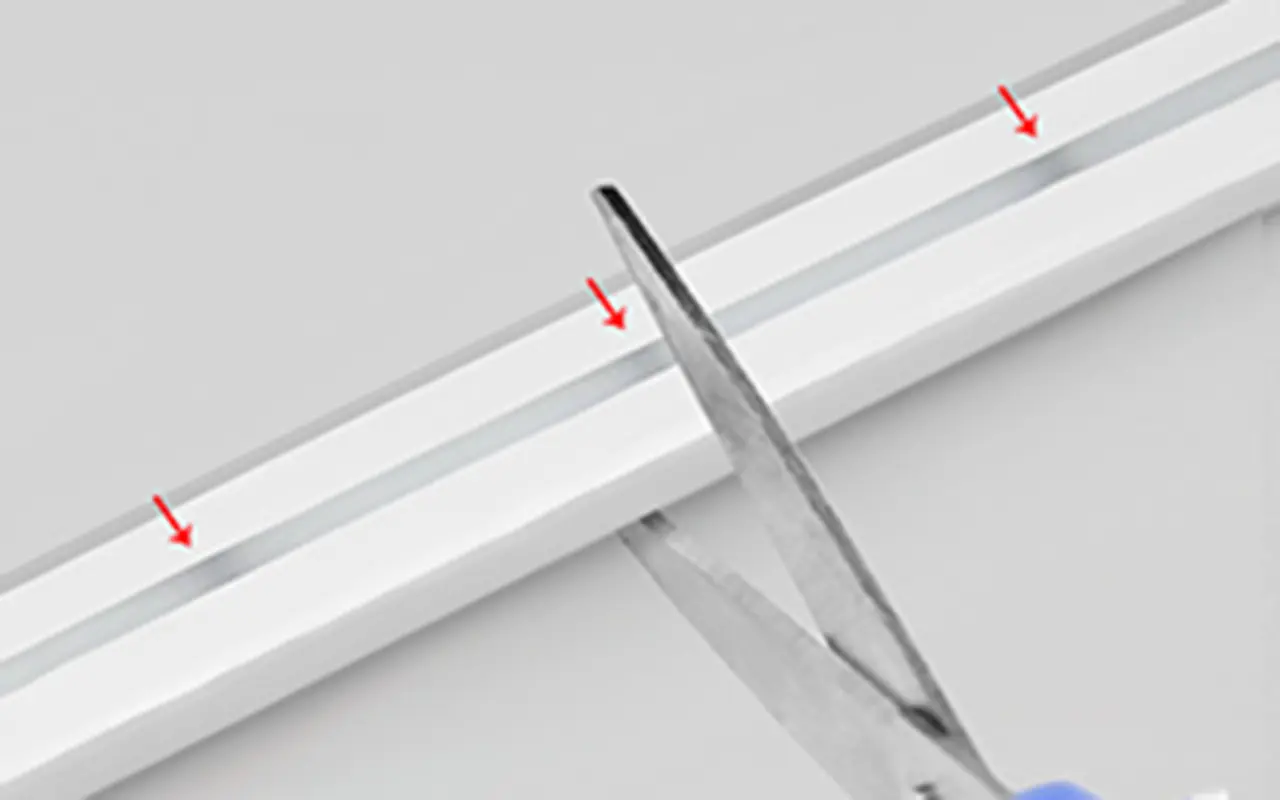
Cut points are predefined locations on the neon strip that are safe to cut without damaging the internal circuitry. These points are typically marked with a scissor icon or a dotted line, indicating where the internal wiring allows for a clean cut. Cutting at these points ensures that the electrical circuit within the strip remains intact, allowing the light to function correctly. The integrity of these cut points is essential for maintaining the strip’s performance and preventing damage.
Identifying the correct cut points on neon strip lights is straightforward if you know what to look for. Manufacturers usually mark these points clearly along the strip at regular intervals. The markings can vary between brands but are often represented by small icons or lines. If these marks are unclear or missing, powering the strip can help you spot the gaps between the slightly dimmer LED segments and indicate where the cuts can be made. Always disconnect the power before making any cuts to ensure safety.
Tools and Materials Required for Cutting Neon Strip Lights
Essential Tools You’ll Need
Cutting neon strip lights requires a few essential tools to ensure a clean and precise cut. A sharp utility knife or craft knife is necessary for cutting through the silicone or PVC casing without damaging the internal wiring. You’ll also need a ruler or measuring tape to measure the correct length and a cutting mat to protect your work surface. To finish the job, silicone caps and heat-shrink tubing are vital for sealing the cut ends and protecting the exposed circuitry from moisture and dust.
Optional Tools for Precision and Safety
Fine-tipped scissors or a specialized LED strip cutter can offer greater control for those seeking added precision. A magnifying glass can help identify small cut points, especially if they are not marked. Protective gear, such as gloves and safety glasses, is recommended to prevent injuries from sharp tools or small particles. These optional tools can make cutting smoother and safer, particularly for more complex or detailed installations.
Preparing to Cut Neon Strip Lights
Measuring the Strip Light Accurately
Accurate measurement is the foundation of a successful cut. Before making any cuts:
- Measure the length of the strip light needed for your installation, marking the exact point where you will cut.
- Use a ruler or measuring tape to ensure precision, and double-check your measurements to avoid mistakes.
Remember, it’s better to measure twice and cut once than to risk an inaccurate cut that could waste material.
Identifying the Right Cut Marks
Once you’ve measured the strip, the next step is identifying the appropriate cut marks. Look for the designated cut points, usually indicated by small symbols or lines on the strip. These marks ensure that you are cutting at a safe point that won’t disrupt the internal circuitry. If the marks are unclear, refer to the manufacturer’s guidelines or use the power-on method to locate the cut points accurately.
Setting Up a Safe and Clean Workspace
Creating a safe and clean workspace is crucial for a successful cutting process. Ensure your work area is well-lit and free from clutter. Lay the strip light on a stable surface, such as a cutting mat, to prevent slipping during the cut. Organize all necessary tools within easy reach and take a moment to clear your mind and focus on the task at hand. A well-prepared workspace reduces the risk of errors and accidents.
Protecting Your Hands and Eyes
Working with sharp tools and electrical components requires careful attention to safety. Always wear protective gloves to shield your hands from cuts and burns. Safety glasses protect your eyes from debris or sparks during cutting or soldering. Taking these precautions minimizes the risk of injury and ensures a safe working environment.
Step-by-Step Guide: How to Cut Neon Strip Lights Correctly
Step 1: Unplug and Secure the Strip Light
Safety is paramount when working with electrical components. Before making any cuts, ensure that the neon strip light is unplugged from its power source. This step is critical to prevent electrical shocks or short circuits. Once the strip is disconnected, secure it on your cutting surface to keep it stable while you work.
Step 2: Measure Twice, Cut Once
The adage “measure twice, cut once” is especially relevant here. After securing the strip, re-measure the length to ensure accuracy. Confirm that the cut point aligns with the correct marker and that the measurement matches your initial calculations. Taking the time to double-check your measurements can save you from making costly mistakes.
Step 3: Use the Right Tools for the Job
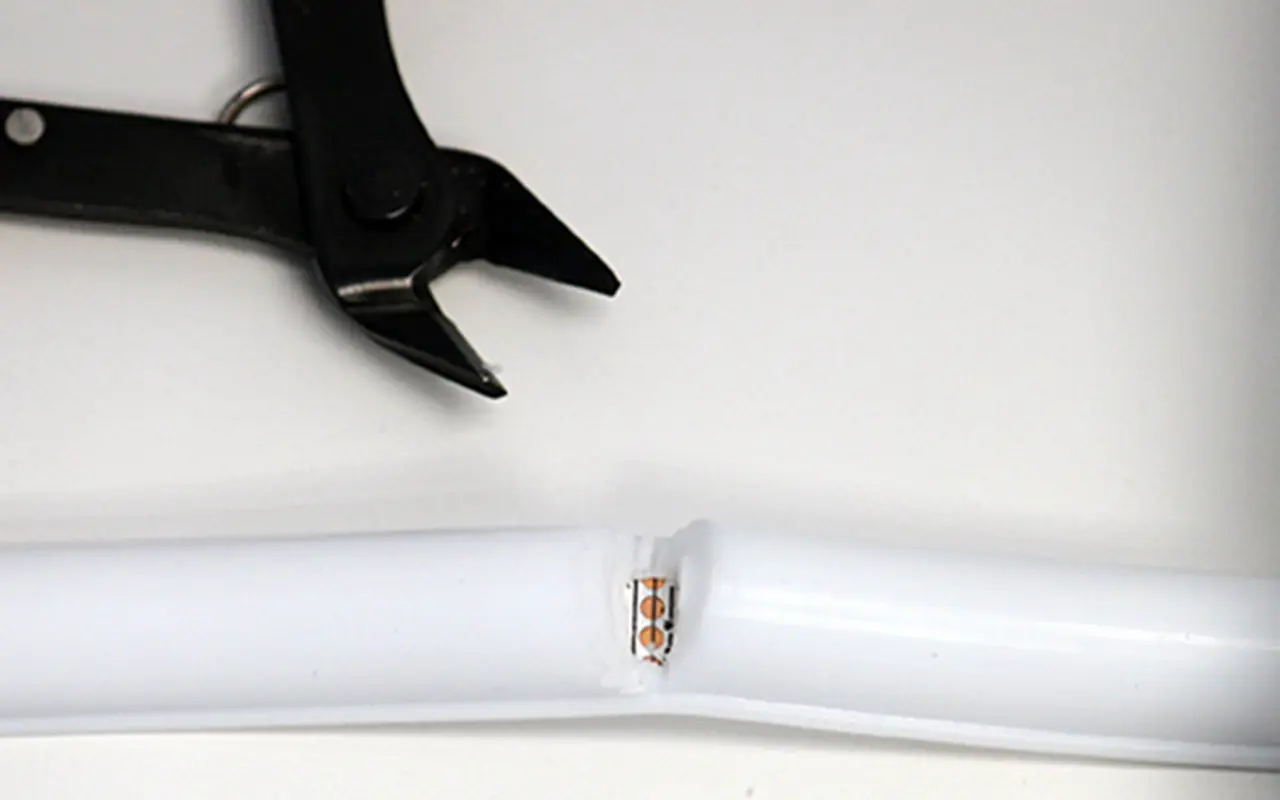
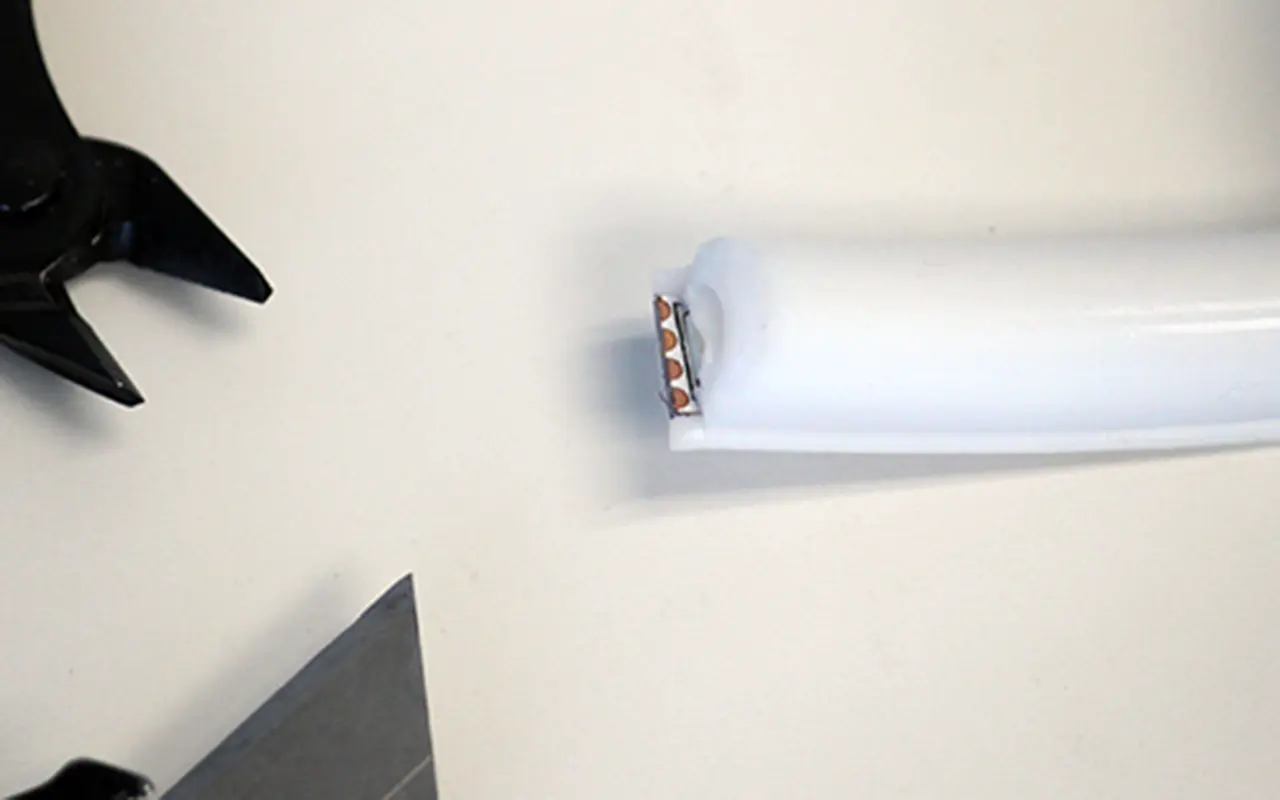
With everything set, it’s time to cut. Using a sharp knife or scissors, carefully cut along the designated mark. Apply steady, even pressure to avoid jagged edges or damage to the internal wiring. If using a specialized cutter, follow the tool’s instructions for the cleanest cut possible. Precision at this stage ensures that the strip will function correctly after reassembly.
Step 4: Sealing the Cut End to Protect the Circuit
After cutting the strip, sealing the exposed ends is essential to protect the circuit from dust, moisture, and other contaminants. Use silicone caps or heat-shrink tubing to cover the ends securely. Apply a silicone adhesive to keep the caps in place and ensure a watertight seal. Proper sealing is crucial for maintaining the durability and safety of your neon strip lights, especially in outdoor or damp environments.
What to Do After Cutting Neon Strip Lights
Reconnecting Cut Sections of Neon Strip Light
After cutting, you may need to reconnect the neon strip light sections to complete your installation. This can be done using connectors designed for LED strips or by soldering the wires together. If using connectors, ensure they are compatible with your strip model and follow the manufacturer’s instructions carefully. Soldering requires more skill but offers a more permanent connection. In either case, ensure the connections are secure to maintain the strip’s integrity.
Testing the Neon Strip Light After Cutting
Before finalizing your installation, testing the neon strip lights to ensure they function correctly is important. Reconnect the strip to the power source and check for issues like flickering, dimming, or non-functioning sections. Testing at this stage allows you to address any problems before completing the installation, saving you time and effort in the long run.
Fixing Common Issues Post-Cutting
Even with careful cutting and reconnection, issues can arise. Double-check the connections and seals if you encounter problems like flickering or sections that don’t light up. Loose wires, poor soldering, or inadequate sealing can cause these issues. Addressing them promptly ensures that your neon strip lights perform as expected, providing a consistent and vibrant glow.
Common Mistakes to Avoid When Cutting Neon Strip Lights
Cutting at the Wrong Spot: Consequences and Solutions
One of the most common mistakes is cutting the strip at the wrong spot, which can sever the internal wiring and render the strip unusable. If this happens, check if the damage is limited to the cut section. If so, you can trim the strip further and reseal it. However, replacing the strip may be necessary if the damage is extensive. Always ensure you’re cutting at the designated cut points to avoid this mistake.
Failing to Seal the Cut End Properly
Another frequent mistake is failing to seal the cut ends adequately. Unsealed ends allow moisture and dust to infiltrate the circuit, leading to electrical shorts or corrosion. Always use high-quality sealing materials and ensure a snug fit to protect the exposed circuitry. Proper sealing is essential for the longevity and safety of your neon strip lights.
Not Double-Checking Measurements: Avoiding Waste
Inaccurate measurements can lead to wasted materials and frustration. Cutting the strip too short means it won’t fit the intended space, and cutting it too long may require additional trimming or adjustments. To prevent this, double-check your measurements before cutting. Accurate measurements ensure that your project proceeds smoothly and materials are used efficiently.
Can All Neon Strip Lights Be Cut? Understanding Compatibility
Not all neon strip lights are designed to be cut. Most flexible LED neon strips can be cut, as they are designed with cut points. However, some models with integrated controllers or complex circuitry may need to be more suitable for cutting. Always consult the manufacturer’s guidelines to determine if your strip can be cut without damaging the circuitry. Understanding compatibility ensures that you select the right product for your project.
If your neon strip light cannot be cut, there are alternatives to achieve the desired length or effect. Pre-cut strips are available in various lengths, allowing you to choose the size that fits your project without cutting. Adjustable neon strips offer another option, allowing you to lengthen or shorten the strip without making permanent cuts. Exploring these alternatives ensures you can still achieve your lighting goals, even if cutting isn’t an option.
Alternatives to Cutting Neon Strip Lights
Pre-Cut Options Available on the Market
If cutting neon strip lights isn’t feasible, consider pre-cut options on the market. Many manufacturers offer strips in various lengths, allowing you to choose the size that best fits your project without cutting. Pre-cut strips are ideal for those who prefer a hassle-free solution or for projects where precision cutting isn’t possible. These options provide the same vibrant glow and flexibility as cut-to-length strips, making them a convenient alternative.
Using Connectors Instead of Cutting
Connectors offer a versatile alternative to cutting neon strip lights. By using connectors, you can join multiple strips together to achieve the desired length without cutting. This method is particularly useful for complex installations or when working with non-cuttable strips. Connectors are easy to use and can be hidden discreetly within the installation, maintaining the aesthetic integrity of the project. Using connectors instead of cutting allows for greater flexibility and reduces the risk of damaging the strip lights.
Adjustable Neon Strip Lights: A Flexible Solution
Adjustable neon strip lights provide an innovative solution for those who need even more flexibility. These strips are designed to be lengthened or shortened without cutting, offering a customizable lighting experience. Adjustable straps are ideal for projects that require frequent changes or adjustments, such as temporary installations or dynamic displays. Exploring adjustable neon strip lights can open new possibilities for creative and functional lighting designs.
FAQs
Q: Can all neon strip lights be cut?
A: Not all neon strip lights are designed to be cut. Only those with designated cut points are safe to modify. Always check the manufacturer’s guidelines to determine whether your model is cuttable.
Q: Where should I cut my neon strip lights to avoid damaging them?
A: You should only cut neon strip lights at the designated cut points, typically marked by a scissor icon or a line on the strip. Cutting anywhere else can damage the internal wiring and render the strip unusable.
Q: What tools do I need to cut neon strip lights safely?
A: Essential tools include a sharp utility knife or scissors, a ruler for accurate measurement, and silicone caps or heat-shrink tubing to seal the cut ends. Optional tools like a magnifying glass or specialized LED strip cutter can also be useful for precision.
Q: How do I ensure a clean cut when cutting neon strip lights?
A: To achieve a clean cut, use a sharp cutting tool and apply steady, even pressure along the designated cut line. Ensuring the strip is unplugged and secured on a stable surface will also help prevent mistakes.
Q: What should I do if my neon strip light doesn’t work after cutting?
A: If your strip light doesn’t work after cutting, check the connections and ensure the cut was made at the correct point. Reseal the ends and inspect for any loose wires. If necessary, re-sold the connections or replace the damaged section.
Q: Can I reconnect sections of the neon strip light after cutting them?
A: Yes, you can reconnect sections of neon strip lights using compatible connectors or by soldering the wires together. Ensure the connections are secure and the ends are properly sealed to maintain functionality.
Q: What are the risks of cutting neon strip lights incorrectly?
A: Cutting neon strip lights incorrectly can damage internal wiring, leading to non-functional sections. It can also cause electrical shorts or moisture ingress if the ends are improperly sealed.
Q: Are there alternatives to cutting neon strip lights?
A: Yes, alternatives include using pre-cut strips, adjustable neon strips that don’t require cutting, or connectors to join multiple strips without making any cuts. These options can provide flexibility without the risk of damaging the strip.
Q: What should I do to ensure the safety of my workspace when cutting neon strip lights?
A: Ensure your workspace is well-lit, clutter-free, and stable. Use a cutting mat to protect your surface and organize all tools within reach. Always wear protective gloves and safety glasses to prevent injury.
Q: How do I test neon strip lights after cutting them?
A: After cutting and sealing the strip, reconnect it to the power source and check for any issues, such as flickering or dim sections. Testing ensures that the strip functions correctly before completing your installation.
Final Thoughts: Should You Cut Your Neon Strip Lights?
Before deciding to cut your neon strip lights, it’s important to weigh the pros and cons. While cutting allows for customization and a perfect fit, it also carries risks if not done correctly. Consider whether the benefits of a tailored length outweigh the potential challenges and whether you have the necessary tools and expertise to complete the task successfully. By carefully evaluating the pros and cons, you can make an informed decision that aligns with your project’s needs. If the risks of cutting seem too great, exploring alternatives may offer a hassle-free solution. Pre-cut strips, connectors, and adjustable lights provide options that eliminate the need for cutting while still allowing customization. These alternatives can save time, reduce stress, and ensure flawless installation, making them attractive for many projects. Considering these options can lead to a smoother and more efficient lighting project.
In conclusion, mastering the art of cutting neon strip lights can transform your lighting projects, offering flexibility and precision. For those seeking top-quality LED strip lights and LED neon flex, Unitop is one of China’s leading manufacturers, renowned for its cutting-edge technology and commitment to excellence. Whether you have further questions or specific requirements, our expert team is ready to assist you. Contact us today to discover how Unitop can illuminate your next project with professionalism and innovation.

Tom is now the Sales Manager of Unitop (China) Co., Limited. He has been in the LED Lighting industry ever since 2005. He is an expert in sales & marketing, and factory management. He likes bodybuilding, and he is also a crazy Apple Fan! He is a hard-working guy and loves to learn and try new things.
Email: tom@unitopledstrip.com WhatsApp: +86-18680307140




Leave a Reply
Want to join the discussion?Feel free to contribute!