Do you need help bending LED strips to achieve that perfect curve for your lighting project? Mastering the art of bending LED strips is crucial for creating seamless, visually appealing designs that enhance any space. Many people assume that LED strips are only suitable for straight lines. Still, with the right techniques, you can achieve stunning curves and angles that transform your lighting setup.
Bending LED strips effectively can seem daunting due to common misconceptions and challenges. For instance, many believe bending can damage the strips or compromise functionality. However, understanding the flexibility of different types of LED strips and employing the right methods can lead to impressive results without any damage. Well-bent LED strips can offer both aesthetic appeal and practical benefits, such as improved light distribution and enhanced design versatility.
This guide will explore the essentials of bending LED strips, including the various methods, tools, and techniques to achieve perfect curves. You will discover practical tips for making smooth bends, learn about advanced techniques for complex shapes, and understand how to seamlessly install LED strips around corners. Dive in to uncover the secrets of bending LED strips like a pro and elevate your lighting designs to a new level of excellence.
Understanding LED Strip Flexibility
Types of LED Strips and Their Bending Capabilities
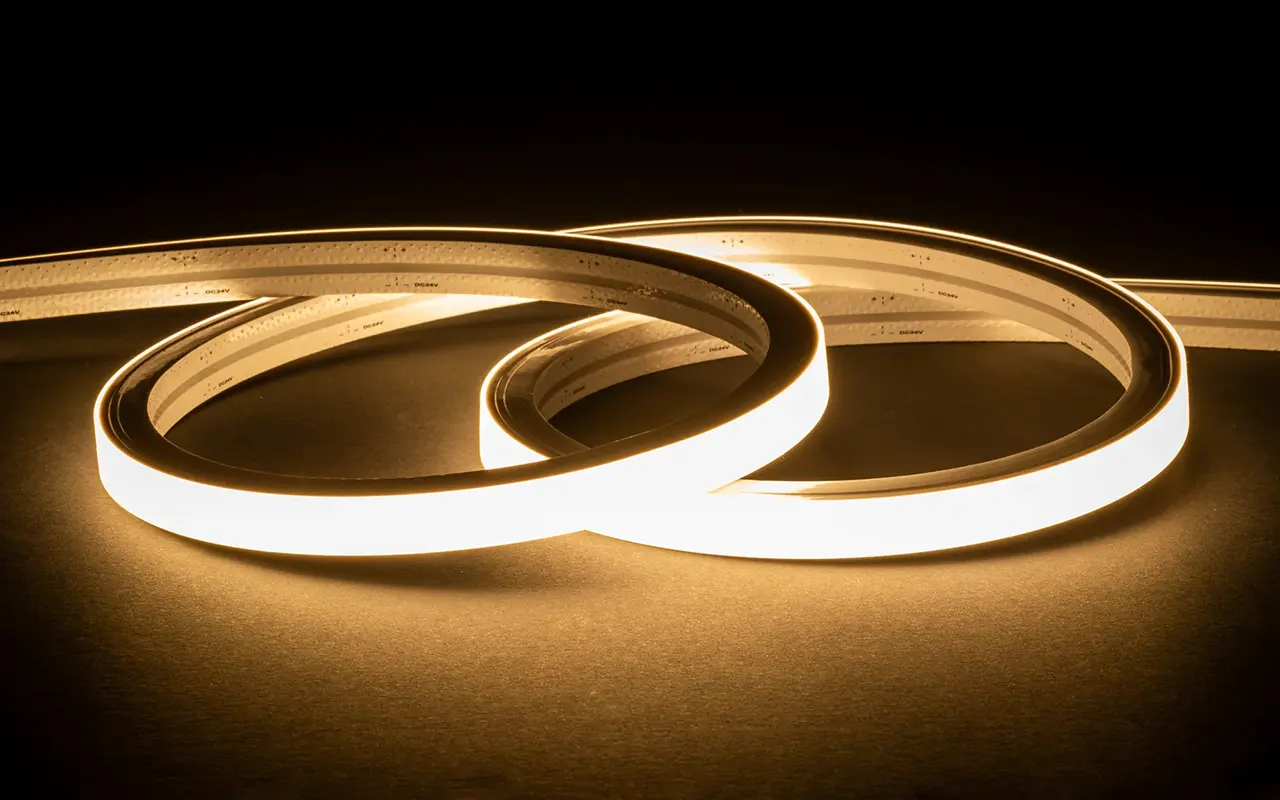
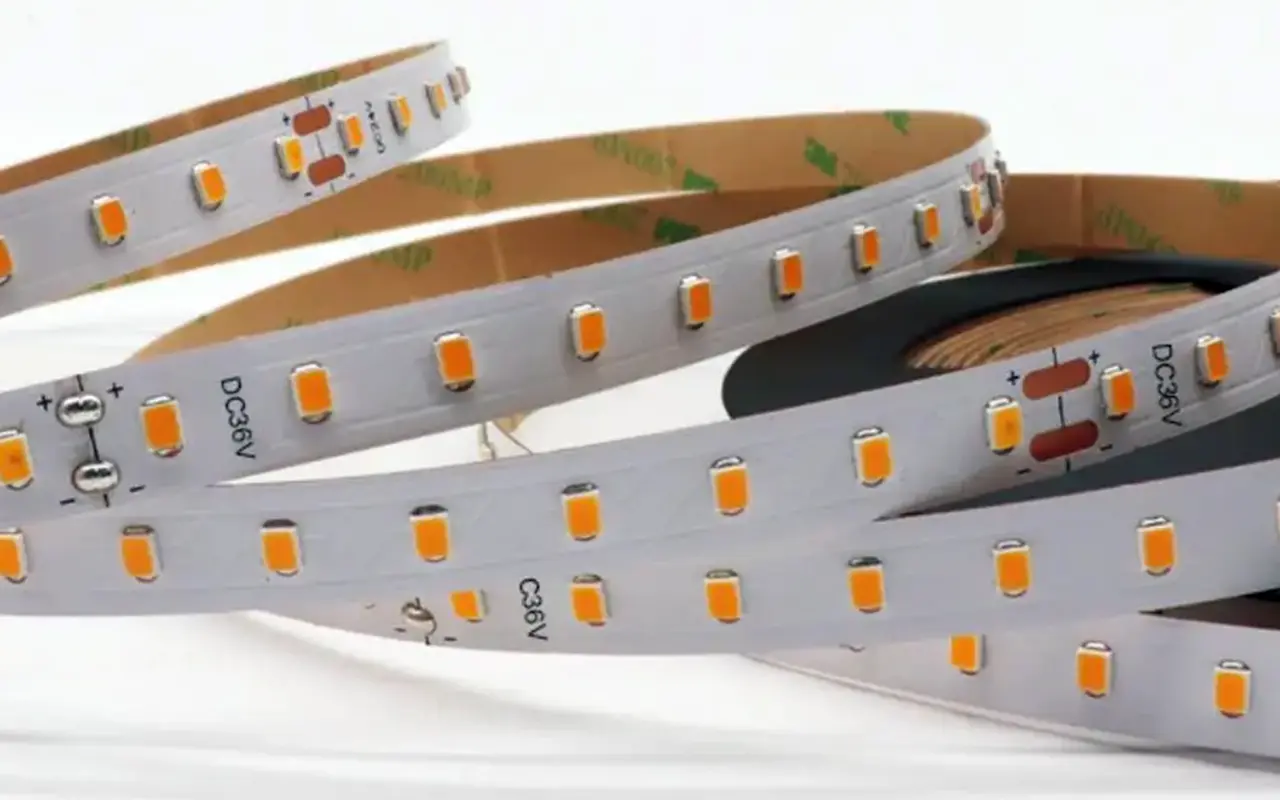
LED strips are not one-size-fits-all; their flexibility varies based on their construction. Rigid LED strips are designed for applications where straight lines are essential and cannot be bent. They are typically used in scenarios requiring consistent, linear lighting. Flexible LED strips, however, are engineered to bend and curve, making them ideal for creative and custom installations where contours and angles are involved. They can navigate around corners and shapes with ease. Semi-flexible LED strips fall in between, offering some bending capability but less than fully flexible options. Understanding these differences helps you select the right LED strip for your specific project needs, ensuring functionality and aesthetic appeal.
Factors Influencing Flexibility and Bend Radius
Several key factors influence the flexibility of an LED strip. Material composition plays a significant role; strips made from more pliable materials can bend more easily and achieve tighter curves. The density of LEDs also affects flexibility; strips with higher LED density can handle smaller bend radii without damage. Additionally, the protective coatings and thickness of the strip impact its ability to bend. A strip with a robust protective layer or excessive thickness may be more prone to damage if bent too sharply. Understanding these factors ensures that you choose the right strip for achieving the desired curves and angles while maintaining the strip’s integrity.
Comparing Rigid vs. Flexible LED Strips
When choosing between rigid and flexible LED strips, it’s important to consider the application. Rigid LED strips are ideal for installations requiring straight, linear lighting without curves. They are often used in environments where uniform illumination is needed along a straight path. On the other hand, flexible LED strips are perfect for custom lighting designs that involve curves and shapes. They can easily conform to various angles and surfaces, making them suitable for creative and intricate installations. Semi-flexible strips offer a middle ground, providing moderate bending capabilities for projects that don’t require extreme flexibility but still need some curve adaptability. Your choice will depend on your specific design requirements and the complexity of your lighting project.
Wichtige Werkzeuge und Materialien
Must-Have Tools for Accurate Bending
Achieving precise bends in LED strips is no small feat—it requires precision and the right set of tools. To start, measuring tape and rulers are non-negotiable for spotting your measurements. These tools ensure you cut your LED strips to the exact length needed, helping avoid costly mistakes or wasted materials. Precise measurements are the foundation of a clean, professional-looking installation.
A sharp utility knife is equally important. LED strips have designated cutting points, so making straight cuts along these lines is essential. A dull blade can cause fraying, jagged edges, or even damage the circuitry, all of which can impact the performance of the strip. Therefore, invest in a high-quality utility knife for the best results.
The most crucial tool in your arsenal is the heat gun. Softening the LED strip before bending is necessary to prevent cracking or damaging the strip’s components. A heat gun allows you to control and apply the temperature evenly along the area you plan to bend. Move the heat gun slowly and maintain a consistent distance to avoid overheating one spot. The right heating technique will make the strip pliable enough to bend smoothly and precisely without affecting its functionality. These tools work together to ensure that your bends are accurate and durable, offering aesthetic appeal and longevity.
Selecting the Right Adhesives and Connectors
The adhesive you use can make or break your installation—literally. Double-sided tape is a popular choice for most LED strip installations, but not just any tape will do. Look for 3M VHB (Very High Bond) or similar quality adhesive tapes designed for long-lasting holds, even on tricky surfaces like metal or plastic. This ensures that the strips stay in place for years, resisting heat and wear that might cause cheaper adhesives to fail.
Mounting clips are an excellent alternative for more permanent installations. These small plastic or metal brackets secure the strip firmly against the surface, offering added stability in areas where the adhesive might not be enough, such as corners or rough textures. Clips also provide easy access for future adjustments or maintenance, allowing you to remove and replace the strips without compromising their adhesion.
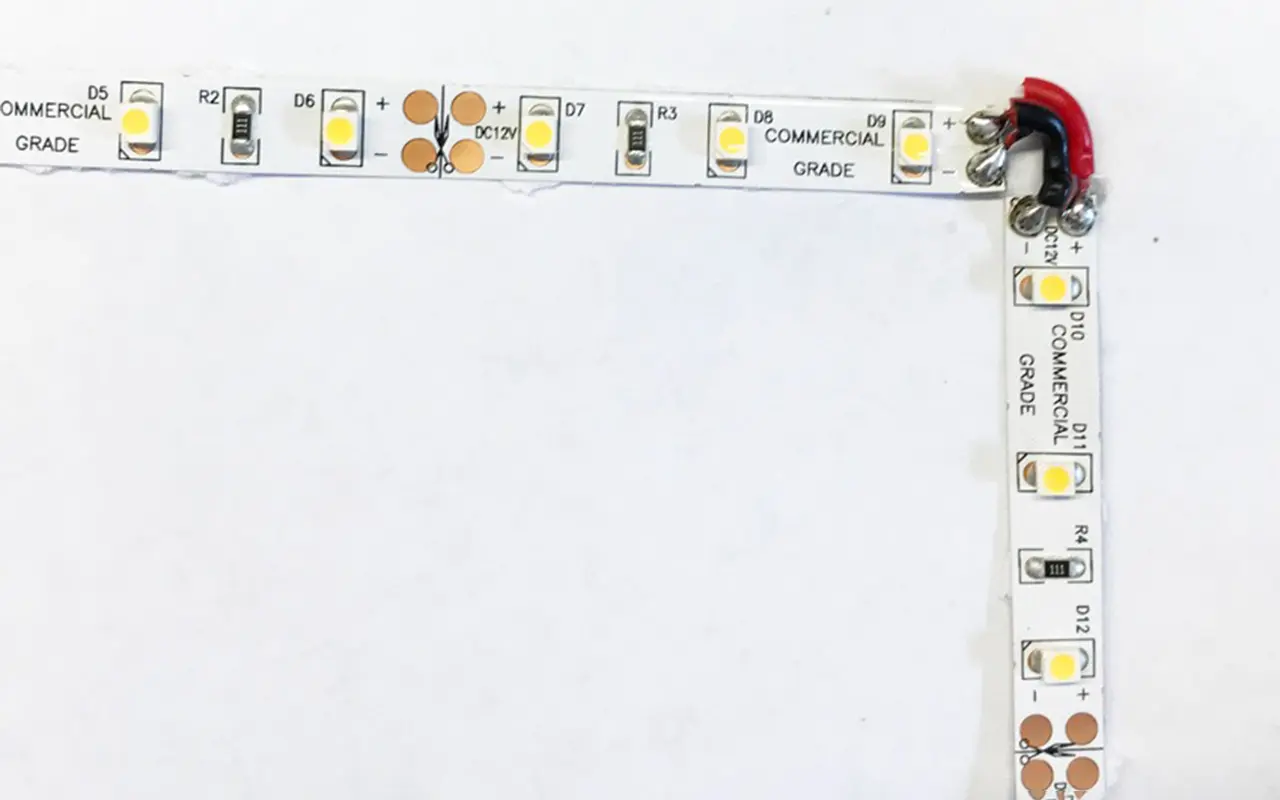
L-shaped and solderless connectors are indispensable when connecting LED strips at corners or in longer runs. L-shaped connectors allow you to create seamless right-angle bends without manually bending the strip, which can lead to uneven light output or damage. Solderless connectors, meanwhile, enable you to join multiple sections of strip lighting without the need for soldering, saving time and reducing the likelihood of mistakes. These connectors ensure a smooth, continuous flow of electricity and light between different strip sections, maintaining performance and appearance.
Optional Tools for Advanced Bending Techniques
For more complex installations that go beyond simple straight lines or gentle curves, advanced tools can help you achieve precision and artistry in your bends. One such tool is the bending jig. This specialized device holds the LED strip in place. At the same time, you bend it, allowing you to create consistent, repeatable curves and angles. Whether you’re working on large architectural projects or small decorative pieces, a bending jig offers greater control and consistency, reducing the chances of error during installation.
Another valuable tool for advanced projects is the heat press. Unlike a heat gun, which applies heat in a localized area, a heat press delivers uniform heat over a broader section of the strip. This is particularly useful when working with more complex designs requiring multiple bends in proximity. A heat press ensures the entire strip area remains pliable, preventing uneven bends or warping. This tool is especially useful for professional installations where precision is paramount.
Incorporating these optional tools improves the accuracy and quality of your installation and expands the range of design possibilities. Whether creating intricate patterns for an interior design project or working on outdoor signage with sharp angles, these tools enable you to push the boundaries of what’s possible with LED strip lighting.
Preparing Your LED Strips
How to Measure and Cut LED Strips for Optimal Results
Proper measurement and cutting are crucial for the successful bending of LED strips. Begin by measuring the length required for each project section, factoring in bends and curves. Use a sharp utility knife to cut along the designated lines on the strip, ensuring clean and precise edges. Avoid cutting between LED segments to preserve the strip’s functionality and avoid damage. Accurate preparation will produce a smoother bending process and a more refined final result.
Cleaning and Preparing Strips for Bending
Before bending, cleaning the LED strips to remove any dust or debris that might interfere with the adhesion or bending process is essential. Use a dry, lint-free cloth to wipe the strip’s surface gently. Ensure the strip is straightened before bending to avoid uneven curves or damage. Proper cleaning and preparation are vital for achieving the best results in your LED strip installation.
Safety Precautions Before You Begin
Safety is paramount when working with LED strips. Always work in a well-ventilated area, especially when using a heat gun or adhesives. Wear protective gloves to prevent burns or irritation from hot surfaces or chemicals. Ensure all power sources are disconnected before cutting or bending the strips to avoid electrical hazards. Taking these safety precautions helps ensure a smooth and risk-free installation process.
Step-by-Step Instructions for Bending LED Strips
Planning Your Bend: Design Considerations and Layout
Begin by planning the design and layout of your LED strips. Sketch a rough outline of the installation area, marking where bends and curves will occur. Consider the radius of each bend and how it will impact the overall look and functionality of the lighting. Proper planning ensures the final result aligns with your design vision and performs as expected, providing aesthetic appeal and effective illumination.
Heating Methods: How to Soften LED Strips Effectively
Softening the LED strip is key to achieving smooth bends. The heat gun is the most effective tool for this purpose. Gently heat the strip along the area where you intend to bend it, moving the heat gun back and forth for even heating. Avoid overheating, as this can damage the strip’s components. Once the strip is sufficiently softened, bend it to the desired shape. Proper heating techniques are crucial for achieving clean, precise bends without causing damage.
Techniques for Creating Smooth, Even Bends
Creating smooth even bends requires a gentle and controlled approach. Start by making small, incremental bends and gradually increase the angle. Use a ruler or bending jig to guide the strip and ensure uniformity. Techniques such as the accordion fold, which involves making small wrinkles, can be effective for curves. This method helps maintain the strip’s flexibility and prevents kinking, resulting in a smooth, continuous curve.
Securing the Bend: Tips for Stability and Longevity
After bending the strip, securing it properly is essential for stability and longevity. Use adhesives or mounting clips to ensure the strip stays firmly in place. Check for any gaps or loose sections and address them to enhance the installation’s durability. Proper securing not only improves the stability of the installation but also extends the lifespan of the LED strip by preventing movement and potential damage.
Testing Your Bend: Ensuring Functionality and Alignment
Once the LED strip is installed, testing its functionality and alignment is crucial. Power up the strip and check for any issues, such as uneven lighting or flickering, which may indicate problems with the bend or installation. Make adjustments to ensure the lighting is consistent and meets your design expectations. Proper testing verifies the quality and effectiveness of the installation, ensuring that it performs as intended.
Advanced Bending Techniques
Crafting Complex Shapes and Designs with LED Strips
Crafting complex shapes and designs with LED strips requires advanced techniques for intricate projects. A bending jig or heat press can help achieve precise, elaborate curves. Experiment with different methods to find the best approach for your design, and consider seeking guidance from experts or additional resources for advanced bending techniques. Mastering these techniques allows for greater creativity and flexibility in your LED strip projects.
Achieving Sharp Angles Without Damage
Creating sharp angles without damaging the LED strip involves careful technique. Use a heat gun to soften the strip at the bend point and make small, controlled bends to avoid stressing the strip. L-shaped connectors can also help achieve clean, sharp angles while maintaining continuity in the lighting. Proper technique and tools are essential for creating sharp angles without compromising the integrity of the LED strip.
Comparing Heat Guns with Other Heating Methods
Heat guns are preferred when softening LED strips because they provide concentrated and adjustable heat. Alternatives like hair dryers or heat presses may offer less control and effectiveness. Heat guns allow for precise heating, crucial for achieving optimal bending results. Consider the level of control and effectiveness required for your project when selecting a heating method.
Installing LED Strips Around Corners
The Corner Fold or 90-degree Fold
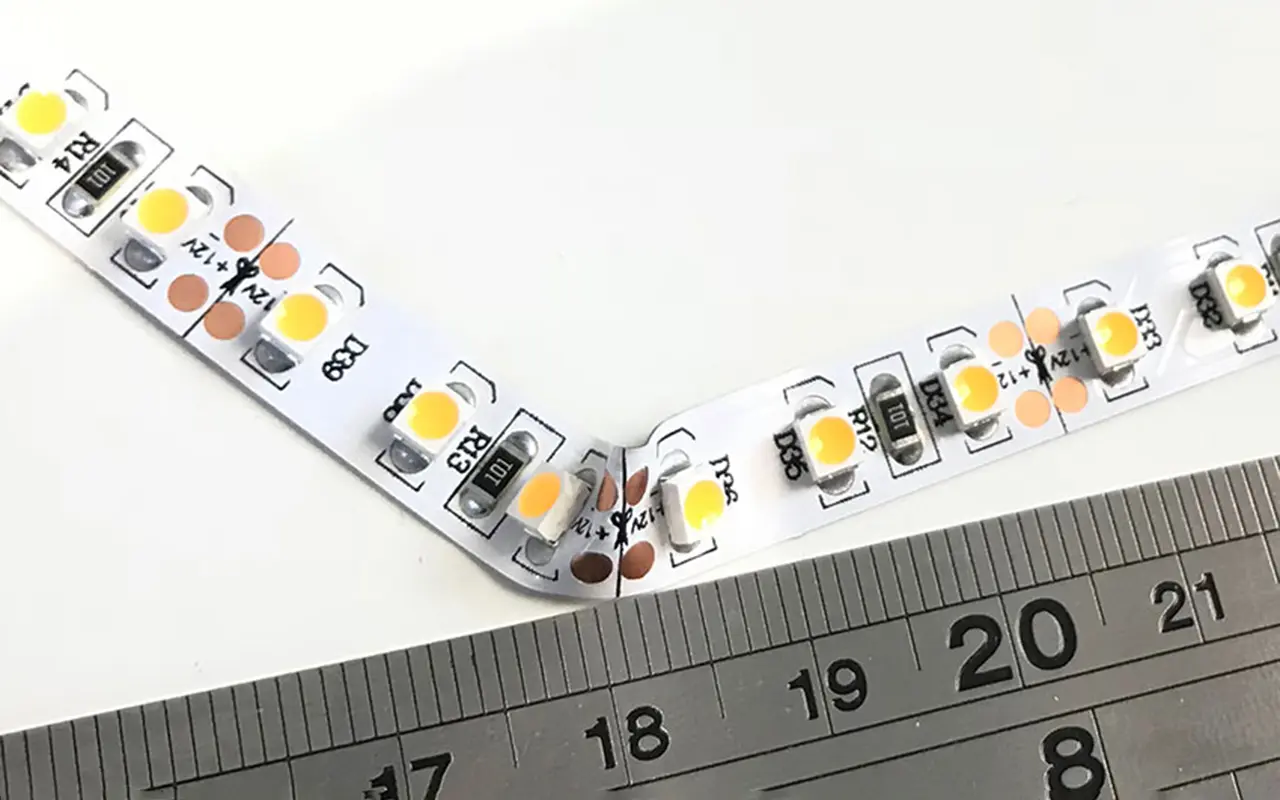
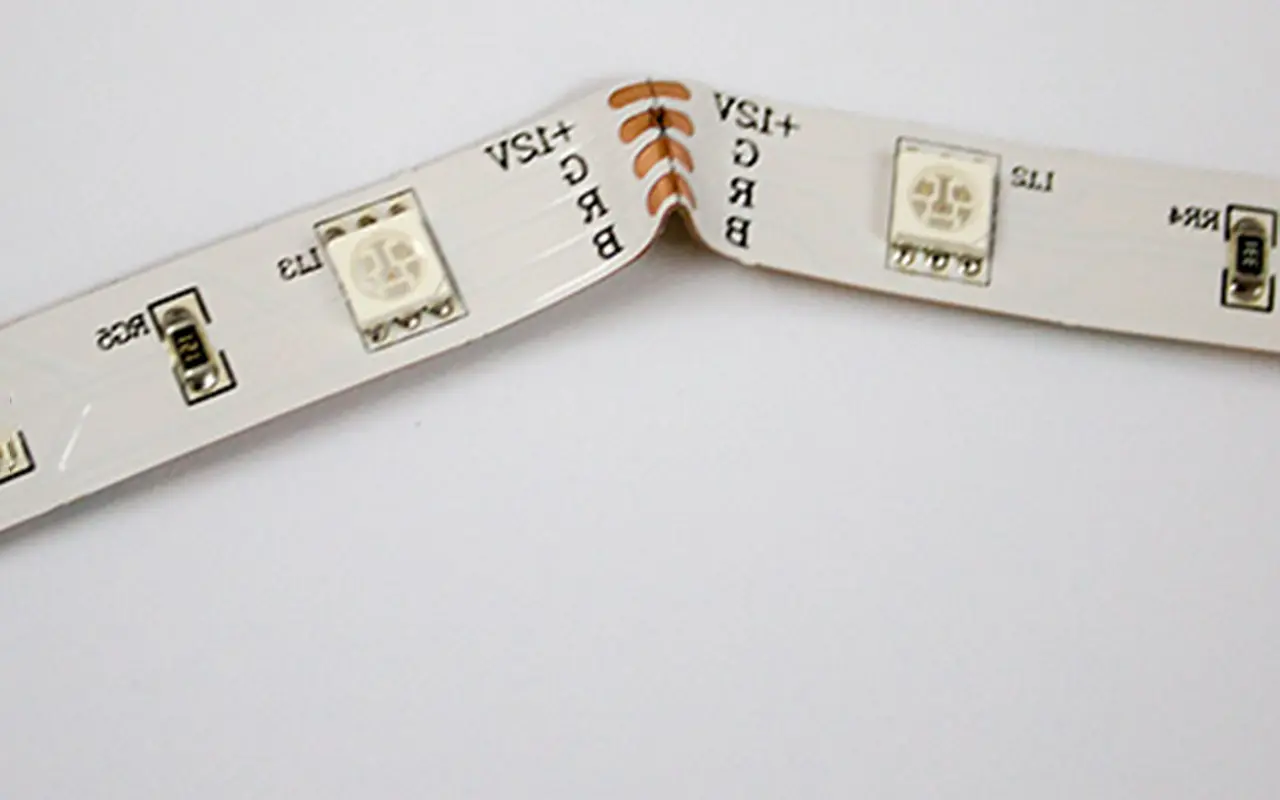
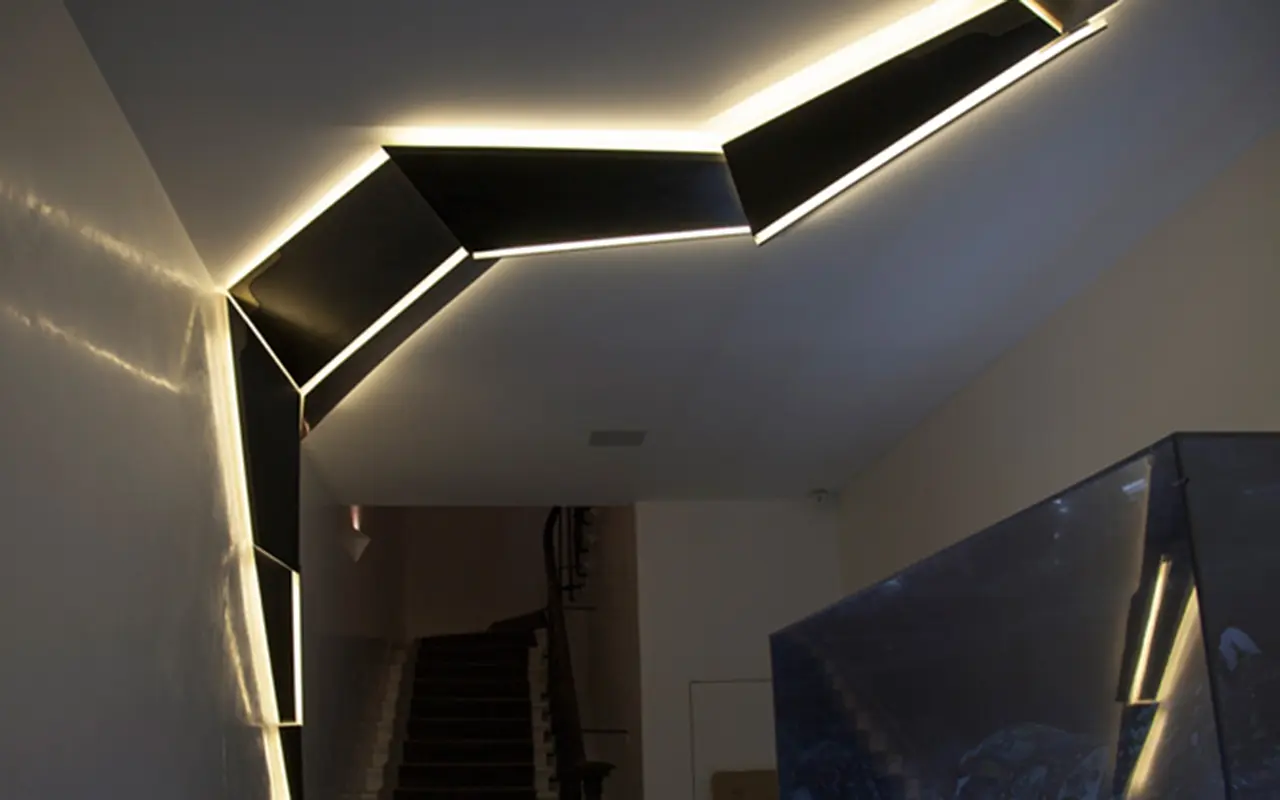
The corner or 90-degree fold is one of the most reliable and straightforward methods for bending LED strips around corners. This method creates a clean, sharp bend at a right angle, making it ideal for installations where precise corner transitions are necessary. Whether lighting up a kitchen backsplash or accenting a ceiling, the corner fold ensures that your LED strip maintains its aesthetic appeal while providing seamless illumination around sharp edges.
To execute this method properly, the first step is to ensure the strip is softened adequately before the bend. This is where the heat gun comes into play. Apply gentle heat to the section of the strip that will be bent, ensuring that the heat is distributed evenly across the entire area. Avoid concentrating heat in one spot, as it can damage the components. Once the strip becomes pliable, carefully bend it to form a 90-degree angle. Using a ruler or other straightedge tool can help maintain the clean, crisp angle necessary for a professional finish.
After completing the bend, securing the strip in place is critical. Mounting clips or strong adhesives will ensure the strip stays put and doesn’t slip out of position over time. The corner fold technique is perfect for applications where right angles are common, such as lighting up architectural corners, shelves, or accent walls.
The Ribbon Bend Technique
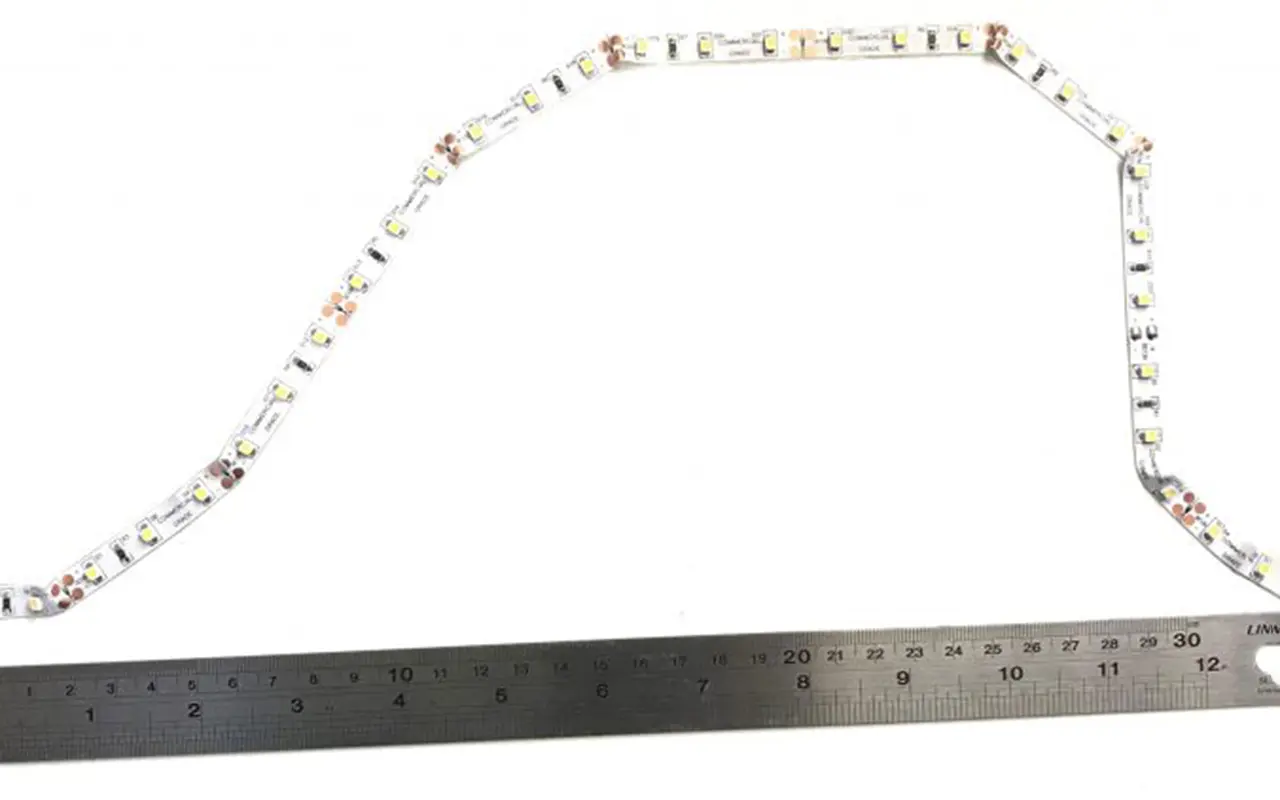
Unlike the sharp corner fold, the ribbon bend technique is designed for more fluid and gradual transitions. Instead of creating a harsh, 90-degree angle, this method involves looping the LED strip in a zigzag or ribbon-like pattern, allowing it to flow naturally around the corner. This technique is ideal for installations requiring smooth curves or a more artistic approach to lighting.
The ribbon bend method is particularly beneficial for areas with rounded edges or complex angles that cannot be easily managed with a sharp corner fold. For example, suppose you’re installing LED strips around a curved ceiling or a rounded kitchen island. In that case, the ribbon bend provides an elegant solution. It’s also an excellent technique for installations requiring a softer, more natural appearance, such as in living rooms or under furniture, where the lighting should appear seamless and subtle.
Adhesive tape or mounting clips best secure the ribbon bend, especially in high-traffic areas where the strip may be subject to movement or wear. The flexibility of this method ensures that the light is evenly distributed, preventing any dark spots or breaks in illumination.
Tips for Securing LED Strips Around Corners
When installing LED strips around corners, proper securing is essential to ensure the longevity and stability of the installation. Corner clips or adhesive backing are the most commonly used methods. If you’re working where the strip may experience tension or movement, such as in kitchens or staircases, mounting clips are highly recommended. These clips provide a firm hold and prevent the strip from pulling away from the surface over time. They’re especially useful for projects requiring extra security, like in areas exposed to temperature fluctuations or humidity.
Alternatively, double-sided adhesive tape is a flexible option for more straightforward installations where the strips won’t be disturbed once in place. Clean the surface thoroughly before applying the tape to ensure strong adhesion. When working with adhesive backing, press down firmly along the entire strip length to avoid gaps or lifting sections that could lead to poor lighting or damage.
Whether using clips or adhesive, ensure the strip is firmly attached and aligned to the surface. Any gaps or loose sections can not only affect the lighting’s performance but also diminish the overall professional appearance of the installation. Cable management is another aspect to consider when securing LED strips, especially around corners, as excess wires can detract from the sleek look and cause obstructions.
Common Mistakes to Avoid
When installing LED strips around corners, there are several common mistakes to avoid, as these errors can damage the strip and affect its overall functionality. One of the biggest pitfalls is making sharp, abrupt bends. LED strips, though flexible, are not designed to withstand severe bends without proper preparation. Attempting to force a sharp angle without softening the strip can lead to broken connections or damaged circuits, resulting in uneven or malfunctioning lighting.
Another frequent mistake is overstretching the strip. Even though LED strips are flexible, stretching them too far can strain the internal components and compromise the strip’s integrity. Always aim for gradual bends, and avoid pulling the strip tightly when securing it around a corner.
Failing to adequately heat the strip before bending is another issue. Without softening the strip with a heat gun, you increase the risk of kinks, cracks, or breaks in the LED’s delicate structure. Even a slight miscalculation in this area can leave you with a strip that no longer performs optimally or, worse, needs to be replaced entirely.
Lastly, poor surface preparation is a common oversight that leads to inadequate adhesion. Surfaces should be clean, dry, and free of dust or oils to ensure the adhesive backing or clips can stick effectively. Without this step, the strip may pull away from the surface over time, leading to a loose, unsightly installation. Always plan, take your time, and ensure each process step is carefully executed. These precautions will not only ensure a smooth installation. Still, they will also help avoid costly repairs or replacements.
FAQs About Bending and Installing LED Strips
Q: Can I bend LED strips into tight corners?
A: Yes, you can bend LED strips into tight corners using specific techniques like the corner fold method or L-shaped connectors. Use pre-bent LED strips or the cut-and-jump method for tight corners to maintain functionality and avoid damage.
Q: How can I avoid damaging my LED strips while bending them?
A: To avoid damage, gently heat the LED strips using a heat gun to soften them before bending. Make gradual bends and use a ruler or bending jig for guidance. Avoid sharp angles and excessive force to maintain the integrity of the strip.
Q: What is the best tool for heating LED strips before bending?
A: A heat gun is the best tool for heating LED strips. It provides precise, adjustable heat that softens the strip without causing damage. Ensure you heat the strip evenly to achieve a smooth bend.
Q: Can I cut LED strips between LED segments?
A: No, you should avoid cutting LED strips between LED segments as it can damage the strip and disrupt the lighting. Always cut along the designated cut lines marked on the strip to ensure it remains functional.
Q: How do I connect two LED strips at a corner seamlessly?
A: To connect two LED strips at a corner, use L-shaped connectors for a clean and easy transition. Alternatively, you can use solderless connectors or the cut-and-jump method for a seamless connection without visible gaps.
Q: What are the common mistakes to avoid when bending LED strips?
A: Common mistakes include overheating the strip, making sharp or uneven bends, and using improper tools. To avoid these issues, carefully use a heat gun, bend gradually, and use the right tools and techniques.
Q: How can I achieve sharp angles with LED strips without causing damage?
A: For sharp angles, gently heat the strip to soften it, then make controlled, gradual bends. L-shaped connectors or a bending jig can also help achieve clean, sharp angles without damaging the strip.
Q: What is the ribbon bend technique for LED strips?
A: The ribbon bend technique involves creating a looped or zigzag pattern to navigate corners. This method allows for smooth transitions and gradual curves, ideal for installations with rounded or intricate designs.
Q: Are pre-bent LED strips a good option for corner installations?
A: Pre-bent LED strips are a convenient option for corner installations. They come pre-shaped for specific angles, eliminating the need for manual bending and ensuring precise, consistent results.
Q: How should I store LED strips to ensure they remain in good condition?
A: Store LED strips in a cool, dry place away from direct sunlight and extreme temperatures. Handle them carefully to prevent damage and keep them in their original packaging or a protective cover to maintain their quality and flexibility.
Fazit
Bending LED strips with precision involves understanding their flexibility, using the right tools, and employing effective techniques. From planning and measuring to securing and testing, each step is vital for achieving flawless curves and a successful installation. Following these guidelines and best practices, you can create custom lighting solutions that enhance any space. LED strips offer endless possibilities for innovative lighting designs. Embrace these techniques and explore new ways to use LED strips in your projects. Whether for residential, commercial, or artistic applications, the ability to bend and shape LED strips opens exciting opportunities for transforming environments with light.
In wrapping up, achieving impeccable bends and installations with LED strips is key to unlocking the full potential of your lighting designs. To ensure you’re using the highest quality products, look no further than Unitop, a leading force in China’s LED industry. Specializing in premium LED-Leuchtbänder und Neon-Flex, Unitop combines innovative technology with unmatched expertise to meet all your lighting needs. Our dedicated team is ready to assist if you have questions or require tailored solutions for your next project. Connect with us today and experience the Unitop difference—where professional excellence meets exceptional lighting solutions.

Tom ist jetzt der Verkaufsleiter von Unitop (China) Co., Limited. Er war in der LED-Beleuchtung Industrie seit 2005. Er ist Experte für Vertrieb und Marketing sowie für Fabrikmanagement. Er mag Bodybuilding und ist außerdem ein verrückter Apple-Fan! Er ist ein fleißiger Kerl und liebt es, neue Dinge zu lernen und auszuprobieren.
E-Mail: tom@unitopledstrip.com WhatsApp: +86-18680307140



Hinterlasse einen Kommentar
An der Diskussion beteiligen?Hinterlasse uns deinen Kommentar!