Step into the world of LED strip light repair with confidence. Our comprehensive guide is your reliable companion, unlocking the secrets to effectively addressing common LED light challenges. Trust in our expertise to guide you through every step, ensuring successful repairs and enhanced longevity for your LED lighting solutions.
LED strip lights can be repaired effectively by diagnosing the problem, selecting the right tools, and executing precise repair steps. This process includes assessing the strip’s condition, rectifying connection issues, and replacing damaged components where necessary.
Delve deeper into our guide for a comprehensive understanding of LED strip light repairs. Discover practical tips, essential tools, and expert advice to master the art of fixing common LED lighting issues efficiently.
Diagnosing Common Problems in LED Strip Lights
Understanding the intricacies of LED strip lights is key to successful repair. Common issues can range from the subtle, like slight color changes, to the more pronounced, such as flickering or complete failure of certain sections.
These problems often manifest in different forms:
- Intermittent or constant flickering
- Patches of discolored or dim lights
- Segments refuse to illuminate at all
To effectively diagnose these issues, close observation in a dimly lit environment can reveal irregularities in light output and color consistency.
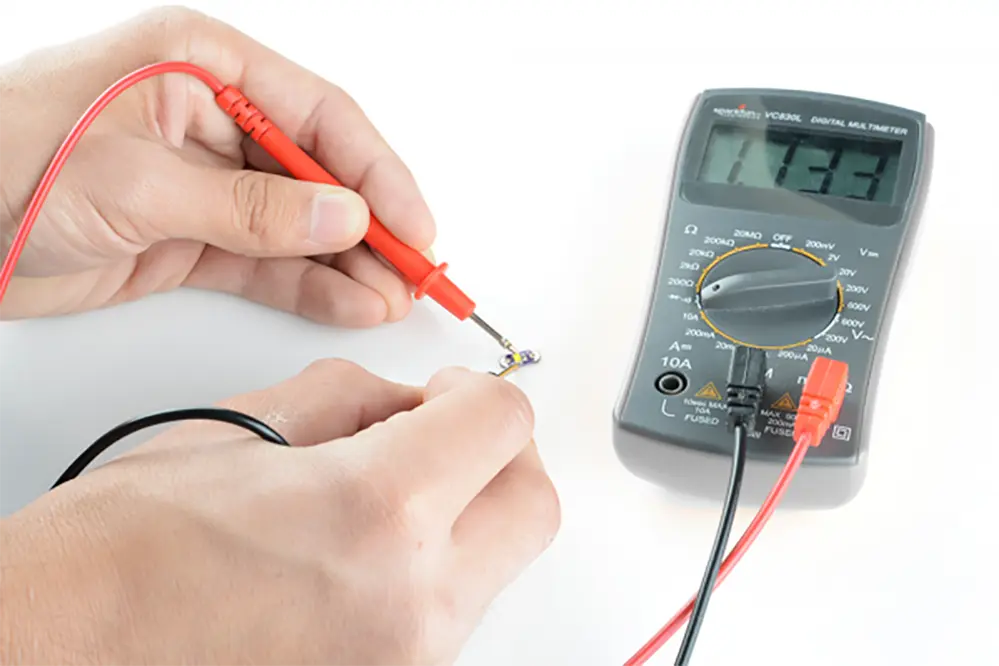
The tools for diagnosis go beyond the standard multimeter, which is essential for checking electrical continuity and voltage discrepancies. A thorough visual inspection can often uncover potential problems. Look for physical signs of damage, such as cuts, kinks, or discoloration on the strip, indicating possible overheating. Loose connections are a common culprit behind flickering lights; thus, it’s important to check the strip’s connection points to the power source and examine any connectors along its length. Utilizing a thermal camera or an infrared thermometer can be beneficial in spotting hot spots on the strip, suggesting high-resistance areas or failing components.
The initial assessment should always begin with the power supply unit (PSU). An inadequate PSU can lead to dimming or flickering, so ensure that its output is compatible with the LED strip’s specifications. If your setup includes a dimmer or controller, try bypassing these components temporarily. This can help determine if they’re contributing to the issue. Additionally, inspect the strip closely for any physical damage, such as cuts or breaks, especially if the strip has been recently adjusted or relocated. This step is crucial, as physical damage can often lead to more complex issues that might require a different approach than simple troubleshooting.
Step-by-Step Repair Guide for LED Strip Lights
Repairing LED strip lights can seem daunting, but with the right approach, it’s a task most DIY enthusiasts can handle. Here’s a step-by-step guide to get you started:
1. Identify the Problem Area: Look for signs like flickering, dimming, or dead sections on your LED strip. Use a multimeter to check for voltage consistency across the strip.
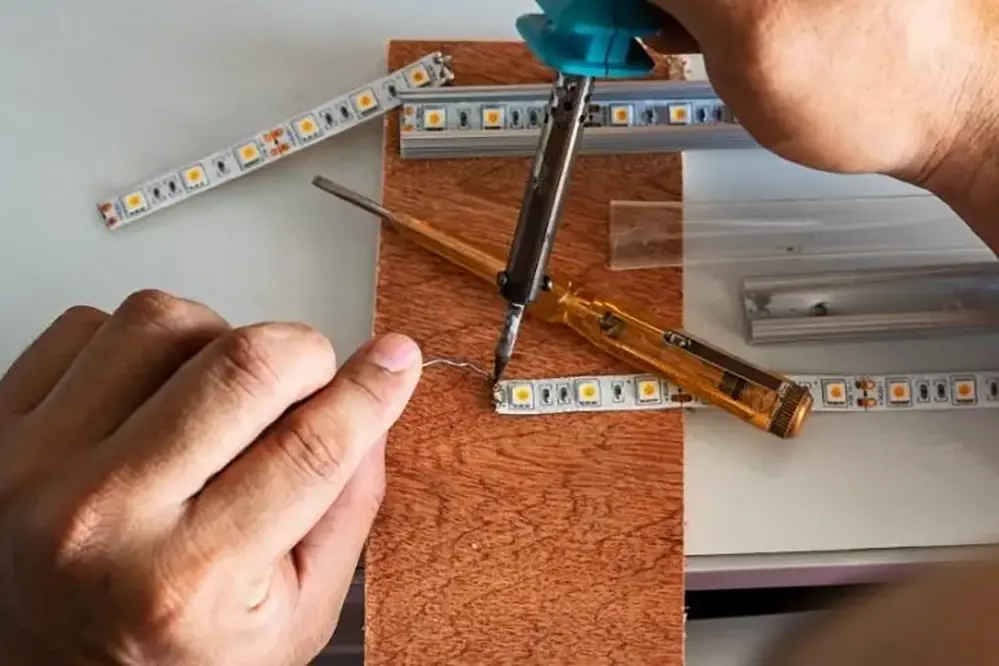
2. Gather Your Tools: You’ll need a soldering iron, solder, wire cutters, and possibly LED strip connectors, depending on the repair type.
3. Preparation: Turn off and unplug the LED strip. If you’re working on a specific section, mark it with tape for precision.
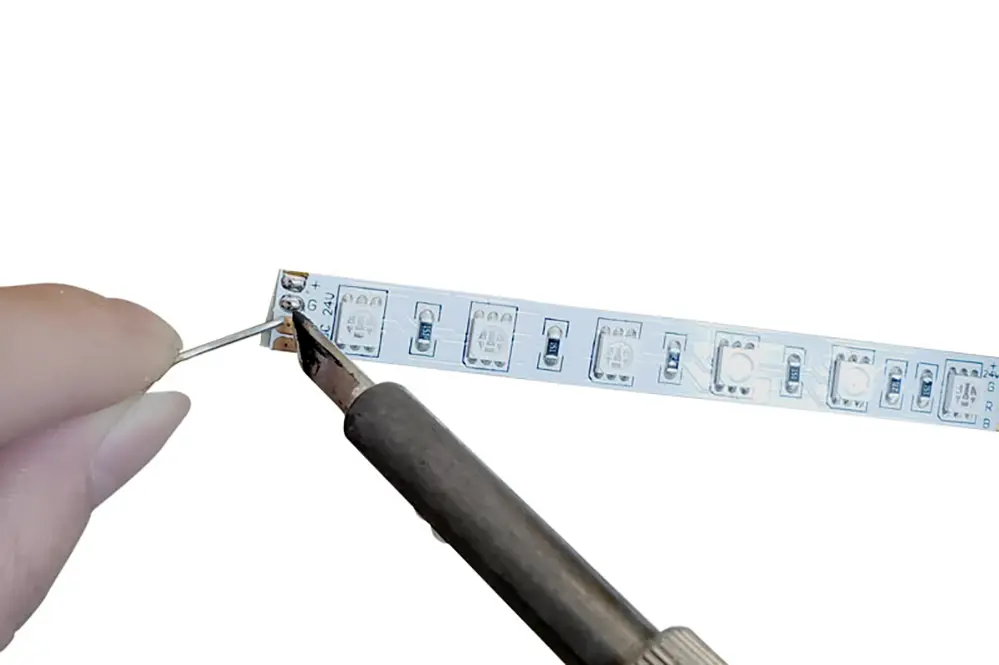
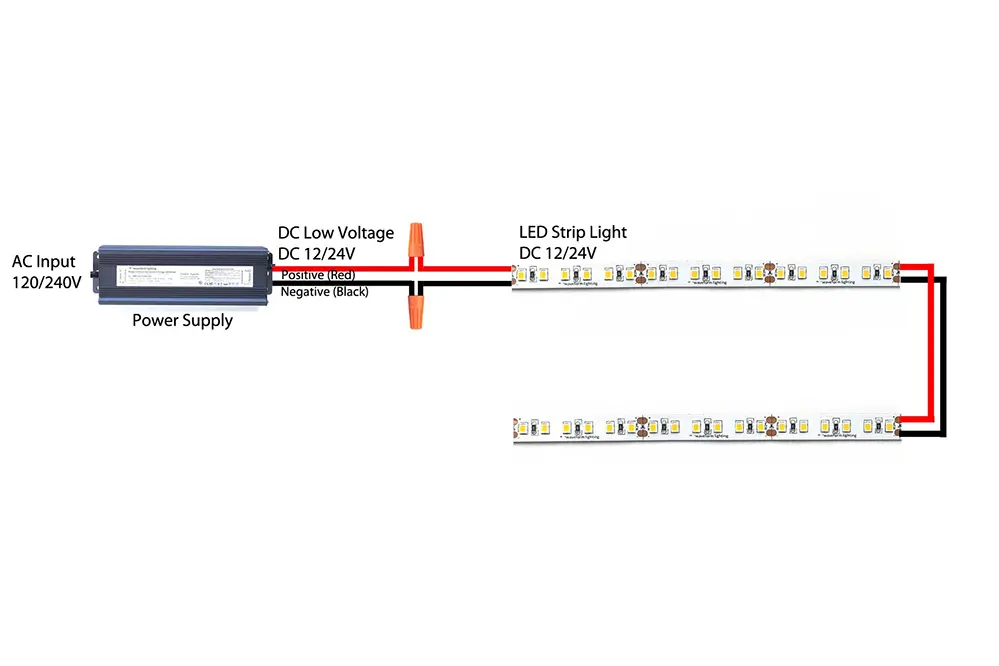
4. Soldering for Repair: If soldering is required, ensure you match the polarity of the wires and LED strip correctly. If you’re replacing a section, remove the damaged part and solder the new segment in place, ensuring it matches the original strip’s specifications.
5. Using Connectors: For a solder-free solution, use compatible connectors to join cut sections of the strip. Ensure the strip ends are clean and straight for a seamless connection.
6. Safety First: Always work in a well-ventilated area when soldering. Wear protective gear, including gloves and safety glasses.
7. Testing: After the repair, test the LED strip before reinstalling it. Check for consistent lighting and color across the strip.
When to Opt for Replacement Over Repair
When faced with the decision of whether to repair or replace your LED strip lights, several factors come into play. Each scenario presents its unique considerations, and understanding when to opt for one over the other can save you both time and money.
1. Age and Efficiency: LED technology is rapidly advancing, and newer models are far more efficient and feature-rich than their predecessors. If your LED strip is several years old, it might be less energy-efficient or as bright as the latest options available. Older strips might also lack features like dimming capabilities or color-changing functions. In such cases, replacing your old strip with a newer, more efficient model can enhance the lighting quality and even reduce energy costs in the long run.
2. Extent of Damage: Examine the extent of damage to your LED strip. If the issue is isolated, such as a few non-functioning LEDs or a loose connection, a repair might suffice. However, if the damage is widespread, affecting multiple sections of the strip, or if the strip has physical damage like severe cuts or water ingress, replacement is a more sensible option. Extensive damage often hints at underlying issues that could lead to further failures, even after repair.
3. Cost Considerations: Sometimes, the cost of repairing an LED strip can be comparable to, or even exceed, the price of a new one. This is especially true if specialized tools or components are required for the repair. In such scenarios, investing in a new LED strip could be more economical. Additionally, consider the time and effort involved in repairing the strip. If the repair process is complex and time-consuming, it might be more efficient to opt for a new strip.
4. Compatibility Issues: When considering a replacement, ensure the new LED strip is compatible with your existing setup. This includes matching voltage requirements, color temperatures, and control systems. If your current setup consists of a specific controller or dimmer, the new LED strip should be able to integrate seamlessly with these components. Incompatibility can lead to issues like flickering, color mismatches, or even complete non-functionality.
Maintenance and Care for Longevity of LED Strip Lights
Maintaining your LED strip lights is essential for ensuring their longevity and optimal performance. Here’s how you can take care of these versatile lighting solutions:
1. Regular Cleaning: LED strips can accumulate dust and dirt over time, which can impact their brightness and color accuracy. Regularly cleaning your LED strips can prevent this. Use a soft, dry cloth to wipe down the strips gently. If necessary, use a slightly damp cloth, but make sure the strips are off and dehydrated before turning them back on. Avoid using harsh chemicals or abrasive materials, as these can damage the strip’s surface.
2. Check Connections: Over time, connections and wiring can loosen or wear out, especially in installations where the strips are flexed or moved. Periodically inspect all connections, including where the strips connect to the power source and any joiners or extenders used. Tighten any loose connections and replace any worn or damaged wires to prevent electrical hazards and ensure consistent lighting.
3. Avoid Moisture: For LED strips not explicitly designed for outdoor or high-moisture environments, it’s crucial to keep them dry. Exposure to moisture can lead to short circuits and reduce the lifespan of your LED strips. If you need lighting in moisture-prone areas, such as kitchens or bathrooms, opt for LED strips with a suitable IP rating that denotes water and dust resistance.
4. Correct Installation: How you install your LED strips can significantly impact their durability. When installing, avoid bending the strips too sharply, as this can damage the internal circuitry. Make sure the surface you’re adhering the strip to is clean, dry, and smooth. Dirt or oil on the surface can weaken the adhesive, leading to the strip peeling off over time. If the strips are installed in an area where they might be bumped or brushed against, consider using additional mounting brackets or clips for extra security.
Troubleshooting Specific LED Strip Light Issues
Troubleshooting specific issues in LED strip lights often requires a bit of detective work and an understanding of the most common problems these lights face. Here’s a guide to addressing some of these unique challenges:
1. Color Discrepancies: One of the most common issues in RGB LED strip lights is color inconsistencies. This can manifest as certain parts of the strip displaying different colors or failing to display certain colors altogether. The first step in troubleshooting this issue is to examine the RGB LEDs and their controllers for any physical damage or malfunction. Sometimes, a simple reset of the controller can solve the problem. If that doesn’t work, recalibrating the controller settings or replacing faulty LEDs might be necessary.
2. Overheating: Overheating can significantly reduce the lifespan of LED strips. If you notice your LED strip getting too hot, check its environment. Ensure that it’s installed in a well-ventilated area and not confined in a closed space without adequate airflow. Overheating can be caused by overloading the strip beyond its capacity, so make sure you’re using a power supply that matches the strip’s voltage requirements. Also, consider installing heat sinks or using LED strips with a higher IP rating for better heat dissipation.
3. Voltage Drops: For longer LED strips, voltage drops can result in dimming or color change towards the end of the strip. This is often due to the resistance in the strip itself. To address this, you can use a power supply with a higher voltage capacity or split the LED strip into shorter segments, powering them individually or in parallel. This ensures that each segment receives adequate power without a significant drop in voltage along the strip.
In complex scenarios, such as when dealing with large installations or specialized lighting systems, consulting with a lighting expert or electrician can provide you with solutions tailored to your specific setup. They can offer insights into the best types of LED strips for your needs, advise on power requirements, and suggest the most effective installation techniques. Remember, the goal is to achieve consistent brightness and color accuracy throughout your LED strip lighting while ensuring it operates safely and efficiently.
FAQs on Repairing LED Strip Lights
This section addresses some of the most common questions users have about LED strip lights.
Q: Why do my LED strip lights flicker intermittently?
A: Intermittent flickering in LED strip lights is often due to fluctuations in the power supply. Check if the power source is consistent and the voltage matches the strip’s requirements. Sometimes, replacing the power adapter or resecuring loose connections can solve this issue.
P: ¿Cómo puedo evitar que mis tiras de LED se sobrecalienten?
A: To prevent overheating, ensure your LED strip lights have adequate ventilation. Avoid enclosing them in tight spaces and keep them away from heat sources. Additionally, using LED strips within their recommended operational parameters is crucial for preventing excess heat build-up.
Q: What causes color inconsistencies in LED strip lights?
A: Color inconsistencies in LED strip lights can result from faulty RGB LEDs, improper power supply, or damage to the strip itself. Check the connections and the controllers, and ensure that the strip isn’t physically damaged or bent excessively.
Q: Can weather affect the performance of outdoor LED strip lights?
A: Yes, extreme weather conditions can affect outdoor LED strip lights. Ensure your outdoor strips have an appropriate IP (Ingress Protection) rating for water and dust resistance. Regular maintenance and choosing the right product for your climate are also important.
Q: How do I know if my LED strip needs repair or replacement?
A: If your LED strip displays significant physical damage, persistent flickering, or sections that don’t light up, it might need repair. However, if these issues are widespread or the strip is old, replacement might be a more cost-effective solution.
Q: What are the best practices for installing LED strip lights?
A: When installing LED strip lights, ensure the surface is clean and dry. Avoid bending the strips too sharply, and use the appropriate adhesive or mounting brackets. Also, make sure the power source matches the strip’s voltage requirements.
Q: Can voltage drops affect the brightness of my LED strip lights?
A: Yes, voltage drops, especially over long distances, can affect the brightness and color consistency of LED strip lights. To combat this, you may use a higher voltage source or connect multiple strips in parallel rather than in series.
Q: Is it safe to repair LED strip lights at home?
A: Repairing LED strip lights at home can be safe if you follow proper precautions. Always disconnect the power before attempting any repair and use appropriate tools. However, for complex issues, consulting a professional is advised.
Q: How do I choose the correct replacement parts for my LED strip lights?
A: When choosing replacement parts, ensure they match the specifications of your existing LED strip lights, such as voltage, LED density, and color temperature. Using parts from the same manufacturer can ensure compatibility.
Q: How frequently should I perform maintenance on my LED strip lights?
A: Regular maintenance, like cleaning and checking connections, should be done every few months. However, the frequency can vary depending on the usage and the environment where the LED strips are installed. Outdoor or high-usage areas may require more frequent checks.
Conclusión
Repairing LED strip lights is a feasible and often straightforward process. By correctly diagnosing issues, using the appropriate tools, and following safety guidelines, you can extend the life of your LED strip lights. Remember, when in doubt, consult a professional to avoid further damage or safety risks.
In conclusion, navigating the world of LED strip light repairs can be both a rewarding and enlightening experience. Whether you’re tackling flickering lights, color inconsistencies, or planning a full-scale replacement, the key lies in a thoughtful and well-informed approach. As we’ve explored, the correct diagnosis, tools, and safety measures are crucial in ensuring the longevity and performance of your LED lighting.
Speaking of excellence in LED solutions, let’s turn the spotlight on Unitop, one of China’s premier manufacturers in the realm of LED strip lights and Flexo de neón LED. Known for our commitment to quality and innovation, Unitop stands at the forefront of the LED industry, offering a spectrum of high-grade lighting solutions tailored to diverse needs. If you find yourself grappling with further questions or specific requirements, don’t hesitate to reach out to us. Our team of seasoned experts is ready to illuminate your path with professional advice and top-notch LED products. Contactar con Unitop today and elevate your lighting experience to new heights, where quality and expertise shine brightest.
Puestos relacionados

Tom es ahora el Director de Ventas de Unitop (China) Co., Limited. Ha estado en el Iluminación LED industria desde 2005. Es experto en ventas y marketing, y en gestión de fábricas. Le gusta el culturismo, ¡y también es un fan loco de Apple! Es un tipo muy trabajador y le encanta aprender y probar cosas nuevas.
Correo electrónico: tom@unitopledstrip.com WhatsApp: +86-18680307140


Dejar un comentario
¿Quieres unirte a la conversación?Siéntete libre de contribuir!