Unlock the full potential of your LED strip lights with our expert guide on powering them without a traditional plug. Our tried-and-true methods will provide simple, effective solutions to achieve the perfect lighting setup for any space. Discover the convenience and versatility of using LED strip lights without a traditional plug. This guide provides simple and effective methods to power your LED strips, ensuring you achieve the perfect lighting solution for any setting.
To use LED strip lights without a plug, connect them to a battery pack, USB power bank, or solar panel system, directly wire them to an electrical circuit or use a portable power station. Each method provides a versatile and effective solution for powering your LED strips in various settings.
Explore detailed instructions and tips to power your LED strip lights without a plug. Read on to discover each method in depth and find the best solution for your lighting needs.
Powering LED Strip Lights with a Battery Pack
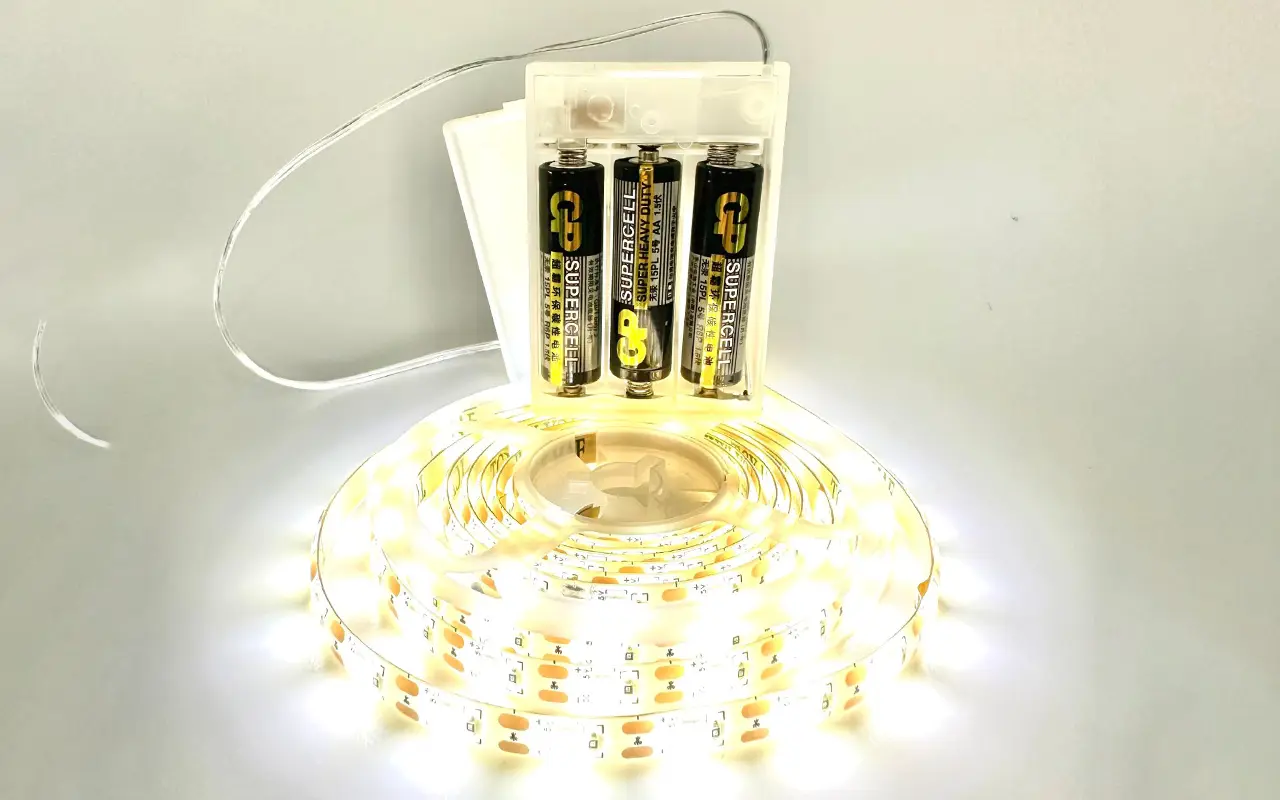
Using a battery pack is a practical and versatile solution for powering LED strip lights without relying on a traditional plug. This method is especially useful for outdoor settings, temporary installations, or areas without easy access to power outlets. Here’s a detailed guide to help you set up your LED strip lights with a battery pack.
Choose the Right Battery Pack
The first step is selecting a suitable battery pack that matches the voltage requirement of your LED strip. Most LED strips operate on either 12V or 24V. It’s crucial to ensure the battery pack can deliver this voltage to avoid damaging the lights or providing insufficient power. Additionally, the battery pack’s capacity, usually measured in milliamp hours (mAh), should be considered. A higher mAh rating means the battery can power the LED strips longer.
For instance, if you have a 12V LED strip, look for a 12V battery pack with a capacity that meets your needs. If you’re planning an extended use, such as for an event or a long-term outdoor setup, opt for a battery pack with a higher capacity to avoid frequent recharges.
Connect the LED Strip
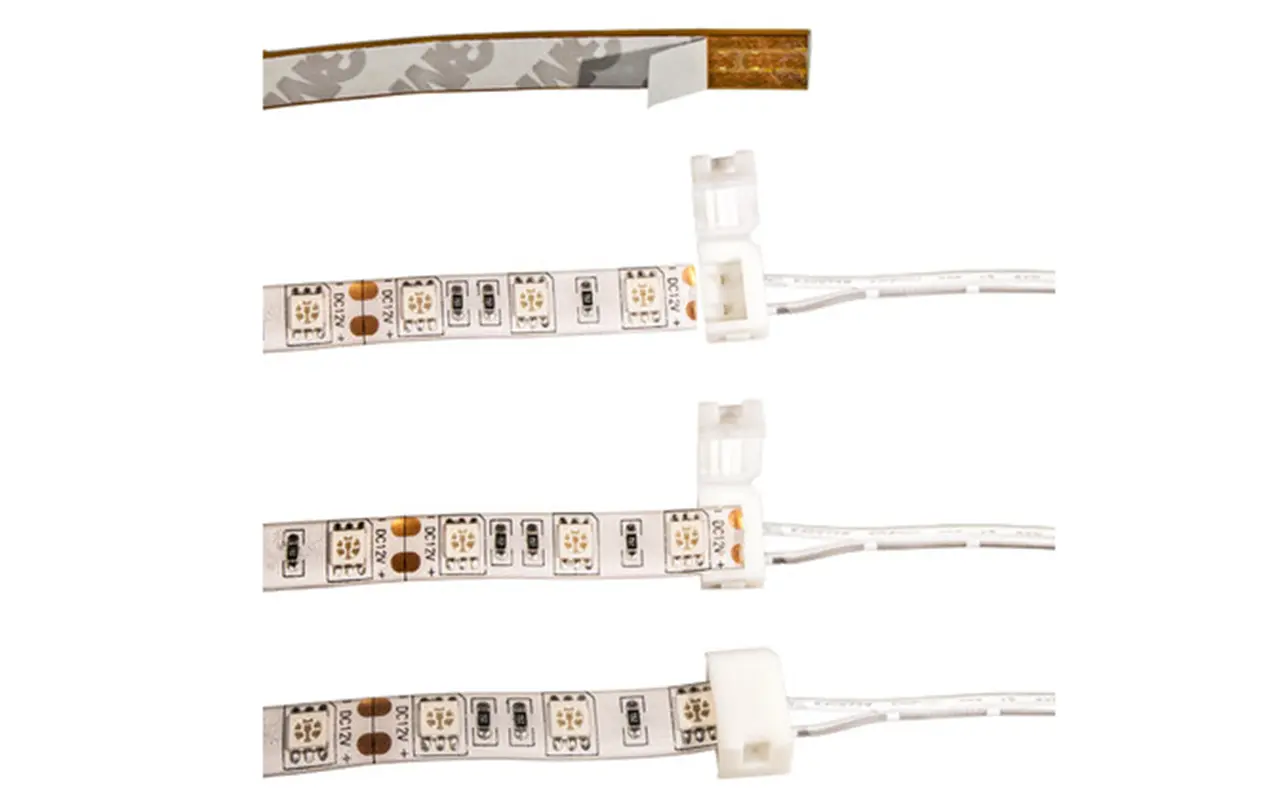
Once you have the appropriate battery pack, the next step is to connect the LED strip. Most LED strips have a positive (+) and negative (-) terminal. Using compatible connectors, link these terminals to the corresponding terminals on the battery pack. Ensure the connections are tight and secure to prevent any power interruptions.
For added convenience, you can use quick-connect terminals or solder the connections for a more permanent setup. Quick-connect terminals are handy for temporary setups as they allow easy disconnection and reconnection, while soldering provides a robust and durable connection ideal for long-term use.
Secure the Connection
Securing the connections is essential after connecting the LED strip to the battery pack. Loose connections can lead to flickering lights or intermittent power loss. Electrical tape wraps the connections tightly, ensuring no exposed wire could cause a short circuit. For a more permanent and secure solution, solder the connections and cover them with heat shrink tubing.
Test the Setup
Before finalizing your installation:
Test the setup to ensure everything is working correctly.
Turn on the battery pack and check if the LED strip lights up evenly and consistently.
Double-check the connections and ensure the battery pack is charged if the lights don’t turn on. Once the LED strip is functioning correctly, you can proceed to fix the strip.
Adjust and Fix the LED Strip
Adjust the placement of the LED strip to achieve the desired lighting effect. Whether you’re highlighting architectural features, creating ambient lighting, or decorating for an event, proper positioning is key to achieving the best results. Use adhesive backing, mounting clips, or channels to secure the LED strip.
Benefits of Using a Battery Pack
Battery packs offer significant portability and flexibility, making them ideal for various applications. They are perfect for situations where traditional power sources are unavailable or impractical. For example, they can light up tents during camping trips, decorate outdoor spaces for events, or add accent lighting to areas without power outlets.
Using a battery pack lets you enjoy the convenience of LED strip lights without being tethered to a wall outlet. This method enhances the versatility of your lighting solutions and provides a reliable and portable power source for a wide range of applications.
Using a USB Power Bank
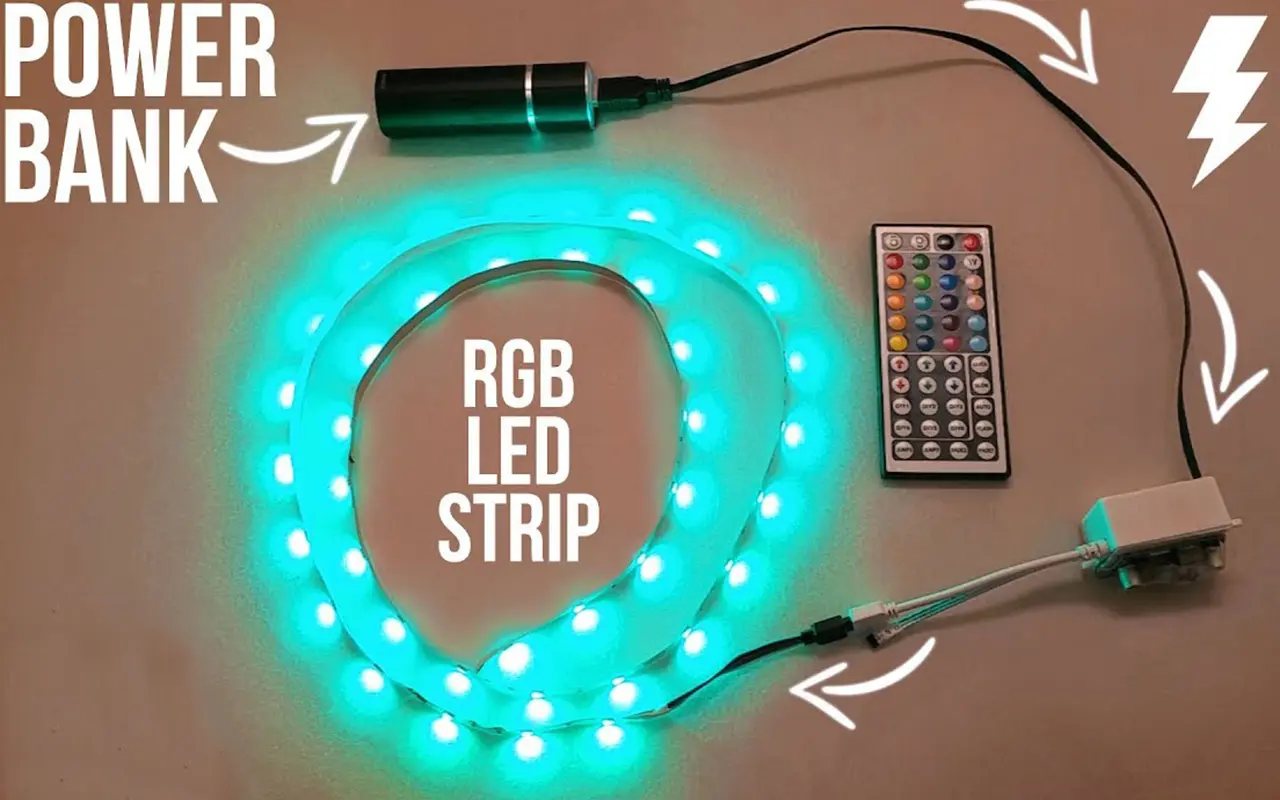
A USB power bank offers a convenient and portable solution for powering LED strip lights without a traditional plug. This method is particularly useful for small projects, temporary setups, or areas where power outlets are not readily accessible. Here’s a detailed guide on using a USB power bank to effectively power your LED strip lights.
Check Voltage Compatibility
The first step is to ensure that your LED strip is compatible with a USB power bank’s output voltage, typically 5V. Most USB power banks are designed to charge devices like smartphones and tablets, which operate at 5V. Therefore, your LED strip should also be rated for 5V to avoid potential issues.
If your LED strip operates at a higher voltage (12V or 24V), you will need a step-down converter to reduce the voltage to 5V. However, it’s best to use LED strips specifically designed to run on 5V for simplicity and compatibility.
Acquire a USB Adapter
You will need a USB to DC adapter to connect your LED strip to a USB power bank. This adapter converts the USB output to a DC connector that matches the input connector of your LED strip. These adapters are relatively inexpensive and readily available online or at electronics stores.
Ensure the connector size matches your LED strip’s input jack when purchasing a USB-to-DC adapter. Most adapters come with multiple tips to fit different sizes, making it easier to find a compatible one.
Connect the LED Strip to the Adapter
Once you have the appropriate adapter, connect the LED strip to the USB adapter. Insert the DC connector into the input jack of the LED strip. Ensure the connection is snug and secure to prevent disconnection or power loss during use.
For added stability, you can use electrical tape to reinforce the connection. This is particularly useful if the setup will be moved around frequently, such as for portable lighting solutions or temporary installations.
Plug Into the Power Bank
Next, plug the USB adapter into the USB port of the power bank. Most power banks come with multiple USB ports, allowing you to connect more than one LED strip if needed. Once connected, press the power button on the power bank to start supplying power to the LED strip.
Power On
Turn on the power bank and check if the LED strip lights up. If the LED strip does not turn on, double-check the connections and ensure the power bank is fully charged. Adjust the placement of the LED strip to achieve the desired lighting effect, whether for decorative purposes, task lighting, or accent lighting.
Ideal for Portable Lighting Solutions
A USB power bank is perfect for small projects and portable lighting solutions. For example, you can use this setup to add ambient lighting to a bookshelf, under-cabinet lighting in the kitchen, or even as a backlight for your TV. The portability of the power bank allows you to move the LED strip lights to different locations easily, making it a versatile option for various applications.
USB power banks are also rechargeable, meaning you can keep your LED strip lights running for extended periods without needing a constant power source. Recharge the power bank when it runs out of juice, and you’re good to go again.
Solar Panels for Sustainable Lighting
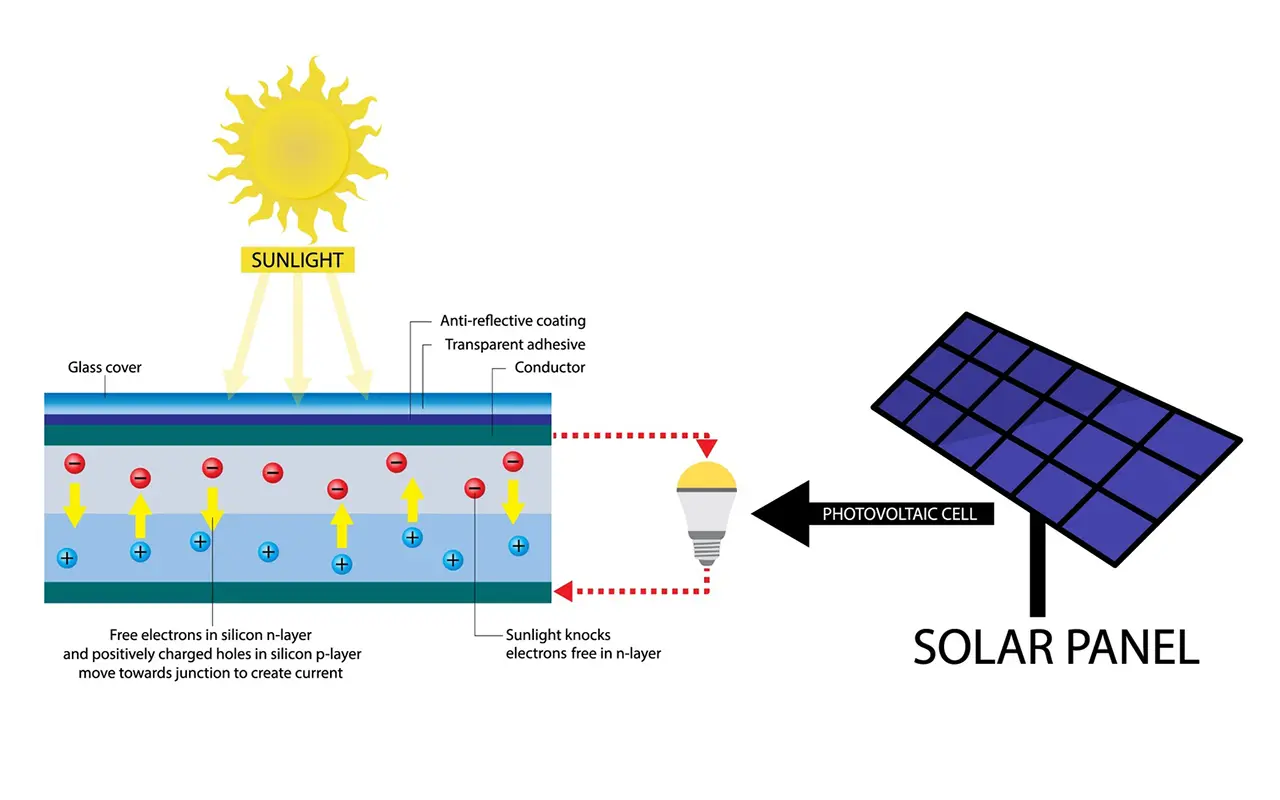
Using solar panels to power LED strip lights is an eco-friendly option and a highly practical one for areas without access to electrical outlets. This method harnesses renewable energy, perfect for outdoor installations, remote locations, or green energy enthusiasts. Here’s a step-by-step guide to installing your LED strip lights with solar power.
Select a Solar Panel System
The first step in this process is selecting the right solar panel system. The solar panel must match your LED strip lights’ voltage and power requirements. Most LED strips run on 12V or 24V, so choose a solar panel to deliver these voltages. Additionally, ensure the solar panel has enough wattage to support the power consumption of the LED strips. For example, if your LED strip consumes 10 watts per meter and you have 5 meters of strip, you’ll need a panel to produce at least 50 watts of power.
Install a Charge Controller
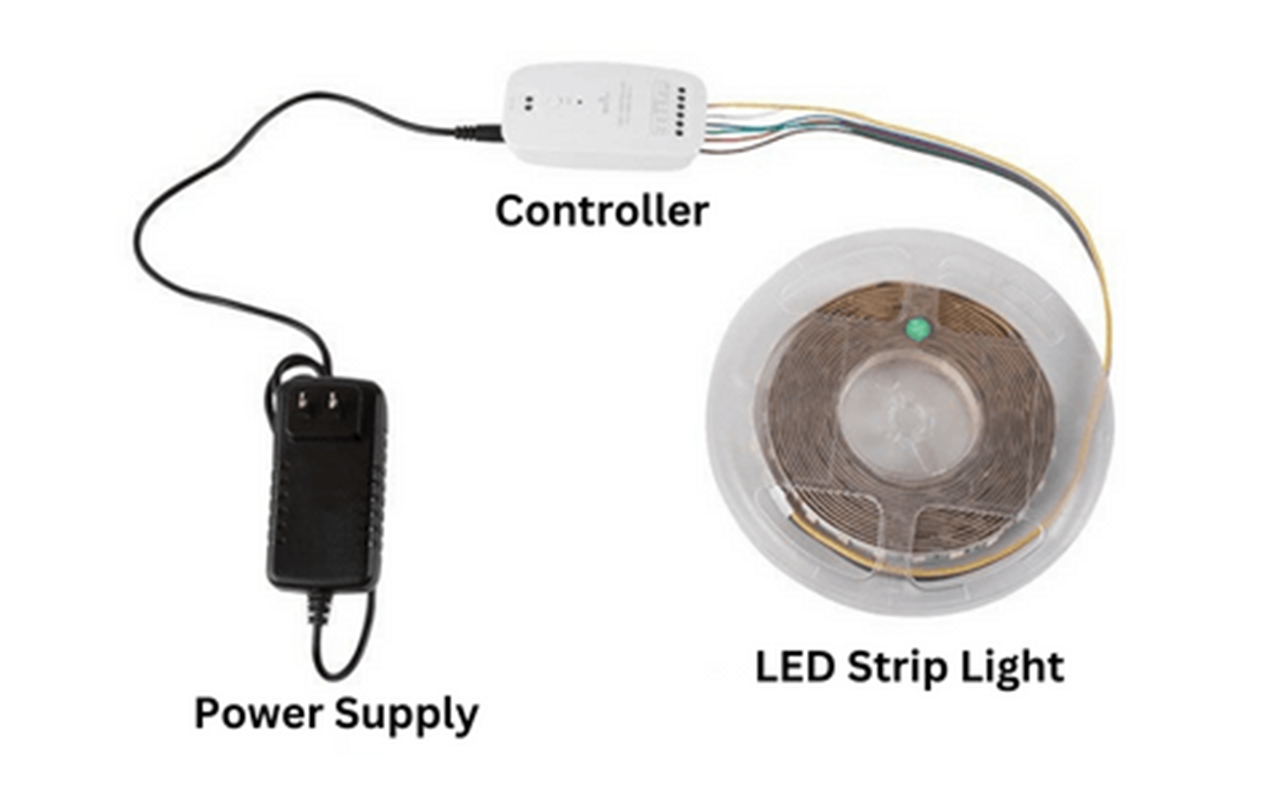
A crucial component in this setup is the solar charge controller. This device regulates the power flow from the solar panel to the rechargeable battery, preventing overcharging and ensuring a stable power supply. Connect the charge controller between the solar panel and the battery. The charge controller typically has marked terminals for the solar panel, battery, and load (LED strip lights). Follow the manufacturer’s instructions to ensure correct installation.
Connect the LED Strip
Next, attach the LED strip lights to the rechargeable battery via the charge controller. This step involves connecting the positive and negative terminals of the LED strip to the corresponding terminals on the battery. Ensure the connections are secure to avoid any power interruptions. Proper connectors or soldering of the wires can help create a stable and reliable connection.
Position the Solar Panel
Il est essentiel de placer correctement le panneau solaire pour maximiser l'exposition à la lumière du soleil et assurer une collecte efficace de l'énergie. Placez le panneau solaire à un endroit qui reçoit un maximum de lumière du soleil tout au long de la journée, par exemple sur un toit, dans un jardin ou dans un champ. Le panneau doit être incliné selon un angle correspondant à votre latitude géographique afin de capter le maximum de lumière solaire. Évitez de placer le panneau dans des zones ombragées ou dans des endroits où des obstacles pourraient bloquer la lumière du soleil.
Tester le système
Il est temps de tester le système après avoir installé le panneau solaire, le régulateur de charge, la batterie et les bandes LED. Allumez les bandes LED pour vérifier qu'elles sont alimentées et qu'elles fonctionnent correctement. Si les lumières ne s'allument pas, vérifiez à nouveau toutes les connexions et assurez-vous que le panneau solaire reçoit suffisamment de lumière du soleil. Ajustez les composants si nécessaire pour garantir des performances optimales.
Idéal pour les installations extérieures
Les bandes LED à énergie solaire offrent une solution d'éclairage durable et indépendante pour les installations extérieures. Qu'il s'agisse d'éclairer une allée de jardin, d'améliorer l'ambiance d'une terrasse ou d'éclairer une zone isolée, l'énergie solaire constitue une option fiable et respectueuse de l'environnement. Cette méthode élimine le besoin de longues rallonges et réduit la dépendance à l'égard des sources d'énergie traditionnelles, ce qui en fait une solution économique et écologique.
Câblage des bandes LED
Le câblage de vos bandes LED sur un circuit électrique existant constitue une solution fiable et permanente. Cette méthode est idéale pour les installations intérieures où vous souhaitez une installation d'éclairage à long terme sans avoir à brancher et débrancher. Voici un guide détaillé sur la manière de câbler efficacement vos bandes LED.
Couper l'alimentation
La sécurité est primordiale lorsqu'il s'agit d'installations électriques. Avant de commencer :
Assurez-vous que le circuit sur lequel vous allez travailler est hors tension.
Localisez le disjoncteur approprié dans votre tableau électrique et mettez-le hors tension.
Vérifiez à nouveau en testant le circuit à l'aide d'un testeur de tension pour vous assurer qu'aucun courant ne circule dans les fils.
Cette précaution permet d'éviter les chocs électriques et autres dangers.
Préparer le câblage
Une fois que vous vous êtes assuré que le courant est coupé, préparez le câblage pour la connexion. Commencez par dénuder les extrémités des fils de la bande LED et les fils du circuit électrique. Utilisez une pince à dénuder pour retirer environ un demi-pouce d'isolant de chaque extrémité de fil. Le matériau conducteur est ainsi exposé, ce qui vous permet de réaliser des connexions sûres. Veillez à ne pas endommager les fils en dénudant l'isolant.
Établir des liens
Une fois les fils préparés, il est temps d'effectuer les connexions. Connectez le fil positif (généralement rouge) de la bande LED au fil positif du circuit électrique. De même, connectez le fil négatif (généralement noir) de la bande LED au fil négatif du circuit. Vous pouvez utiliser des écrous pour serrer solidement les fils ensemble. Vous pouvez également souder les fils pour obtenir une connexion plus permanente et plus solide. Veillez à ce que les connexions soient bien serrées et sécurisées afin d'éviter toute coupure de courant.
Fixer le câblage
Après avoir effectué les connexions, il est essentiel de sécuriser le câblage afin d'éviter tout court-circuit ou toute connexion lâche. Utilisez du ruban adhésif électrique pour envelopper les écrous des fils ou les joints soudés. Cela permet d'isoler les connexions et d'ajouter une couche de protection supplémentaire.
Tester les lumières
Une fois que tout est sécurisé, remettez le courant pour tester les bandes LED. Retournez au tableau électrique et remettez le disjoncteur en marche. Allumez les bandes LED pour vous assurer qu'elles fonctionnent correctement. Si les lumières ne s'allument pas, vérifiez à nouveau les connexions pour vous assurer que tout est câblé correctement. Dépannez les problèmes éventuels en vérifiant que toutes les connexions sont sûres et qu'il n'y a pas de rupture dans le câblage.
Idéal pour les installations intérieures
Le câblage des bandes LED est particulièrement adapté aux installations intérieures où une solution d'éclairage permanente est souhaitée. Cette méthode est parfaite pour l'éclairage sous les armoires dans les cuisines, l'éclairage d'accentuation dans les salons ou l'éclairage des couloirs et des escaliers. Le câblage élimine le besoin de cordons d'alimentation visibles, ce qui donne un aspect propre et professionnel. Il garantit également la stabilité et la fiabilité de l'installation d'éclairage, réduisant ainsi la nécessité de procéder à des ajustements ou à une maintenance fréquents.
Utilisation de stations d'alimentation portables
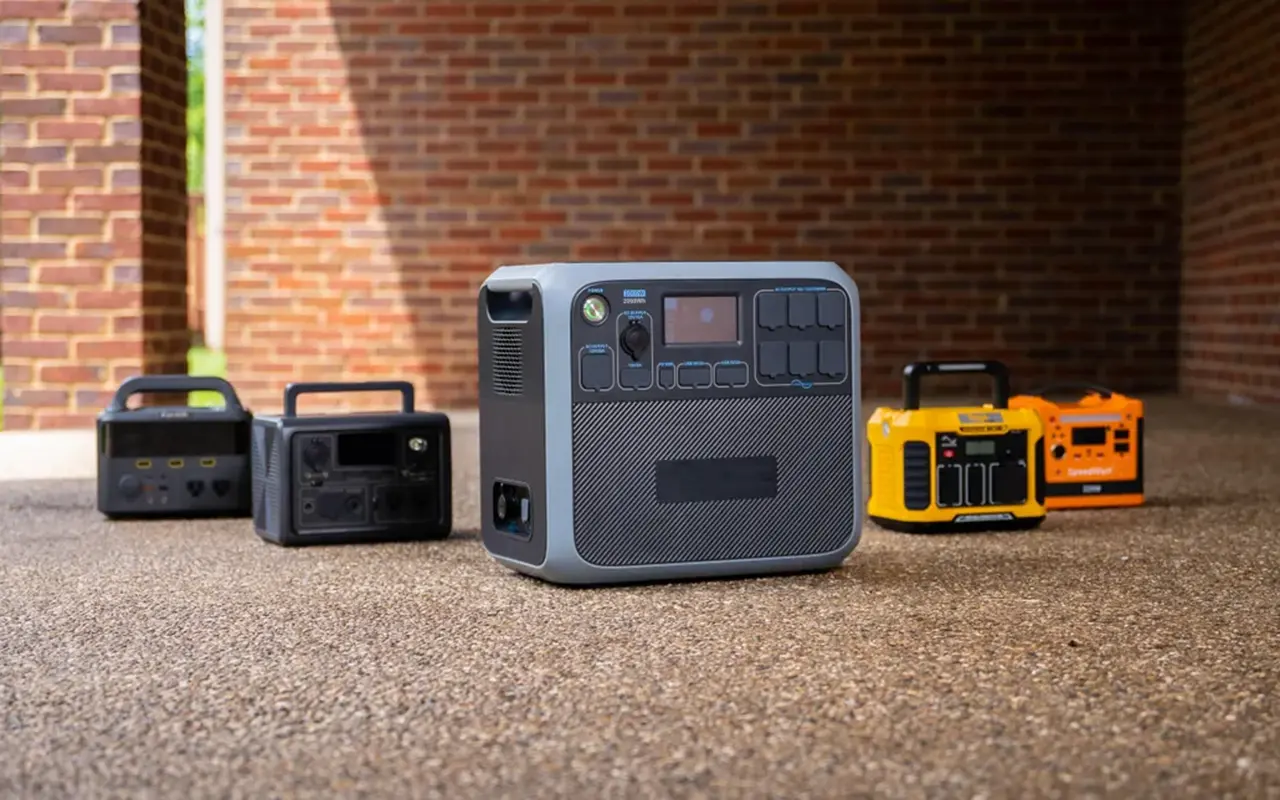
Les stations d'alimentation portables constituent une solution flexible et fiable pour alimenter les bandes LED sans prise traditionnelle. Ces unités sont de grandes batteries rechargeables avec de multiples options de sortie, ce qui les rend parfaites pour différents scénarios. Voici comment utiliser une unité d'alimentation portable pour alimenter efficacement vos bandes LED.
Vérifier la compatibilité
Avant d'utiliser une unité d'alimentation portable, il est essentiel de s'assurer qu'elle peut fournir la tension et le courant nécessaires à vos bandes LED. La plupart des unités d'alimentation portables disposent de plusieurs options de sortie, notamment des ports USB, des sorties CC et des prises CA. Vérifiez les spécifications de vos bandes LED pour déterminer leurs besoins en énergie, généralement indiqués en volts (V) et en watts (W). Par exemple, si vos bandes LED nécessitent une tension de 12 V et une puissance de 24 W, assurez-vous que la station d'alimentation dispose d'une sortie de 12 V avec une capacité en watts suffisante.
Connect the LED Strip
Une fois la compatibilité confirmée, connectez la barrette de LED à la station d'alimentation. Utilisez les connecteurs appropriés pour relier l'entrée d'alimentation de la barre LED au port de sortie de la station d'alimentation. Vous aurez probablement besoin d'un câble de connexion CC si votre bande LED a une entrée CC. Branchez les barrettes de DEL dotées d'une entrée USB sur le port USB de la station d'alimentation. Veillez à ce que toutes les connexions soient sécurisées afin d'éviter toute interruption de l'alimentation.
Allumer la centrale électrique
Après avoir connecté la bande LED :
Mettre en marche la centrale électrique.
Activez votre port de sortie - la plupart des centrales électriques sont dotées de boutons ou d'interrupteurs permettant de contrôler chaque sortie individuellement.
Une fois activée, vérifiez si la bande LED s'allume.
Vérifiez à nouveau les connexions et assurez-vous que la station d'alimentation est suffisamment chargée si ce n'est pas le cas. Ajustez l'emplacement de la bande LED pour obtenir l'effet d'éclairage souhaité, qu'il s'agisse d'une décoration, d'un éclairage d'appoint ou d'une ambiance.
Idéal pour divers scénarios
Les centrales électriques portables sont idéales pour de nombreuses applications, car elles offrent à la fois portabilité et fiabilité. Elles sont particulièrement utiles pour les événements en plein air, les séjours en camping et d'autres scénarios où les sources d'énergie traditionnelles ne sont pas disponibles. Par exemple, vous pouvez utiliser une centrale électrique portable pour éclairer un camping, fournir un éclairage d'ambiance lors d'une fête dans l'arrière-cour ou éclairer un site de travail éloigné. La portabilité de ces unités vous permet de les déplacer facilement et de les utiliser à différents endroits selon les besoins.
Autres considérations
Lors de l'utilisation de bandes LED sans prise, plusieurs autres facteurs importants doivent être pris en compte pour garantir l'efficacité, la sécurité et l'efficience de votre installation. Ces facteurs comprennent l'utilisation d'adaptateurs de batterie pour la conversion de la tension, la connexion avec des connecteurs CC et le calcul de la durée de vie attendue de la batterie.
Adaptateurs de batterie pour la conversion de tension
Si la batterie disponible ne correspond pas à la tension requise par votre bande LED, vous pouvez utiliser un adaptateur de batterie pour convertir la tension. Il existe deux types d'adaptateurs de batterie : les convertisseurs élévateurs et les convertisseurs abaisseurs. Un convertisseur élévateur augmente la tension, tandis qu'un convertisseur abaisseur la réduit. Par exemple, un convertisseur élévateur peut augmenter la tension au niveau requis si vous disposez d'une batterie de 5V, mais que votre bande LED nécessite 12V.
Ces convertisseurs veillent à ce que votre bande LED reçoive la tension correcte, ce qui est crucial pour son bon fonctionnement et sa longévité. La bande LED ne peut fonctionner correctement ou être endommagée qu'avec la tension appropriée. Veillez toujours à ce que le convertisseur que vous choisissez corresponde à la puissance nominale de votre batterie et de votre bande LED afin d'éviter tout problème de compatibilité.
Connexion avec des connecteurs DC
Des connexions sûres sont essentielles pour maintenir une alimentation stable de vos bandes LED. Les connecteurs DC sont couramment utilisés pour connecter les sources d'alimentation aux bandes LED. Ces connecteurs assurent une connexion fiable et sûre, minimisant le risque de perte de puissance ou de dommages. Il est important de faire correspondre la taille et le type de connecteur à votre bande LED et à votre source d'alimentation lorsque vous utilisez des connecteurs CC afin de garantir la compatibilité.
Calcul de l'autonomie de la batterie
Pour que vos bandes LED alimentées par batterie durent aussi longtemps que nécessaire, il est essentiel de calculer la durée de vie prévue de la batterie. Pour ce faire, vous devez connaître la consommation électrique de vos bandes LED et la capacité de votre batterie. Des calculs précis vous aideront à planifier une alimentation électrique adéquate, évitant ainsi les coupures de courant inattendues en cours d'utilisation.
Facteurs clés du calcul
Deux facteurs clés déterminent la durée de vie de la batterie de vos bandes LED : la capacité totale de la batterie et la consommation d'énergie des bandes LED. La capacité de la batterie est généralement mesurée en milliampères-heures (mAh) ou en watts-heures (Wh), tandis que la consommation électrique des bandes LED est mesurée en watts par mètre (W/m). La connaissance de ces valeurs permet de calculer la durée de vie de la batterie dans des conditions spécifiques.
Le modèle mathématique
Pour calculer l'autonomie de la batterie, utilisez la formule suivante :
Autonomie de la batterie (heures) = Capacité de la batterie (mAh) / (Consommation électrique de la bande LED (W) / Tension (V))
Cette formule permet d'estimer la durée de fonctionnement de vos bandes LED avec une batterie entièrement chargée.
Exemple de calcul
Let’s say you have a 12V LED strip with a power consumption of 24W and a battery pack with a capacity of 5000mAh. Using the formula, you can calculate the battery life as follows:
Battery Life (hours) = 5000mAh / (24W / 12V)
= 5000 / 2
= 2.5 hours
This means the battery pack can power the LED strip lights for approximately 2.5 hours before recharging. This calculation is crucial for planning your lighting setup, especially for events or applications requiring continuous lighting.
FAQs : Les réponses à vos questions
Q: What are the different methods to power LED strip lights without a plug?
A: You can power LED strip lights without a plug using a battery pack, USB power bank, solar panel system, hardwiring to an electrical circuit, or a portable power station. Each method offers unique benefits depending on your setup and requirements.
Q: Can I use a battery pack to power my LED strip lights?
A: A battery pack is a popular and portable solution. Ensure the battery pack matches the voltage requirements of your LED strip, and securely connect the positive and negative terminals. This method is ideal for temporary or outdoor installations.
Q: How do I connect LED strip lights to a USB power bank?
A: To connect LED strip lights to a USB power bank, ensure the LED strip operates at 5V. Use a USB to DC adapter that matches the connector of your LED strip, and plug it into the power bank. This setup is perfect for small projects and portable lighting needs.
Q: Is it possible to power LED strip lights with solar panels?
A: Absolutely. Solar panels can provide a sustainable power source for LED strip lights. You’ll need a solar panel, a charge controller, and a rechargeable battery. Connect the components, place the solar panel in a sunny location, and enjoy eco-friendly lighting.
Q: How can I hardwire LED strip lights to an electrical circuit?
A: Hardwiring LED strip lights involves connecting the strip directly to an electrical circuit. Ensure the power is off, strip the wire ends, connect the wires securely using wire nuts or solder, and then turn the power back on to test the lights. This method is suitable for permanent indoor installations.
Q: What are the benefits of using a portable power station for LED strip lights?
A: Portable power stations offer versatility and reliability for powering LED strip lights. They are ideal for events, camping, or any scenario where portability is crucial. Ensure the power station matches your LED strips’ voltage and current requirements for optimal performance.
Q: How do I ensure the longevity of my battery-powered LED strip lights?
A: Match the battery pack’s capacity with the LED strip’s power consumption to maximize battery life. Secure connections to prevent power interruptions, and use voltage converters if necessary to match the strip’s voltage requirements.
Q: What should I consider when choosing a battery pack for my LED strip lights?
A: When selecting a battery pack, ensure it matches the voltage requirement of your LED strip (typically 12V or 24V) and has sufficient capacity to power your lights for the desired duration. A higher mAh rating indicates longer battery life.
Q: Are there any eco-friendly options for powering LED strip lights?
A: Yes, solar panels are an excellent eco-friendly option. They harness sunlight to power LED strip lights, reducing reliance on traditional electricity sources. This setup is perfect for outdoor areas or locations without easy access to power outlets.
Q: What additional accessories might I need to set up LED strip lights without a plug?
A: Depending on your chosen power source, you might need USB to DC adapters, solar charge controllers, rechargeable batteries, and DC connectors. These accessories ensure secure and efficient connections for uninterrupted power to your LED strip lights.
Conclusion
In conclusion, powering LED strip lights without a traditional plug opens possibilities for creative and functional lighting solutions. Each method offers unique advantages tailored to your specific needs, from battery packs and USB power banks to solar panels, hardwiring, and portable power stations. Whether you’re aiming for a temporary setup, an eco-friendly solution, or a permanent installation, the options provided in this guide will help you achieve the perfect lighting ambiance. By understanding and leveraging these alternative power sources, you can enjoy the versatility and convenience of LED strip lights in any setting, indoors or outdoors.
For those seeking reliable and high-quality Bandes lumineuses LED et Flexible à néon LED, Unitop stands out as a top choice. As one of China’s leading manufacturers, Unitop has built a strong reputation for innovation, quality, and expertise in the LED industry. Our advanced products are designed to meet the highest standards, ensuring durability and superior performance. We encourage you to contactez-nous immediately if you have further questions or specific lighting requirements. Our dedicated team is ready to provide expert advice and support, helping you find the best solutions for all your lighting needs. Trust Unitop to light up your world with excellence and reliability.

Tom est maintenant le directeur des ventes de Unitop (China) Co., Limited. Il a été dans le Éclairage LED l'industrie depuis 2005. Il est expert en ventes et marketing, et en gestion d'usine. Il aime le bodybuilding, et il est aussi un fan fou d'Apple ! C'est un travailleur acharné qui aime apprendre et essayer de nouvelles choses.
Email : tom@unitopledstrip.com WhatsApp : +86-18680307140


Laisser un commentaire
Rejoindre la discussion?N’hésitez pas à contribuer !