Are you tackling the challenge of uncooperative LED strip lights? Rest assured, you’ve found the right place for solutions. With expertise and proven methods, we’ll guide you through the steps to ensure your LED lights adhere seamlessly and enhance your space just as you envisioned.
LED strip lights often fail to stick due to improper surface preparation, low-quality adhesive, or incorrect installation techniques. Ensuring a clean, appropriate surface, using suitable adhesives, and following the correct installation methods are crucial for optimal adhesion.
Dive deeper into our comprehensive guide to discover a wealth of expert tips and practical solutions. From choosing the suitable adhesive to mastering the art of installation, we’ll equip you with all the knowledge you need to fix those LED strips flawlessly. Keep reading to transform your lighting experience!
Diagnosing the Root Causes of LED Lights Not Sticking
When embarking on the journey of installing LED strip lights, it’s essential to recognize and address the root causes of adhesion failure. This failure is not just a minor inconvenience; it can undermine the entire aesthetic and functionality of your lighting project. Let’s delve deeper into the primary factors that contribute to this issue:
Rough or Dirty Surfaces
The foundation of successful LED strip adhesion is the surface condition. Imagine trying to stick a band-aid on a sandy or wet skin; it simply won’t hold. Similarly, LED strips struggle to adhere to surfaces that are rough, uneven, or covered in dust and grime. These conditions create a barrier between the strip’s adhesive and the intended surface, leading to weak bonding. Before installation, it’s crucial to ensure that your chosen surface is as smooth and clean as possible. A simple wipe with a damp cloth or an alcohol-based cleaner can make a world of difference.
Low-Quality Adhesive
Not all LED strips are created equal, especially in terms of the adhesive they come with. Many users are tempted by the affordability of cheaper LED strip options, only to find that the included adhesive could be better. This inferior adhesive might seem adequate at first but often fails to provide long-term hold, particularly in challenging conditions. Investing in LED strips with high-quality adhesive or preparing to supplement with a stronger adhesive can save time and frustration in the long run.
Fattori ambientali
The environment where the LED strips are installed plays a pivotal role in their adhesion longevity. Humidity, temperature fluctuations, and direct sunlight exposure can all weaken the adhesive bond over time. For instance, a bathroom with high moisture levels or a sunlit window frame can prove to be challenging locations for LED strips. In such cases, considering the environmental conditions and selecting adhesives that are designed to withstand these factors is crucial.
Essential Surface Preparation for LED Strips
Successfully sticking LED strips begins long before the adhesive backing is peeled off. The secret to a firm and lasting bond lies in the crucial steps of surface preparation. Here’s a detailed look at how to create the perfect canvas for your LED strips:
- Start with a Spotless Surface: The foremost task is to clean the intended surface meticulously. Use a mild detergent or isopropyl alcohol to remove any traces of dirt, oil, or grease. This is particularly important in kitchens or areas prone to dust. A residue-free surface ensures that the adhesive on the LED strips can bond effectively without interference.
- Ensure Complete Dryness: After cleaning, patience is key. Let the surface dry thoroughly to eliminate any moisture. Moisture can act as a barrier between the adhesive and the surface, weakening the bond and causing the LED strips to peel off eventually. This step is crucial, especially in humid environments.
- Address the Texture: Different surfaces require different approaches. For glossy or smooth surfaces, creating a slightly rough texture can enhance adhesion. Gently sanding the area can provide the necessary grip for the LED strip’s adhesive. However, be careful not to overdo it and damage the surface.
Consider a Primer or Sealant: In some cases, especially where moisture is a concern, applying a primer or sealant can be beneficial. This not only helps in creating an adhesive-friendly surface but also protects the material underneath. It’s a step often overlooked but can significantly improve the longevity of your LED strip installation.
Selecting the Right Adhesive for Your LED Strips
When it comes to ensuring your LED strips stick reliably, choosing the appropriate adhesive is as vital as the initial surface preparation. The adhesive plays a pivotal role in the longevity and effectiveness of your LED lighting setup. Let’s break down the adhesive options to help you make an informed decision:
- Understanding Standard Adhesives: Most LED strips come with a pre-applied adhesive, typically designed for general indoor use. While convenient, it’s important to recognize that the efficacy of this adhesive can vary based on the brand and quality of the LED strips. In ideal conditions – clean, dry, and smooth surfaces – these standard adhesives perform well. However, they might falter in more demanding environments or on surfaces that are less than ideal.
- The Need for Specialty Adhesives: In environments subjected to humidity fluctuations, such as bathrooms or outdoor settings, standard adhesives may not suffice. Specialty adhesives are formulated to withstand these challenging conditions. They offer enhanced bonding strength and resilience, ensuring your LED strips remain securely in place despite the environmental stresses. When selecting a specialty adhesive, consider factors like moisture resistance and temperature tolerance.
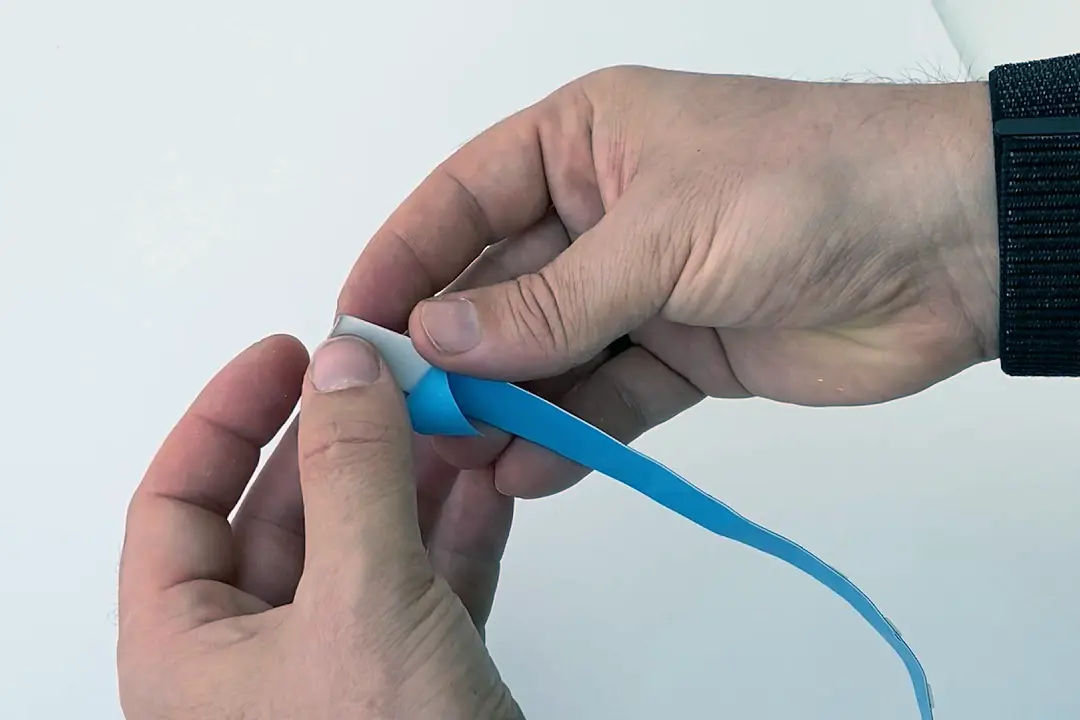
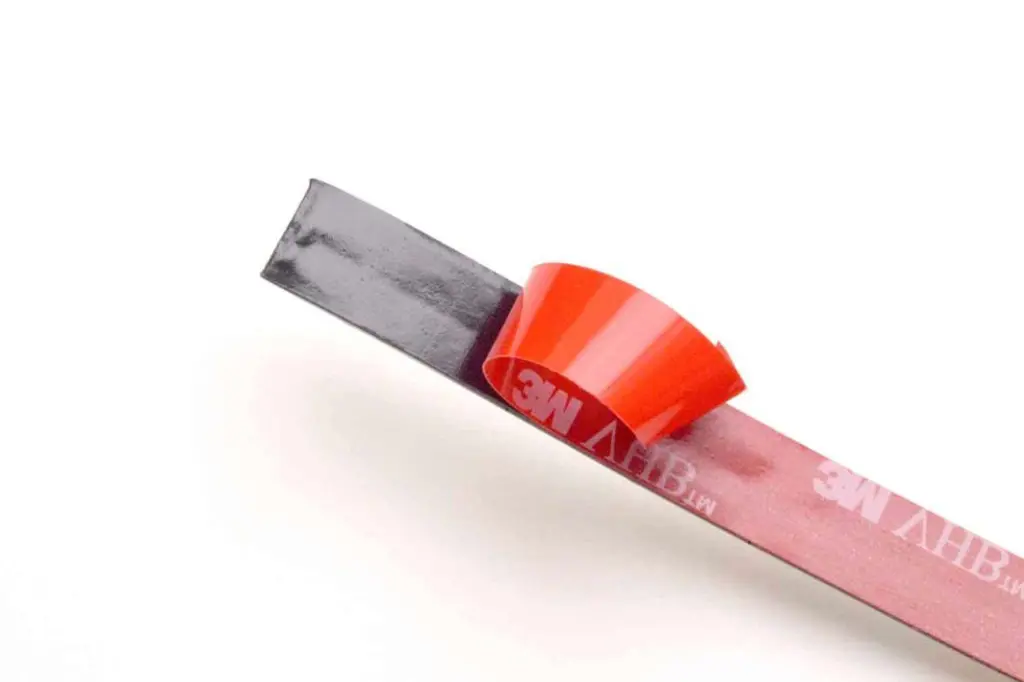
- Exploring Alternative Solutions: There are scenarios where neither standard nor specialty adhesives are adequate. This is particularly true for surfaces that are porous, excessively rough, or exposed to extreme conditions. In such cases, alternatives like 3M VHB tapes can be a game-changer. These tapes are known for their superior strength and durability. Similarly, silicone-based adhesives provide a robust solution, especially in areas exposed to significant temperature variations.
Installation Best Practices for Secure Adhesion
Mastering the installation of LED strip lights is essential to ensure they stick effectively and enhance the aesthetic appeal of your space. Here are some best practices to secure your LED strips successfully:
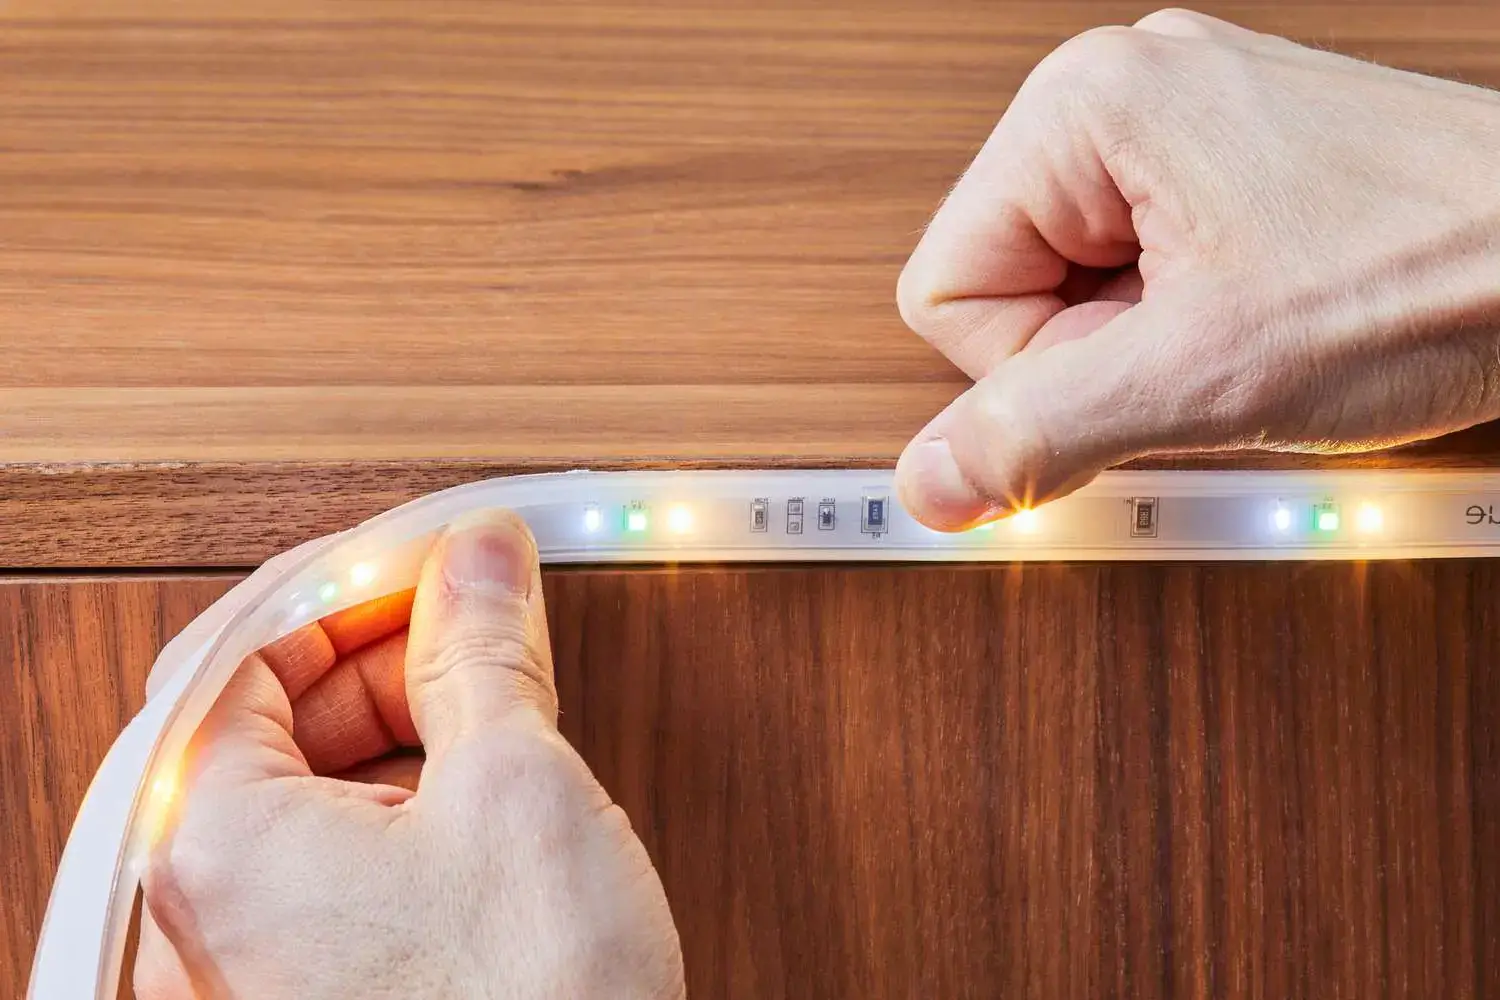
Applying the right pressure is crucial for the effectiveness of the adhesive. Once you’ve positioned the LED strip, apply uniform and firm pressure along its entire length. You can do this using a small roller or a soft cloth. The aim is to eliminate any air pockets and ensure full contact between the adhesive and the surface, which is key to a strong and lasting bond.
Proper alignment is also vital. Before you peel off the adhesive backing, plan the exact placement of your LED strips. Misaligned strips can detract from the overall look and create weak spots in adhesion. Use a ruler or measuring tape to ensure that the strips are straight and align with your desired design layout.
Avoiding common errors is important. One frequent mistake during LED strip installation is rushing the process. Take your time to ensure proper alignment and application, as hastiness can lead to errors that are challenging to correct without damaging the strips or the surface. Another common error is over-stretching the LED strips during installation, which can cause tension on the adhesive and weaken its grip over time. Gently unroll the LED strip as you apply it to the surface to avoid this issue.
Consider the environmental factors where you are installing the LED strips. In high-humidity areas, make sure the surface is dry and consider using a moisture-resistant adhesive. For areas with temperature fluctuations, choose adhesives known for their thermal stability.
Finally, testing a small section of the LED strip before fully applying it is a good practice. This step allows you to check the strength of the adhesive and the suitability of the surface without committing to the entire length of the strip.
Overcoming Adhesion Issues with Alternative Mounting Techniques
Sometimes, the typical adhesive backing on LED strip lights just doesn’t cut it, especially in challenging environments or on certain surfaces. That’s where alternative mounting techniques come into play, offering not just a solution to sticking issues but also enhancing the overall installation. Here’s a closer look at some effective alternatives:
Mounting Clips – A Secure Hold for Tricky Areas
Mounting clips are an excellent solution for securing LED strips on complex surfaces, such as areas with corners, curves, or uneven textures. These clips provide a firm grip, ensuring that the strips remain firmly in place.
When installing these clips, it’s important to choose the right size that fits your LED strips. For optimal support, space the clips evenly along the length of the strip. Using a sufficient number of clips will ensure that the strip is held securely against the surface.
One of the great advantages of mounting clips is their versatility; they can be effectively used on various surfaces, including wood, drywall, and certain tile types, making them a highly adaptable option for LED strip installation.
3M Tape – A Strong Alternative for Harsh Conditions
3M tape stands out for its robust adhesion, making it an ideal choice in environments where temperatures fluctuate or humidity levels are high. When applying 3M tape, it’s best to cover the entire length of the LED strip for maximum effectiveness. Press down firmly along the strip to ensure that the tape makes full contact with the surface.
Selecting the right type of 3M tape is crucial; you’ll want to consider both the surface you’re adhering to and the specific environmental conditions to ensure optimal adhesion and longevity of your LED strip installation.
Mounting Channels – Enhancing Aesthetics and Functionality
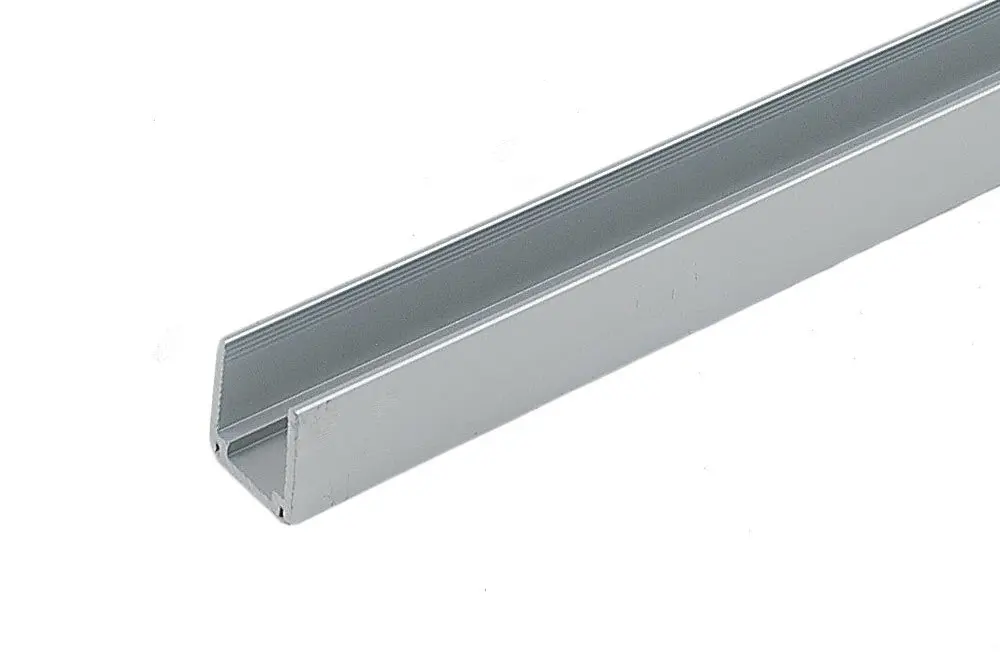
Mounting channels offer more than just a secure way to affix your LED strips; they significantly enhance the aesthetic appeal of your installation. Their sleek, professional design is ideal for areas where a clean and streamlined appearance is desired. Beyond aesthetics, these channels are beneficial in diffusing light evenly. This feature is crucial for eliminating bright spots and shadows, ensuring a uniform and pleasing lighting effect.
Additionally, mounting channels serve a protective role. They safeguard your LED strips against dust accumulation and physical damage, thereby extending the lifespan and maintaining the quality of your lighting setup.
Troubleshooting and Resolving LED Strip Adhesion Problems
Encountering adhesion issues with LED strip lights, even after careful installation, is not uncommon. Here are some effective strategies for troubleshooting and resolving these problems:
Addressing Peeling Strips
Initial Step: If your LED strips start to peel off, begin by cleaning the surface once more. Dirt and grease can build up over time, weakening the adhesive’s grip.
Stronger Adhesive: Reapply the strips using a stronger adhesive, such as a high-bond 3M tape or a silicone-based adhesive, especially if the environment is humid or the temperature varies significantly.
Using Mounting Clips or Channels: If the issue persists, mounting clips or channels can provide additional security. They not only secure the strips but also add a level of professionalism to your installation.
Fixing Lifting Corners
Cause and Solution: Often, corners start lifting due to insufficient pressure during installation or environmental factors like humidity. Reinforce these spots with additional adhesive or small mounting clips, which are specifically designed for such challenging areas.
Regular Inspection: Make it a habit to inspect these trouble spots periodically and address any lifting immediately to prevent further peeling.
Reapplying LED Strips
Gentle Removal: If you need to reapply LED strips, carefully remove them to avoid damaging the strip or the surface. Use a heat source like a hairdryer to warm the adhesive, making it easier to remove gently.
Surface Prep: Clean both the strip and the surface thoroughly before reapplying. This removes any residual adhesive or grime and ensures a clean bonding surface.
Choosing the Right Adhesive: Apply new adhesive, considering the specific needs of your installation area. Remember, the adhesive that works in a living room might not be suitable for a bathroom or outdoor setting.
Maintenance Tips to Prolong the Life of Your LED Strips
Maintaining your LED strip lights properly is essential for ensuring their longevity and optimal performance. Here’s a comprehensive guide on how to keep your LED strips in prime condition:
Regular cleaning is crucial. Dust and grime can not only dim the lights but also weaken the adhesive bond over time. To keep your LED strips bright and secure, gently wipe them down regularly with a soft, dry cloth. If you encounter stubborn stains, a slightly damp cloth with a bit of mild detergent can be effective. However, be very cautious to prevent any moisture from seeping into the connections or the strip itself.
It’s also important to conduct routine inspections of your LED strips. Look out for any signs of wear, such as frayed wires or areas where the light seems dimmer, which could indicate potential electrical issues. Addressing these problems early on can prevent more serious complications later.
In terms of minor repairs, if you notice a section of the strip flickering or appearing dimmer, try pressing down gently to re-establish a connection. This simple action can often resolve loose connections that occur due to environmental factors or vibrations. However, for more significant issues like cut or severely damaged strips, it’s advisable to seek professional help or consider replacements.
Overheating is a concern that shouldn’t be overlooked. Make sure that your LED strips aren’t covered or enclosed in a manner that restricts airflow, as this can lead to overheating and damage both the LEDs and the adhesive. Ensuring proper ventilation will greatly extend the life of your strips.
Regular checks of the adhesive are also a part of good maintenance practice. If you notice the adhesive beginning to peel or lose its effectiveness, a thorough cleaning and reapplication or reinforcement of the adhesive may be necessary.
Lastly, consider the installation itself. If your initial setup was less than ideal, it might be worth taking the time to reinstall the strips correctly. A proper installation from the start can significantly reduce maintenance efforts and prolong the lifespan of your LED strips. By following these maintenance tips, you can enjoy a beautifully lit space with LED strips that perform at their best for years to come.
Domande frequenti
Q: Can temperature affect the adhesion of my LED strips?
A: Absolutely! Extreme temperatures, both hot and cold, can weaken the adhesive on LED strips. Ideally, install them in a moderate temperature setting. If it’s too hard, gently heating the adhesive with a hairdryer can improve adhesion.
Q: Is there a particular type of cleaner I should use before sticking my LED strips?
A: For most surfaces, a simple wipe-down with isopropyl alcohol is sufficient. It removes grease and provides a clean surface for the adhesive to bond effectively. Avoid harsh chemicals that could damage the strips or the surface.
Q: How do I prevent my LED strips from peeling at the corners?
A: Corners are tricky but can be managed by applying extra adhesive, like double-sided tape, or using mounting clips specifically designed for LED strips. Also, ensure you’re not bending the strips too sharply at corners.
Q: What should I do if my LED strips get dirty or dusty?
A: Regularly clean your LED strips with a soft, dry cloth. If they’re filthy, a lightly dampened cloth can be used. Be sure to turn off and unplug the strips before cleaning, and avoid using excessive water.
Q: Can I use super glue to restick my LED strips?
A: It’s not recommended to use super glue as it can damage the strip’s surface and leave a residue that’s hard to remove. Instead, opt for adhesives specifically designed for LED strips, like double-sided tape or silicone-based adhesives.
Q: My LED strips are losing stickiness after being moved. What should I do?
A: When relocating LED strips, it’s often necessary to apply new adhesive. Double-sided tape or adhesive clips are great options for reattaching the strips to a new surface.
Q: Are there any LED strip adhesives that are resistant to moisture?
A: Yes, there are moisture-resistant adhesives available. Look for silicone-based adhesives or waterproof double-sided tapes, which are ideal for high-humidity areas or outdoor use.
Q: How often should I check and maintain my LED strips?
A: It’s a good practice to inspect your LED strips every few months. Look for signs of wear, check the adhesion, and clean the surface to ensure they continue to function correctly and look their best.
Q: Can LED strip lights be installed on textured walls?
A: Yes, but it requires a stronger adhesive. Consider using mounting clips or heavy-duty double-sided tape designed for textured surfaces.
Q: What’s the best way to hide the wires of my LED strips for a cleaner look?
A: You can use cable management tools like cord clips or raceways. Another option is to install the strips within aluminum channels, which can neatly conceal both the strips and their wiring.
Conclusione
In summary, the key to a successful sticking LED lights installation lies in meticulous attention to detail throughout the process, from initial preparation to ongoing maintenance. By understanding the factors that influence adhesion, selecting the appropriate adhesive, and applying the strips with care and precision, you can significantly enhance the reliability and lifespan of your LED lighting.
In wrapping up our comprehensive guide on “Why Are My LED Strip Lights Not Sticking? Ultimate Solutions,” we’ve covered everything from surface preparation to innovative adhesive solutions, ensuring your LED lighting experience is hassle-free and visually stunning.
However, for those seeking an even more professional touch and the highest quality Luci a striscia LED e LED al neon flessibile, look no further than Unitop.Unitop stands as one of China’s leading manufacturers in the LED industry, renowned for our commitment to excellence and innovation. Our products are a testament to cutting-edge technology combined with user-friendly designs. If you have further questions or specific requirements, we encourage you to reach out to us without hesitation. Our team at Unitop is always ready to assist, providing expert advice and solutions tailored to your unique LED lighting needs. Ci contatti today to illuminate your space with the finest LED products and experience the Unitop difference in quality and service.
Messaggi correlati

Tom è ora il Direttore Vendite di Unitop (Cina) Co., Limited. È stato nella Illuminazione a LED industria dal 2005. È un esperto di vendite e marketing e di gestione della fabbrica. Gli piace il bodybuilding ed è anche un fan sfegatato di Apple! È un lavoratore instancabile e ama imparare e provare cose nuove.
Email: tom@unitopledstrip.com WhatsApp: +86-18680307140


Lascia un Commento
Vuoi partecipare alla discussione?Sentitevi liberi di contribuire!