Step into the world of LED strip light repair with confidence. Our comprehensive guide is your reliable companion, unlocking the secrets to effectively addressing common LED light challenges. Trust in our expertise to guide you through every step, ensuring successful repairs and enhanced longevity for your LED lighting solutions.
LED strip lights can be repaired effectively by diagnosing the problem, selecting the right tools, and executing precise repair steps. This process includes assessing the strip’s condition, rectifying connection issues, and replacing damaged components where necessary.
Delve deeper into our guide for a comprehensive understanding of LED strip light repairs. Discover practical tips, essential tools, and expert advice to master the art of fixing common LED lighting issues efficiently.
Diagnosing Common Problems in LED Strip Lights
Understanding the intricacies of LED strip lights is key to successful repair. Common issues can range from the subtle, like slight color changes, to the more pronounced, such as flickering or complete failure of certain sections.
These problems often manifest in different forms:
- Intermittent or constant flickering
- Patches of discolored or dim lights
- Segments refuse to illuminate at all
To effectively diagnose these issues, close observation in a dimly lit environment can reveal irregularities in light output and color consistency.
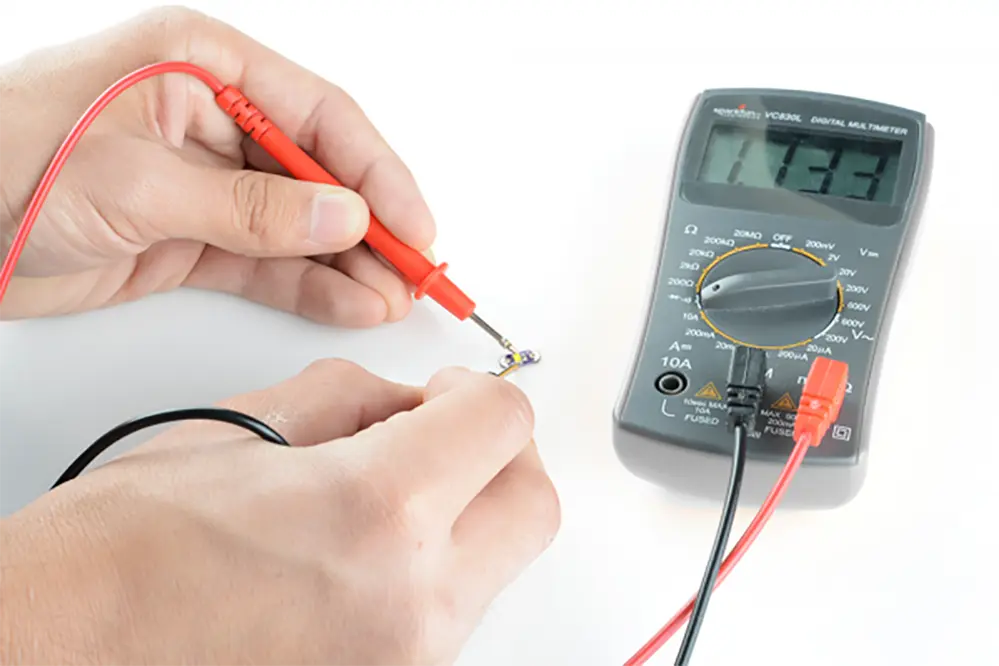
The tools for diagnosis go beyond the standard multimeter, which is essential for checking electrical continuity and voltage discrepancies. A thorough visual inspection can often uncover potential problems. Look for physical signs of damage, such as cuts, kinks, or discoloration on the strip, indicating possible overheating. Loose connections are a common culprit behind flickering lights; thus, it’s important to check the strip’s connection points to the power source and examine any connectors along its length. Utilizing a thermal camera or an infrared thermometer can be beneficial in spotting hot spots on the strip, suggesting high-resistance areas or failing components.
The initial assessment should always begin with the power supply unit (PSU). An inadequate PSU can lead to dimming or flickering, so ensure that its output is compatible with the LED strip’s specifications. If your setup includes a dimmer or controller, try bypassing these components temporarily. This can help determine if they’re contributing to the issue. Additionally, inspect the strip closely for any physical damage, such as cuts or breaks, especially if the strip has been recently adjusted or relocated. This step is crucial, as physical damage can often lead to more complex issues that might require a different approach than simple troubleshooting.
Step-by-Step Repair Guide for LED Strip Lights
Repairing LED strip lights can seem daunting, but with the right approach, it’s a task most DIY enthusiasts can handle. Here’s a step-by-step guide to get you started:
1. Identify the Problem Area: Look for signs like flickering, dimming, or dead sections on your LED strip. Use a multimeter to check for voltage consistency across the strip.
2. Gather Your Tools: You’ll need a soldering iron, solder, wire cutters, and possibly LED strip connectors, depending on the repair type.
3. Preparation: Turn off and unplug the LED strip. If you’re working on a specific section, mark it with tape for precision.
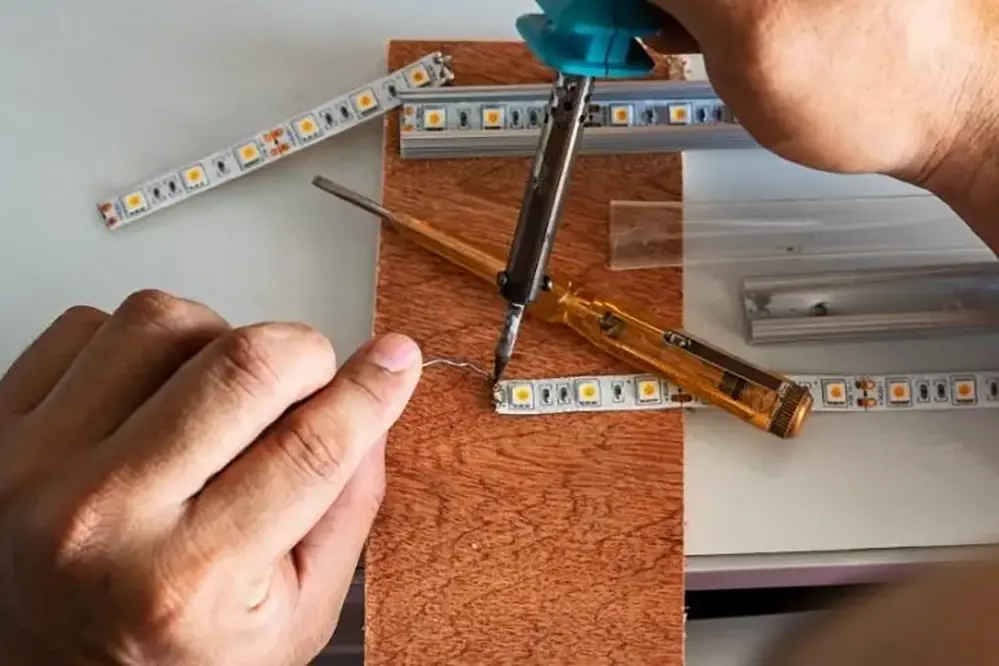
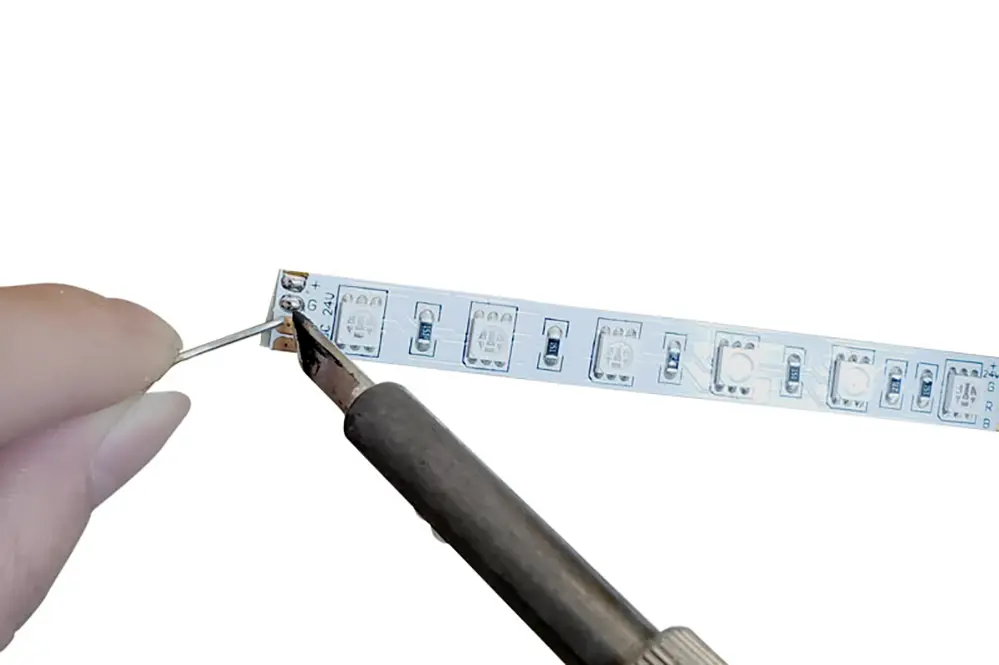
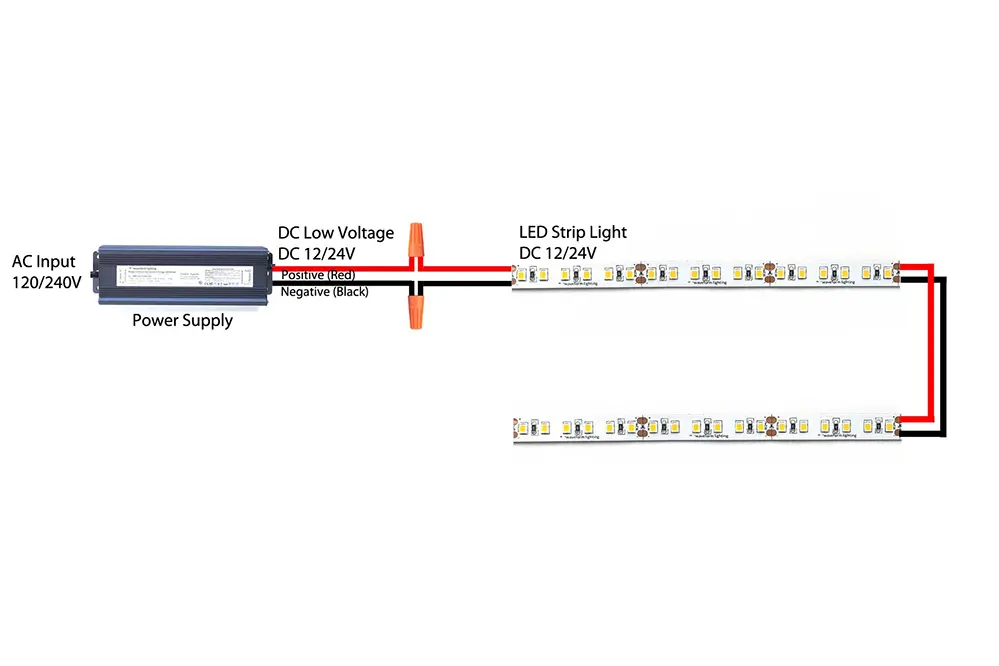
4. Soldering for Repair: If soldering is required, ensure you match the polarity of the wires and LED strip correctly. If you’re replacing a section, remove the damaged part and solder the new segment in place, ensuring it matches the original strip’s specifications.
5. Using Connectors: For a solder-free solution, use compatible connectors to join cut sections of the strip. Ensure the strip ends are clean and straight for a seamless connection.
6. Safety First: Always work in a well-ventilated area when soldering. Wear protective gear, including gloves and safety glasses.
7. Testing: After the repair, test the LED strip before reinstalling it. Check for consistent lighting and color across the strip.
When to Opt for Replacement Over Repair
When faced with the decision of whether to repair or replace your LED strip lights, several factors come into play. Each scenario presents its unique considerations, and understanding when to opt for one over the other can save you both time and money.
1. Age and Efficiency: LED technology is rapidly advancing, and newer models are far more efficient and feature-rich than their predecessors. If your LED strip is several years old, it might be less energy-efficient or as bright as the latest options available. Older strips might also lack features like dimming capabilities or color-changing functions. In such cases, replacing your old strip with a newer, more efficient model can enhance the lighting quality and even reduce energy costs in the long run.
2. Extent of Damage: Examine the extent of damage to your LED strip. If the issue is isolated, such as a few non-functioning LEDs or a loose connection, a repair might suffice. However, if the damage is widespread, affecting multiple sections of the strip, or if the strip has physical damage like severe cuts or water ingress, replacement is a more sensible option. Extensive damage often hints at underlying issues that could lead to further failures, even after repair.
3. Cost Considerations: Sometimes, the cost of repairing an LED strip can be comparable to, or even exceed, the price of a new one. This is especially true if specialized tools or components are required for the repair. In such scenarios, investing in a new LED strip could be more economical. Additionally, consider the time and effort involved in repairing the strip. If the repair process is complex and time-consuming, it might be more efficient to opt for a new strip.
4. Compatibility Issues: When considering a replacement, ensure the new LED strip is compatible with your existing setup. This includes matching voltage requirements, color temperatures, and control systems. If your current setup consists of a specific controller or dimmer, the new LED strip should be able to integrate seamlessly with these components. Incompatibility can lead to issues like flickering, color mismatches, or even complete non-functionality.
Maintenance and Care for Longevity of LED Strip Lights
Maintaining your LED strip lights is essential for ensuring their longevity and optimal performance. Here’s how you can take care of these versatile lighting solutions:
1. Regular Cleaning: LED strips can accumulate dust and dirt over time, which can impact their brightness and color accuracy. Regularly cleaning your LED strips can prevent this. Use a soft, dry cloth to wipe down the strips gently. If necessary, use a slightly damp cloth, but make sure the strips are off and dehydrated before turning them back on. Avoid using harsh chemicals or abrasive materials, as these can damage the strip’s surface.
2. Check Connections: Over time, connections and wiring can loosen or wear out, especially in installations where the strips are flexed or moved. Periodically inspect all connections, including where the strips connect to the power source and any joiners or extenders used. Tighten any loose connections and replace any worn or damaged wires to prevent electrical hazards and ensure consistent lighting.
3. Avoid Moisture: For LED strips not explicitly designed for outdoor or high-moisture environments, it’s crucial to keep them dry. Exposure to moisture can lead to short circuits and reduce the lifespan of your LED strips. If you need lighting in moisture-prone areas, such as kitchens or bathrooms, opt for LED strips with a suitable IP rating that denotes water and dust resistance.
4. Correct Installation: How you install your LED strips can significantly impact their durability. When installing, avoid bending the strips too sharply, as this can damage the internal circuitry. Make sure the surface you’re adhering the strip to is clean, dry, and smooth. Dirt or oil on the surface can weaken the adhesive, leading to the strip peeling off over time. If the strips are installed in an area where they might be bumped or brushed against, consider using additional mounting brackets or clips for extra security.
Troubleshooting Specific LED Strip Light Issues
Troubleshooting specific issues in LED strip lights often requires a bit of detective work and an understanding of the most common problems these lights face. Here’s a guide to addressing some of these unique challenges:
1. Discrepanze di colore: Uno dei problemi più comuni delle strisce LED RGB è l'incoerenza dei colori. Ciò può manifestarsi con la visualizzazione di colori diversi in alcune parti della striscia o con la mancata visualizzazione di alcuni colori. Il primo passo per la risoluzione di questo problema è esaminare i LED RGB e i relativi controller per verificare che non vi siano danni fisici o malfunzionamenti. A volte, un semplice reset del controller può risolvere il problema. Se non funziona, potrebbe essere necessario ricalibrare le impostazioni del controller o sostituire i LED difettosi.
2. Surriscaldamento: Il surriscaldamento può ridurre notevolmente la durata delle strisce LED. Se notate che la vostra striscia LED si scalda troppo, controllate l'ambiente in cui si trova. Assicuratevi che sia installata in un'area ben ventilata e che non sia confinata in uno spazio chiuso senza un adeguato flusso d'aria. Il surriscaldamento può essere causato dal sovraccarico della striscia oltre la sua capacità, quindi assicuratevi di utilizzare un alimentatore che corrisponda ai requisiti di tensione della striscia. Inoltre, si consiglia di installare dissipatori di calore o di utilizzare strisce LED con un grado di protezione IP più elevato per una migliore dissipazione del calore.
3. Cadute di tensione: Per le strisce LED più lunghe, le cadute di tensione possono provocare un oscuramento o un cambiamento di colore verso la fine della striscia. Ciò è spesso dovuto alla resistenza della striscia stessa. Per ovviare a questo problema, è possibile utilizzare un alimentatore con una capacità di tensione superiore o dividere la striscia di LED in segmenti più corti, alimentandoli singolarmente o in parallelo. In questo modo si garantisce che ogni segmento riceva un'alimentazione adeguata senza una significativa caduta di tensione lungo la striscia.
In scenari complessi, come nel caso di installazioni di grandi dimensioni o di sistemi di illuminazione specializzati, la consulenza di un esperto di illuminazione o di un elettricista può fornire soluzioni su misura per la vostra specifica configurazione. Questi possono offrire indicazioni sui tipi di strisce LED più adatti alle vostre esigenze, consigliarvi sui requisiti di alimentazione e suggerirvi le tecniche di installazione più efficaci. Ricordate che l'obiettivo è ottenere una luminosità e un'accuratezza del colore costanti in tutta l'illuminazione a strisce LED, garantendo al contempo un funzionamento sicuro ed efficiente.
Domande frequenti sulla riparazione delle strisce luminose a LED
Questa sezione affronta alcune delle domande più comuni degli utenti sulle strisce luminose a LED.
D: Perché le mie strisce LED sfarfallano a intermittenza?
R: Lo sfarfallio intermittente delle strisce LED è spesso dovuto a fluttuazioni dell'alimentazione. Verificare che la fonte di alimentazione sia costante e che la tensione corrisponda ai requisiti della striscia. A volte, la sostituzione dell'adattatore di alimentazione o il ripristino dei collegamenti allentati possono risolvere il problema.
D: Come posso evitare che le mie strisce LED si surriscaldino?
R: Per evitare il surriscaldamento, assicurarsi che le strisce LED abbiano una ventilazione adeguata. Evitate di chiuderle in spazi ristretti e tenetele lontane da fonti di calore. Inoltre, l'utilizzo delle strisce LED entro i parametri operativi raccomandati è fondamentale per evitare l'accumulo di calore in eccesso.
D: Quali sono le cause delle incongruenze di colore nelle strisce LED?
R: Le incongruenze di colore nelle strisce LED possono essere causate da LED RGB difettosi, da un'alimentazione non corretta o da danni alla striscia stessa. Controllare i collegamenti e i controller e assicurarsi che la striscia non sia fisicamente danneggiata o eccessivamente piegata.
D: Le condizioni atmosferiche possono influire sulle prestazioni delle strisce LED per esterni?
R: Sì, le condizioni atmosferiche estreme possono influire sulle strisce LED per esterni. Assicuratevi che le strisce per esterni abbiano un adeguato grado di protezione IP (Ingress Protection) per la resistenza all'acqua e alla polvere. È importante anche una manutenzione regolare e la scelta del prodotto giusto per il clima.
D: Come faccio a sapere se la mia striscia LED deve essere riparata o sostituita?
R: Se la striscia LED presenta danni fisici significativi, sfarfallii persistenti o sezioni che non si accendono, potrebbe essere necessario ripararla. Tuttavia, se questi problemi sono diffusi o la striscia è vecchia, la sostituzione potrebbe essere una soluzione più economica.
D: Quali sono le migliori pratiche per l'installazione delle strip LED?
R: Quando si installano le strisce LED, assicurarsi che la superficie sia pulita e asciutta. Evitare di piegare le strisce troppo bruscamente e utilizzare l'adesivo o le staffe di montaggio appropriate. Inoltre, assicurarsi che la fonte di alimentazione corrisponda ai requisiti di tensione della striscia.
D: Le cadute di tensione possono influire sulla luminosità delle mie strisce LED?
R: Sì, le cadute di tensione, soprattutto su lunghe distanze, possono influire sulla luminosità e sulla consistenza del colore delle strisce LED. Per ovviare a questo problema, è possibile utilizzare una fonte di tensione più elevata o collegare più strisce in parallelo anziché in serie.
D: È sicuro riparare le luci a striscia LED a casa?
R: Riparare le strisce luminose a LED a casa può essere sicuro se si seguono le dovute precauzioni. Scollegare sempre l'alimentazione prima di tentare qualsiasi riparazione e utilizzare strumenti adeguati. Tuttavia, per problemi complessi, si consiglia di rivolgersi a un professionista.
D: Come faccio a scegliere le parti di ricambio corrette per le mie luci a striscia LED?
R: Quando si scelgono i pezzi di ricambio, assicurarsi che corrispondano alle specifiche delle strisce LED esistenti, come la tensione, la densità dei LED e la temperatura del colore. L'utilizzo di parti dello stesso produttore può garantire la compatibilità.
D: Con quale frequenza devo eseguire la manutenzione delle mie strisce LED?
R: La manutenzione regolare, come la pulizia e il controllo dei collegamenti, dovrebbe essere effettuata ogni pochi mesi. Tuttavia, la frequenza può variare a seconda dell'utilizzo e dell'ambiente in cui sono installate le strisce LED. Le aree esterne o ad alto utilizzo possono richiedere controlli più frequenti.
Conclusione
La riparazione delle strisce luminose a LED è un processo fattibile e spesso semplice. Diagnosticando correttamente i problemi, utilizzando gli strumenti appropriati e seguendo le linee guida di sicurezza, è possibile prolungare la vita delle strisce luminose a LED. In caso di dubbio, consultare un professionista per evitare ulteriori danni o rischi per la sicurezza.
In conclusione, navigare nel mondo delle riparazioni delle strisce luminose a LED può essere un'esperienza gratificante e illuminante. Sia che si tratti di luci tremolanti, di incongruenze cromatiche o di pianificare una sostituzione su larga scala, la chiave sta in un approccio ponderato e ben informato. Come abbiamo visto, la diagnosi, gli strumenti e le misure di sicurezza corrette sono fondamentali per garantire la longevità e le prestazioni dell'illuminazione a LED.
Parlando di eccellenza nelle soluzioni LED, accendiamo i riflettori su Unitop, uno dei principali produttori cinesi nel campo delle luci a striscia LED e delle lampade a LED. LED al neon flessibile. Conosciuti per il nostro impegno verso la qualità e l'innovazione, Unitop è all'avanguardia nel settore dei LED e offre una gamma di soluzioni di illuminazione di alto livello, adatte alle diverse esigenze. Se vi trovate alle prese con ulteriori domande o requisiti specifici, non esitate a contattarci. Il nostro team di esperti è pronto a illuminare il vostro cammino con consigli professionali e prodotti LED di alta qualità. Contatto Unitop e portare la vostra esperienza di illuminazione a nuovi livelli, dove la qualità e l'esperienza brillano di più.
Messaggi correlati

Tom è ora il Direttore Vendite di Unitop (Cina) Co., Limited. È stato nella Illuminazione a LED industria dal 2005. È un esperto di vendite e marketing e di gestione della fabbrica. Gli piace il bodybuilding ed è anche un fan sfegatato di Apple! È un lavoratore instancabile e ama imparare e provare cose nuove.
Email: tom@unitopledstrip.com WhatsApp: +86-18680307140


Lascia un Commento
Vuoi partecipare alla discussione?Sentitevi liberi di contribuire!