Welcome to the enlightening world of LED strip lights, where the dazzling array of colors and patterns transform plain spaces into spectacular scenes. In our quest to delve deeper into this vibrant technology, we explore the crucial question: How can you tell if an LED strip is addressable? This question is more than just technical—it unlocks the potential for customized lighting solutions that can adapt to any mood or setting.
LED strip lights are more than just decorative elements; they are essential for creating atmospheres and enhancing environments. Whether you’re a DIY enthusiast looking to add a personal touch to your home or a professional seeking dynamic lighting options for commercial projects, understanding the capabilities of your LED strips is fundamental. Proper installation not only ensures safety but also maximizes the effectiveness and durability of your lighting setup.
So, whether you’re planning your first project or looking to refine your expertise, join me as we delve into the intricacies of LED technology. Let’s dive right in and illuminate the possibilities that await!
Addressable vs. Non-Addressable LED Strips: Key Differences
H2: Addressable vs. Non-Addressable LED Strips: Key Differences
The primary difference between addressable and non-addressable LED strips lies in the level of control offered over the lighting. Non-addressable strips, also known as single-color strips, consist of multiple LEDs that all display the same color at any time. They’re simpler in design and operation and typically used where a consistent lighting effect is needed.
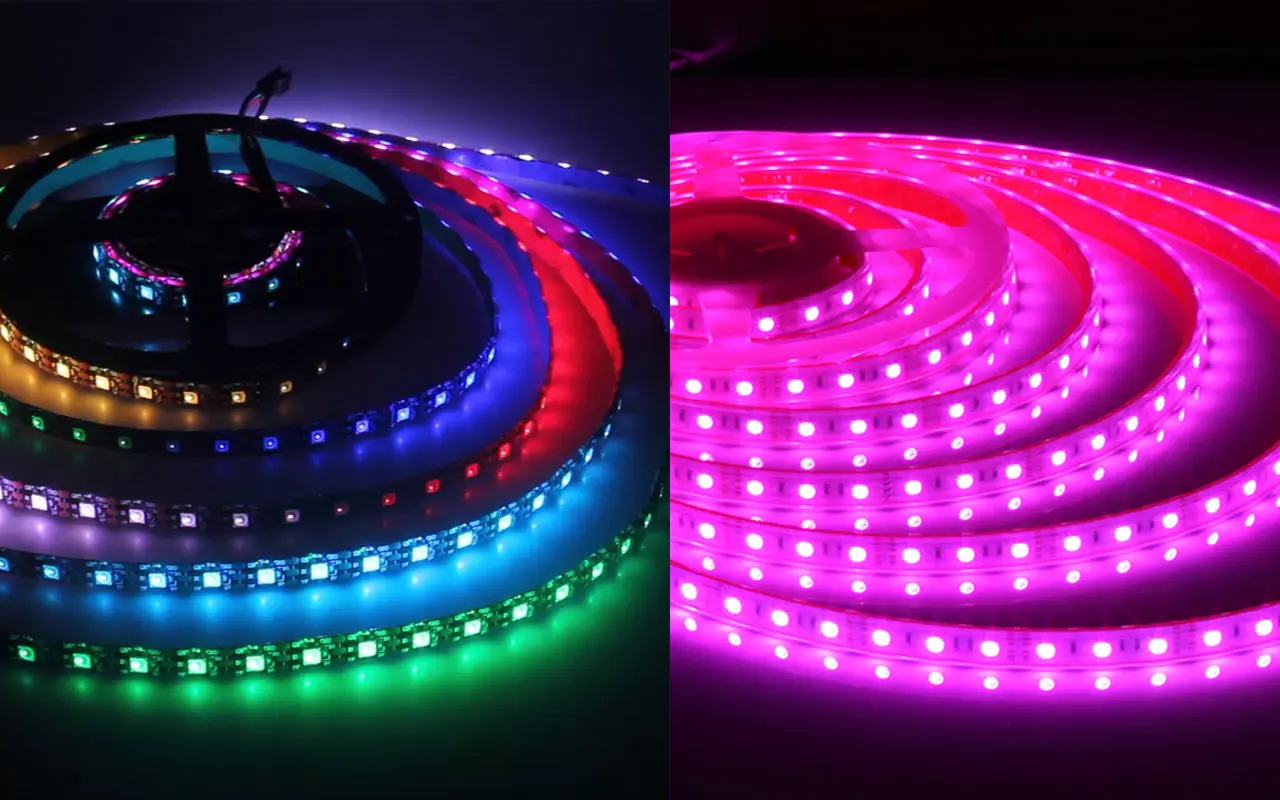
On the other hand, addressable LED strips provide individual control over each LED, enabling a vast array of dynamic lighting effects. Each LED or group can be programmed to change color and brightness independently. This functionality is about personalizing a space with multiple colors and creating animations and effects that can respond to environmental inputs like sound or movement.
Addressable LEDs operate with a built-in driver chip that manages how each LED changes. These chips, integral to the LEDs or located separately on the strip, receive data from a controller and send it to each diode, allowing for precise control. Popular chip models include the WS2812 or APA102, each with unique color consistency, response time, and power consumption characteristics.
The flexibility in control and the ability to produce intricate lighting patterns make addressable LED strips especially popular for entertainment and architectural applications. Whether enhancing the ambiance in a home theater with synced lighting effects or creating attention-grabbing commercial displays, addressable LEDs offer unmatched capabilities. However, this control requires a more sophisticated setup involving controllers and sometimes additional software, which can increase the complexity and cost compared to non-addressable options.
What Makes an LED Strip Addressable?
Definition and Characteristics of Addressable LED Strips
Addressable LED strips, often called digital LED strips, embody advanced functionality where each LED, or a group of LEDs, can be controlled independently. Unlike traditional LED strips that display one uniform color at a time, addressable strips utilize integrated circuit chips that assign unique addresses to each LED. This architecture enables individual color and brightness control and facilitates complex lighting designs without the interference of neighboring LEDs.
These strips are typically powered by protocols like WS2812 or APA102, which communicate through Arduino or Raspberry Pi microcontrollers. The versatility of addressable LED strips makes them ideal for applications requiring high degrees of customization, including stage design, home automation, and mood lighting.
The Role of Individual LED Control
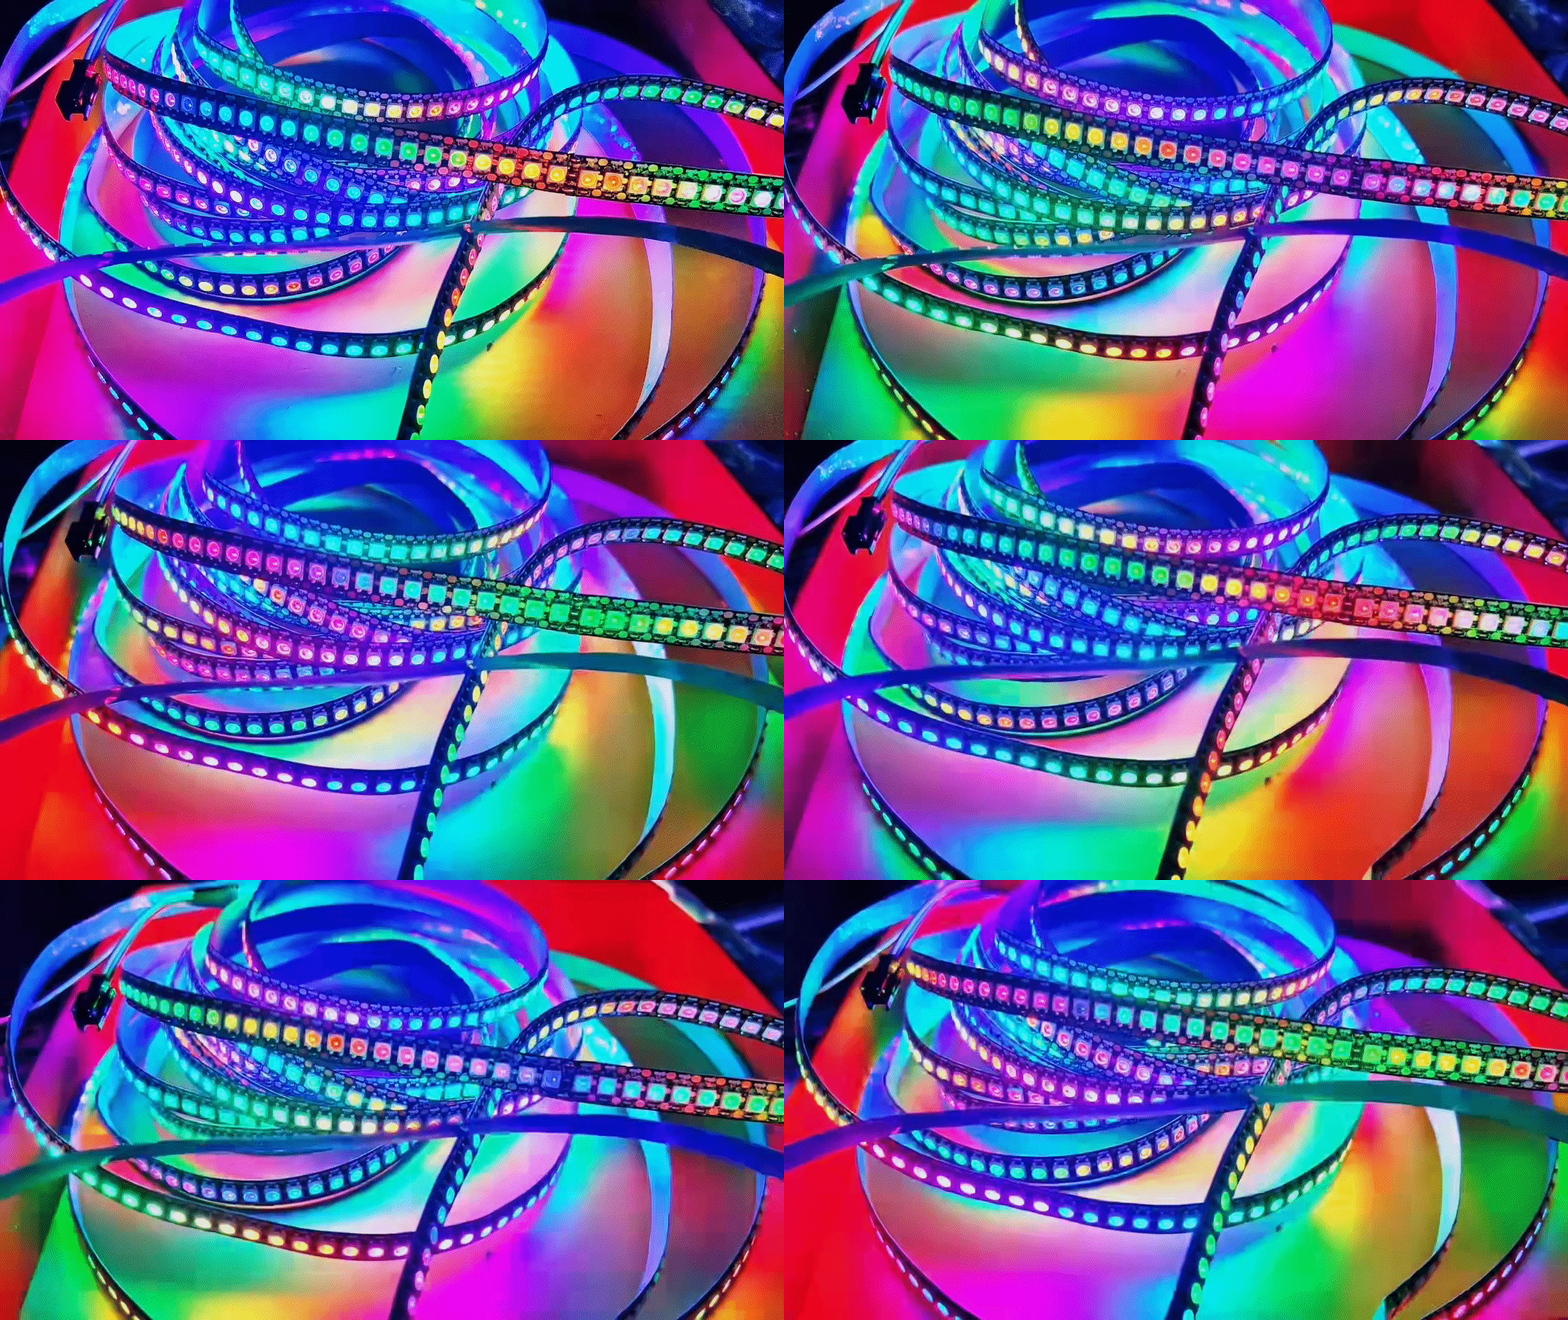
The ability to control each LED individually is the cornerstone of what makes addressable LED strips so innovative. This granularity of control transforms a simple light strip into a canvas for digital artistry. Users can program specific LEDs to flicker, change colors, and transition through effects seamlessly, creating visually striking patterns that flow along the length of the strip.
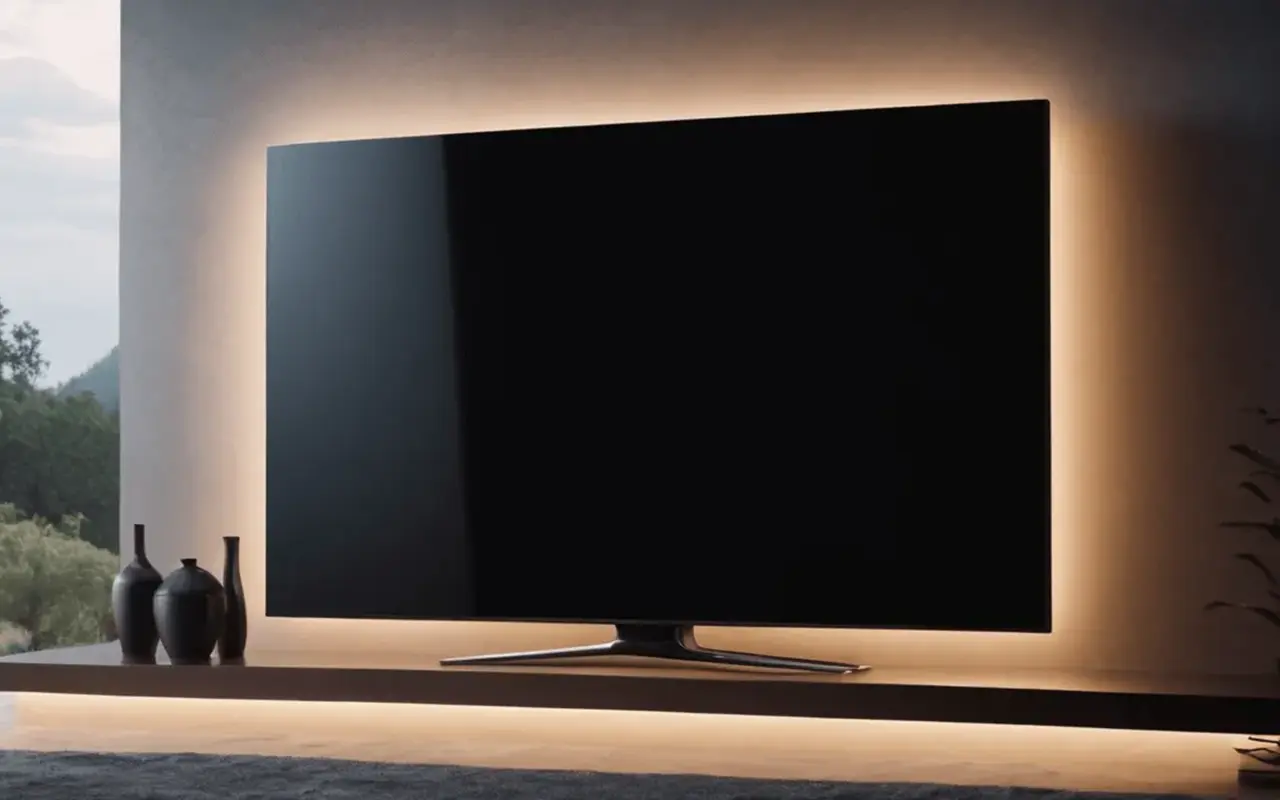
Individual LED control allows for the implementation of a spectrum of scenarios, from synchronized light shows that react to music to subtle shifts that mimic natural light patterns. For example, in a home theater, addressable strips can be programmed to react to on-screen actions, enhancing the viewer’s experience by extending the visual components of the media into the room in real time.
Moreover, the precision control of each diode means that energy consumption can be optimized. LEDs not required for particular scenes or effects can be dimmed or turned off. This reduces power usage compared to non-addressable strips, where the entire length must be lit to achieve specific colors.
This advanced control mechanism not only elevates the aesthetics of a space but also contributes to energy efficiency and creative flexibility, pushing the boundaries of traditional lighting solutions.
Identifying Addressable LED Strips
Visual Inspection Tips: What to Look For
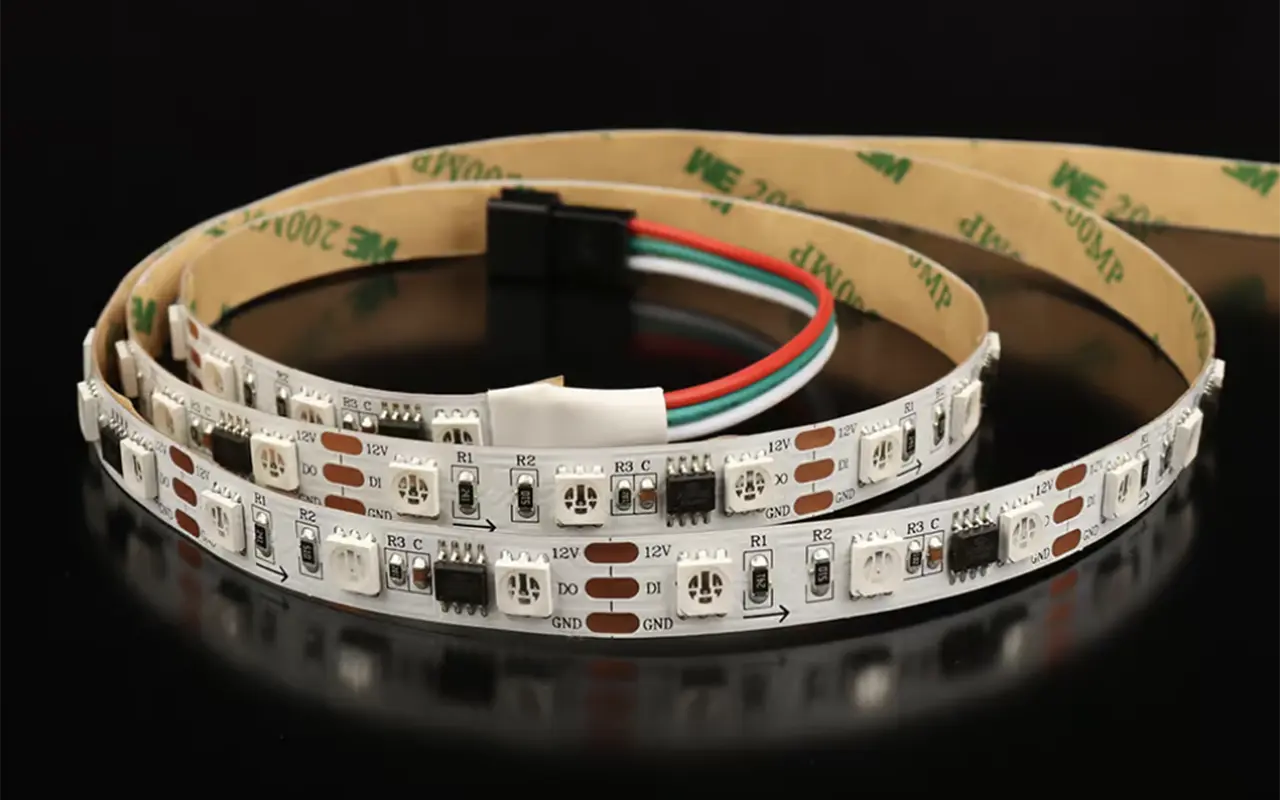
Identifying an addressable LED strip can be straightforward if you know what to look for. First, examine the LED strip for visible integrated circuit chips next to each LED. These tiny chips are often marked and slightly larger than the LED itself, distinguishing them from non-addressable strips where such chips are absent. Each chip on an addressable strip controls that specific LED, enabling independent control of its color and brightness.
Also, check for the cutting points, usually marked along the strip. Addressable LED strips allow cutting at specific intervals, each corresponding to a segment that can be controlled independently. These segments typically contain one or more LEDs with the same control chip.
Understanding the Wiring and Connectors
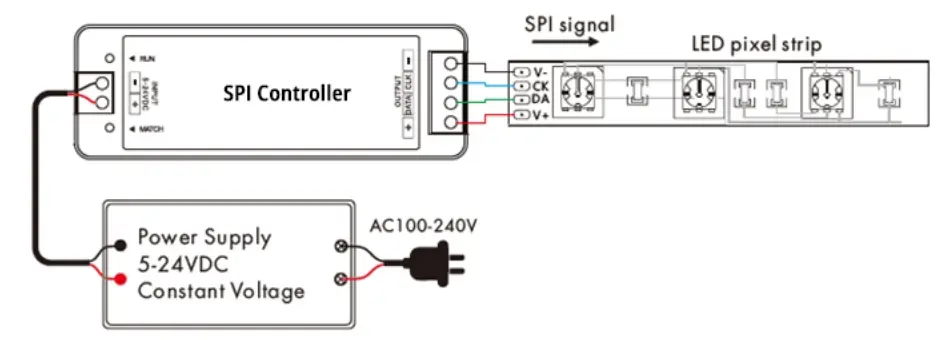
Understanding the wiring setup of addressable LED strips is crucial for proper installation and operation. These strips generally have a three-wire configuration, essential for their functionality:
Power Wire: Supplies the voltage necessary for the LEDs and the integrated circuits.
Ground Wire: Completes the electrical circuit and is essential for stable operation.
Data Line: Transmits control signals from the controller to the LEDs, allowing for the manipulation of colors and effects.
The connectors at the ends of these strips are also distinctive. Often, addressable LED strips will include a three or four-pin connector, depending on whether they require a separate clock line (like those using APA102 chips). This makes them easy to extend or integrate with controllers and power supplies designed for addressable LEDs.
Technical Specifications and Chips
Common Chip Types: WS2812, APA102
The WS2812 is one of the most commonly used chips in addressable LED strips. It integrates the control circuit and the RGB chip in a single package, allowing for a compact and efficient design. Each WS2812 LED can display 256 brightness levels per color, enabling them to produce over 16 million color combinations.
The APA102 chip is another popular type used in addressable LED strips. Unlike the WS2812, the APA102 features a separate data and clock line, allowing faster data transmission rates and more precise control over the timing. This can be particularly beneficial in applications requiring dynamic lighting effects or where many LEDs need to be controlled without noticeable lag.
Controller Types and Their Functions
The controllers for addressable LED strips vary widely in complexity and functionality. At the basic level, simple handheld remotes or pre-programmed controllers can select colors and patterns. More advanced setups may include Arduino or Raspberry Pi controllers, which can be programmed to create custom lighting sequences and integrate with other smart home devices.
For ultimate customization, software-based controllers offer interfaces on PCs or mobile devices, allowing users to design elaborate displays and synchronize lighting with music or other media. These software solutions often support network connectivity, enabling centralized control of multiple LED installations across different locations.
By understanding these technical aspects, users can effectively choose and implement addressable LED strips in various applications, from simple home decor to complex, interactive art installations.
Testing Your LED Strip’s Addressability
Step-by-Step Guide to Using a Multimeter
Testing the addressability of an LED strip using a multimeter is a crucial step for anyone working with customizable lighting setups. This process involves verifying the functionality of the data line, which is essential for the individual addressability of the LEDs. Here’s a detailed guide on how to conduct this test:
Set Up the Multimeter: Begin by setting your multimeter to the continuity setting, often represented by a diode symbol or the sound wave icon. This setting is designed to test if two points are electrically connected, making it ideal for checking the continuity of the data line in an LED strip.
Locate the Data Line: Identify the data line on your LED strip. It is typically marked on the strip and is separate from the power and ground lines. If you are using a strip like the APA102, it might also have a separate clock line.
Test Continuity: Place one probe of the multimeter on the data input end of the LED strip and the other on the data output end. If the multimeter beeps or shows a reading (which indicates continuity), it confirms that the data line is intact across the strip. This doesn’t confirm addressability but shows that the path necessary for individual LED control is continuous.
Check Each Segment: If your LED strip allows for it, test continuity between segments by placing probes on the data lines at the beginning and end of each cuttable segment. Continuity should exist for addressable strips in each segment.
Analyze Results: If there is no continuity where expected, there might be a break or defect in the strip’s data line. Alternatively, suppose your LED strip passes the continuity test. In that case, it’s ready for further testing with a controller to see the addressability in action.
Practical Demonstrations with Controllers
After confirming the integrity of your LED strip’s data line with a multimeter, the next step involves practical testing with a controller. This will verify addressability and allow you to check the functionality and responsiveness of each LED. Here’s how to proceed:
Connect to a Controller: Attach your LED strip to a compatible controller. Controllers can vary from basic handheld devices to sophisticated software-driven systems. Ensure the connections for power, ground, and data are secure. For strips like the WS2812 or APA102, ensure the controller supports the specific chip protocol.
Program a Test Sequence: Using the controller interface, program a simple sequence that changes colors or patterns across the strip. Start with basic commands, such as turning all LEDs to a single color or creating a chase effect that moves along the strip.
Observe the Behavior: Watch how the LEDs respond to the controller’s commands. Each LED should change according to the input from the controller, independently from its neighbors. This is a clear indication of addressability.
Adjust and Retest: If some LEDs do not respond as expected, adjust your connections and ensure that the controller settings are correct for the LED strip you use. It may be necessary to troubleshoot or consult the controller’s documentation for specific programming guidelines.
Document the Results: Take notes on how each section of the LED strip responds to the test sequences. This documentation can be invaluable for larger projects with multiple strips, ensuring consistency and functionality across all components.
Through these tests, you can confidently determine the addressability of your LED strips, setting the stage for more complex installations and applications that leverage the dynamic capabilities of individually controllable LEDs.
Applications of Addressable LED Strips
Home Automation and Decorative Uses
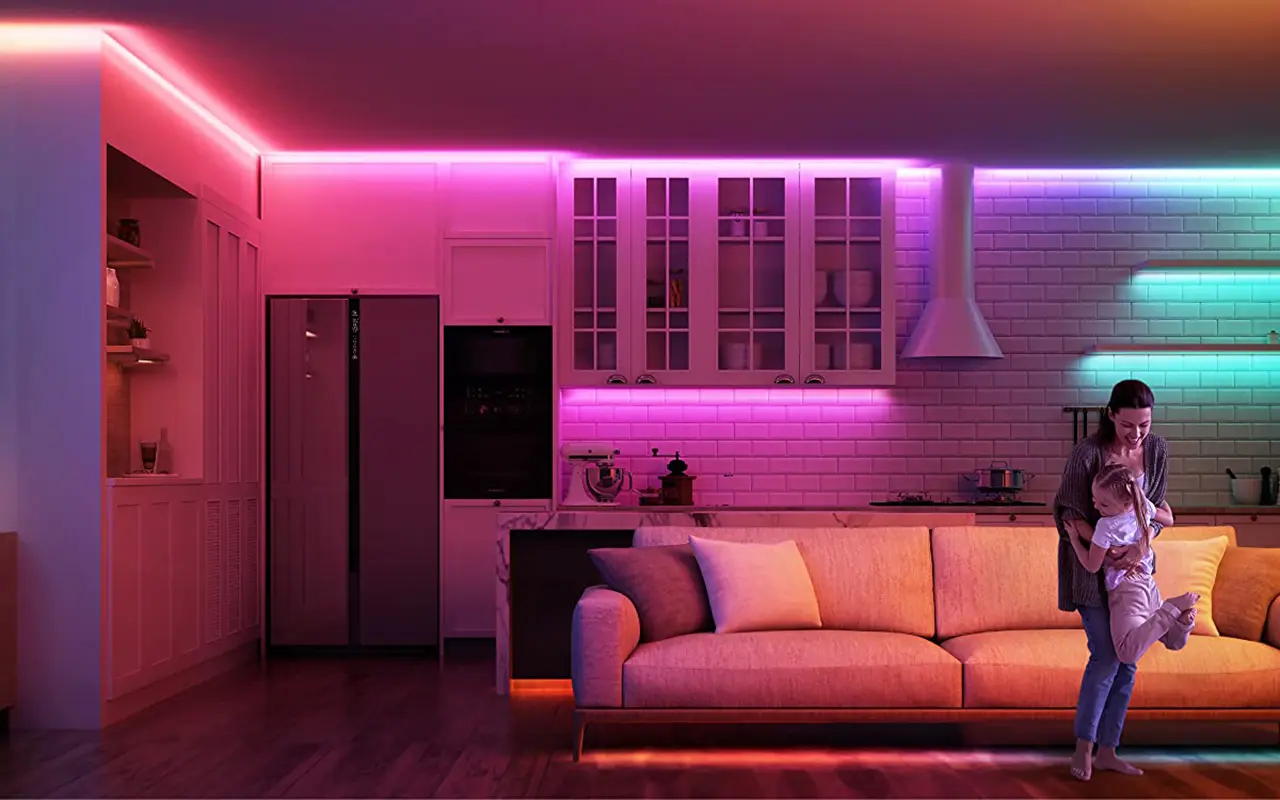
Addressable LED strips have revolutionized home lighting and decor, offering exceptional control and customization that can significantly enhance any living space. These strips are perfect for creating ambient lighting that sets the mood in various rooms—soft backlighting for media centers, vibrant displays for parties, or calming hues for relaxation areas. They provide enhanced visibility under kitchen cabinets, closets, or workspaces for practical applications, combining functionality with a sleek, modern aesthetic. Addressable LEDs also allow for dramatic accent lighting, programmed to highlight architectural features, artworks, or specific furniture pieces with custom colors and dynamic patterns. Additionally, they can be integrated with smart home systems to create interactive decor that responds to music, games, or movies, offering real-time synchronization for a truly immersive experience. Outdoor and safety lighting solutions also benefit from these versatile strips, providing weather-resistant, customizable lighting that enhances the beauty and safety of exterior spaces.
Commercial and Creative Project Applications
In the commercial realm, addressable LED strips significantly impact various industries by enhancing retail displays and signage with dynamic, eye-catching lighting that can be easily adjusted to suit promotional themes or seasonal changes. This adaptability makes LEDs ideal for showcasing products and attracting customer attention effectively. In the creative sectors, these lighting solutions are indispensable for stage design in the entertainment industry, where they contribute to creating captivating backdrops and atmospheric effects that elevate performances. Artists also adopt addressable LEDs in their installations, using them to introduce kinetic elements and interactive experiences that challenge traditional artistic expressions. Moreover, event planners increasingly rely on these LEDs to customize settings for weddings, corporate events, and other functions, programming lights to change according to different stages of an event to enhance the overall ambiance. Lastly, the architectural field uses these innovative lighting tools to add aesthetic and functional value to buildings, employing programmable features that adjust lighting according to the specific use of spaces, optimizing both interior and exterior environments.
Overall, addressable LED strips are expanding the possibilities for both residential and commercial lighting, delivering solutions that are not just about illumination but about creating responsive, adaptable, and interactive environments.
Troubleshooting Addressable LED Strips
Common Issues and How to Fix Them
H3: Common Issues and How to Fix Them
While versatile and visually stunning, addressable LED strips can sometimes present challenges in the form of operational issues, identifying these common problems and knowing how to address them can save time and frustration. Here are several typical issues encountered with addressable LED strips and practical solutions to fix them:
LEDs Not Lighting Up:
Cause: This could be due to inadequate power supply, disconnected or loose wires, or a faulty LED strip.
Solution:
Check the power supply for adequate voltage and ensure it matches the strip’s requirements.
Secure all connections and inspect the strip for any visible damage.
Replace the segment if necessary.
Flickering LEDs:
Cause: Flickering results from unstable power input or signal interference.
Solution: Ensure the power supply is stable and has the correct voltage. Adding a capacitor (1000 µF, 6.3V) at the power input can help stabilize the voltage and reduce flickering. Also, ensure the data line is not too close to power cables to avoid interference.
Color Inconsistency:
Cause: If the LEDs display incorrect colors, this could be due to incorrect coding, a faulty controller, or signal degradation over long distances.
Solution: Verify the code uploaded to the controller is correct and that the controller is functioning correctly. Use a signal amplifier or repeater to maintain color accuracy across the strip for long LED runs.
Partial Strip Lighting:
Cause: This issue might occur because of a broken connection or a damaged strip section.
Solution: Check the strip for any physical damage or signs of wear. Test continuity with a multimeter and replace faulty segments as needed.
Overheating:
Cause: Overheating can happen if the LED strip is coiled during operation or placed near heat-sensitive materials without adequate ventilation.
Solution: Uncoil the strip fully during operation and ensure it is mounted on a heat-dissipating surface. Consider installing a cooling system or heat sinks if overheating persists.
Ensuring Proper Connectivity and Functionality
H3: Ensuring Proper Connectivity and Functionality
Maintaining your addressable LED strip’s connectivity and functionality involves regular inspection and proper handling. Here are some tips to help ensure your LED setups continue to operate efficiently and effectively:
Regular Inspections:
Conduct periodic checks of all components, including power supplies, LED strips, controllers, and connections. Look for signs of wear and tear or loose connections.
Proper Labeling:
Label all connections, especially in complex setups involving multiple strips and controllers. This simplifies troubleshooting and maintenance tasks.
Use Quality Components:
Invest in high-quality LED strips and components to reduce the likelihood of electrical failures and to enhance overall performance and durability.
Avoid Physical Damage:
Handle LED strips carefully during installation. Avoid bending or stretching the strips sharply, as this could damage the circuitry.
Proper Power Management:
Ensure that the power supply adequately meets the strip’s requirements. Calculate the total amperage draw of the LEDs and confirm the power supply can handle this load with a margin for safety.
Test Before Full Installation:
Before permanently mounting the strips, connect and test all components to ensure everything works correctly. This approach helps identify faulty elements before they are installed.
By addressing common issues promptly and ensuring all components are properly connected and functioning, you can maximize the lifespan and effectiveness of your addressable LED strips. Regular maintenance prevents operational failures and ensures that your lighting continues to enhance spaces just as intended.
Enhancing Your Setup with Addressable LED Technology
Upgrading from Non-Addressable to Addressable
Transitioning to addressable LED strips enhances customization, allowing individual control over each LED’s color and intensity. This shift from non-addressable strips means moving from a single-color display to intricate, dynamic lighting designs.
Basics and Upgrade Steps:
Non-addressable LEDs show one color at a time across all LEDs.
Addressable LEDs have a microcontroller per LED for individual control.
Upgrade Steps:
Check compatibility with existing power supplies and controllers.
Select an addressable strip fitting your LED density and color range needs.
Address power needs as addressable LEDs often require more power.
Install the new strips carefully, ensuring the correct data flow direction.
Program the setup using appropriate software for custom light patterns.
Integration Tips with Smart Home Systems
Integrate addressable LED strips with smart home systems like Alexa or Google Home for voice control, scheduling, and enhanced interactivity.
Integration Benefits and Steps:
Voice Control: Operate lights via voice commands.
Scheduling: Automate lighting based on routines, improving convenience and energy efficiency.
Scene Setting: Sync lights with other smart devices for activities like movie nights or dinners.
Integration:
Use a smart-home compatible controller.
Connect the controller to your Wi-Fi network.
Set up the controller with your smart home app, following on-screen instructions.
Customize and control the lights through the app or voice commands.
This integration not only simplifies management but enriches the functionality of your home lighting, making it adaptive and responsive to your lifestyle.
The Future of LED Lighting
Trends and Innovations in LED Technology
LED lighting continues to evolve, pushing the boundaries of efficiency, design, and functionality. Enhanced energy efficiency, IoT integration, human-centric designs that promote health, and flexible solutions mark the forefront of LED advancements. These innovations make LEDs the top choice for sustainable and versatile lighting solutions.
Key Developments:
Energy Efficiency: LEDs now offer superior lumens per watt ratios, which is ideal for reducing environmental impact.
Smart Integration: IoT capabilities in LEDs facilitate remote and automated control, optimizing energy use and user convenience.
Human-Centric Lighting: Adjusts to daily cycles to improve well-being and productivity.
Flexible LEDs: Bendable designs enable unique customizations in interiors and architecture, expanding creative possibilities.
How Addressable LEDs Are Shaping the Industry
Addressable LEDs enhance precise control over lighting, revolutionizing industries from stage design to retail by enabling intricate and dynamic visual displays.
Sector Impact:
Entertainment: Transform stage designs with synchronized light shows that boost the visual appeal of performances.
Architecture: Tailor lighting to architectural features, enhancing aesthetics dynamically.
Retail: Engage customers with interactive, eye-catching product displays.
Art Installations: Create interactive public art that responds to environmental stimuli, fostering unique viewer experiences.
Addressable LEDs are improving lighting solutions and pioneering new applications across industries, indicating a significant shift in lighting technology and its uses.
FAQ
What is the difference between addressable and non-addressable LED strips?
Addressable LED strips allow you to control each LED’s color and brightness, creating complex lighting patterns and effects. On the other hand, non-addressable LED strips can only display one color at a time across the entire strip, limiting their use to more basic lighting setups.
How can I tell if my LED strip is addressable?
Look for a chip near each LED to determine if an LED strip is addressable. This chip allows for individual control of each LED. Additionally, addressable strips usually have three wires (power, ground, and data), essential for transmitting control signals to each LED.
What common types of chips are used in addressable LED strips?
Popular chips used in addressable LED strips include the WS2812 and APA102. These chips are known for controlling color and brightness at each diode, allowing for detailed customization and dynamic lighting effects.
How do I connect an addressable LED strip to a controller?
Addressable LED strips are connected to controllers using at least three connections: power, ground, and a data line. The data line is crucial as it carries the signal that controls each LED’s color and brightness. Ensure the connections are secure and matched to the controller’s output specifications to avoid functional issues.
What are some practical applications of addressable LED strips?
Addressable LED strips are used in various settings, from enhancing home automation with under-bed lighting and full theater setups to commercial applications like dynamic signage and stage design. Their ability to sync with music or change according to programmed settings makes them ideal for creating immersive environments.
What should I do if my addressable LED strip isn’t working correctly?
Common issues with addressable LED strips often stem from poor connections or incorrect data signals. Check all connections are secure and correctly configured. If issues persist, inspect the strip for visible damage and test connections with a multimeter to diagnose and resolve electrical faults.
Can I integrate addressable LED strips with smart home systems?
Addressable LED strips can be integrated with smart home systems such as Alexa or Google Home, allowing for voice-controlled lighting scenarios. This integration usually requires a compatible controller to connect to your smart home network and communicate with the LED strip.
What future innovations can we expect in LED technology?
The future of LED technology will likely see further advances in energy efficiency, integration with IoT devices for smarter control, and enhancements in light quality. Flexible and cuttable LED solutions are expected to become more prevalent, offering more lighting design and application versatility across various industries.
Conclusion: Maximizing Your LED Experience
Recap the versatility and the creative potential of addressable LED strips. Whether for home decor or commercial use, they offer a significant upgrade over traditional lighting solutions. Embrace the future of lighting by considering addressable LED technology for your next project. Remember, the transition to advanced lighting tech, like addressable LEDs, elevates the aesthetic appeal and increases any space’s functional value.
As we wrap up our exploration into the fascinating world of addressable LED strip lights, it’s worth highlighting the expertise of Unitop, one of China’s premier manufacturers. Specializing in producing top-quality Luci a striscia LED e LED al neon flessibile, Unitop stands at the forefront of lighting innovation. If you have any further questions about LED technology or specific requirements for your lighting projects, don’t hesitate to reach out. Unitop’s team of experts is ready to provide tailored solutions that perfectly illuminate your space. Connect with us today and bring your lighting ideas to life with precision and professionalism.
Articoli correlati

Tom è ora il Direttore Vendite di Unitop (Cina) Co., Limited. È stato nella Illuminazione a LED industria dal 2005. È un esperto di vendite e marketing e di gestione della fabbrica. Gli piace il bodybuilding ed è anche un fan sfegatato di Apple! È un lavoratore instancabile e ama imparare e provare cose nuove.
Email: tom@unitopledstrip.com WhatsApp: +86-18680307140





Lascia un Commento
Vuoi partecipare alla discussione?Sentitevi liberi di contribuire!