Have you ever marveled at the stunning light displays created by programmable LED strips and wondered, “Could I do that?” Well, the answer is an emphatic “Yes!” With a little guidance on how to program LED light strips and the right tools, you too can bring vibrant color to your space.
The voice behind this guide is Tom, an expert in the LED industry since 2005. He’s spent countless hours programming LEDs, including programming LED lights and LED strip lights, to create all sorts of captivating visual experiences. His extensive knowledge and hands-on experience put him in the perfect position to break down this complex topic into digestible bits.
Throughout this comprehensive guide, you’ll journey from the basics, understanding the components you need, to advanced concepts that’ll make your LED light strips dance with colors. Expect to dive into programming tools, code examples, common troubleshooting solutions, and much more, making the learning curve feel more like an exhilarating slide!
Now, the world of programmable LED lights awaits. Excited to unlock creative freedom and paint your spaces with light? Let’s dive right in!
Introduction: The Magic of LED Strips
Welcome to the vibrant world of LED 스트립 조명 – a universe where creativity and technology converge, sparking a dynamic spectrum of color and light. Today, we’re going to explore how to unlock the full potential of these versatile gadgets by delving into the intriguing process of programming LED strip lights. By the end of this comprehensive guide, you’ll be able to transform your spaces with mesmerizing, customized lighting displays. But before we delve into the technical aspects, let’s grasp the essence of LED strips and why programming them can be a fascinating venture.
Unveiling the Power of Programming LED Strip Lights
Why Program LED Strip Lights?
So, why should you program LED strip lights? At their core, LED strips are incredibly customizable, offering limitless potential for personalized lighting solutions. With programming, you get to wield full control over their behavior – from color patterns and transitions to brightness and pulsation. Whether you’re setting up mood lighting for your living room or organizing a dazzling light show for an event, programmed LED strips are your canvas, with the power to evoke emotion, draw attention, or set a distinctive ambiance.
Applications of RGB Diodes: Unlocking Creative Freedom
Beyond their obvious applications in interior design and decor, programmed LED strips have found their way into various sectors. They are used in art installations to create stunning visual effects, in photography for light painting, in wearables like costumes or accessories for enhanced aesthetics, and even in advertising, where they can be programmed to display logos or promotional messages. With the power to control RGB (Red, Green, Blue) diodes, your creative freedom is truly unbounded.
What Will You Achieve By the End of This Guide?
In this guide, we’ll take you from understanding the basics of LED strip components to mastering the art of programming them using the Arduino Uno and the FastLED library. Whether you’re a novice who’s just getting started or a hobbyist seeking to refine your skills, this guide will equip you with the know-how to animate your LED strips in a way that complements your space and vision.
Getting Started: Tools and Components You Need
Before we set out on our programming journey, let’s ensure we have all the necessary components:
Identifying Different Types of Programmable LED Strips
LED strips come in several types, the most common being the RGB strips. These strips contain separate red, green, and blue LEDs, allowing for creation of a wide range of colors through color mixing. A step further are the RGBW strips, which add a dedicated white LED for better white tones and additional brightness.
Essential Components for Programming LED Strip Lights
The LED Strip
To start with, you’ll need an LED strip. For beginners, a one-meter strip with 30 to 60 LEDs is ideal.
Power Supply and Barrel Jack
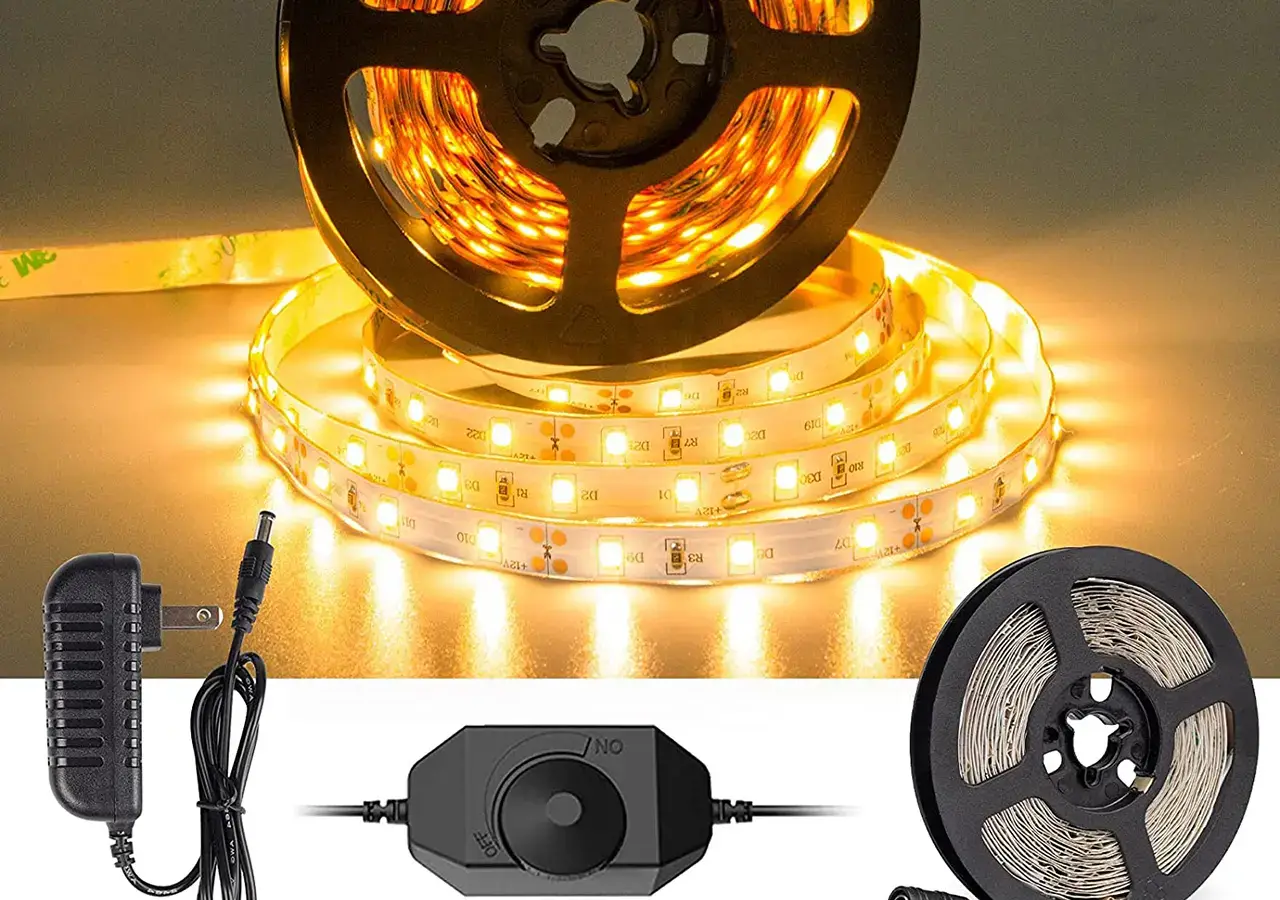
LED strips need a suitable power supply to operate. The power requirement can be calculated based on the strip’s length and the LEDs’ power consumption. A 5V power supply is commonly used, and a barrel jack will be needed for easy connection.
Arduino Uno Board
This microcontroller board will act as the brains of our operation. It’s what we’ll be programming to control the LED strip.
Connector Wires
Connector wires are used to establish a connection between the Arduino and the LED strip.
Portable Power Bank (Optional)
A portable power bank is handy for making your LED setup mobile.
Which Strip and Controller to Choose? RGB or RGBW?
The choice between RGB and RGBW strips boils down to your project’s needs. If true white light or increased brightness is important for your setup, an RGBW strip would be the better choice. However, the RGB strip is a simpler and more affordable solution for most other applications.
Setting the Stage: Assembling the Components
Now that we have all our components ready, let’s set the stage for programming
Preparing the LED Strip
Preparing the LED strip involves cutting it to the desired length, ensuring that the cut is made at designated points marked on the strip. Once cut, solder pin headers onto the strip’s connector points for easy attachment to the wires.
Connecting the Power Supply
Connect the power supply to the LED strip via the barrel jack. The red wire from the jack should be connected to the strip’s 5V, while the black wire connects to GND.
Setting up the Arduino Board
The Arduino board will be powered through the USB connection to your computer. Before connecting it to the LED strip, ensure the appropriate Arduino IDE software(LED light programming software) is installed on your computer.
Wiring the Components Together
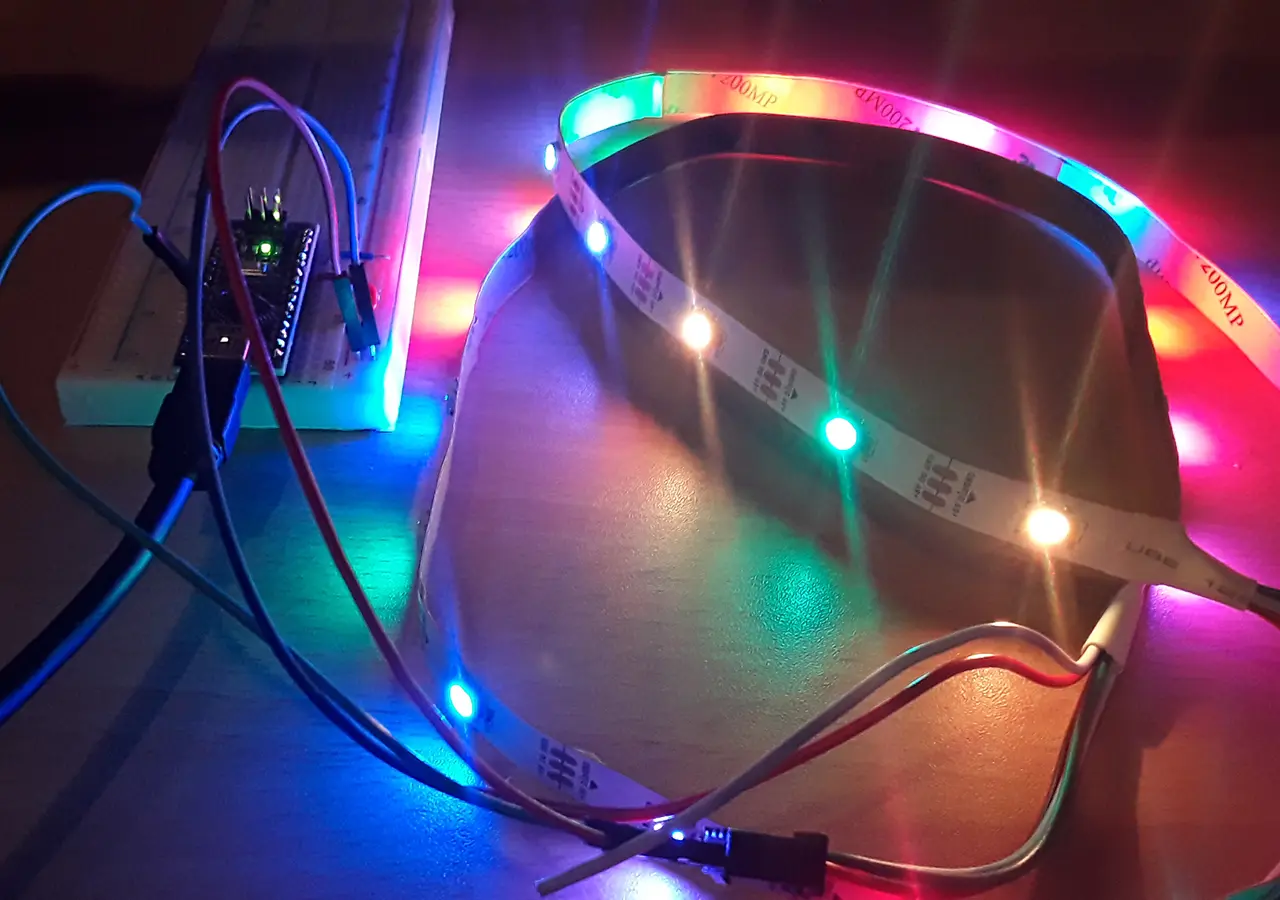
To connect the Arduino to the LED strip, link the strip’s data input pin to one of the Arduino’s digital pins. For power, connect the 5V and GND of the Arduino to the corresponding points on the LED strip.
Taking Control: Program LED lights
Now that the stage is set, it’s time to get programming.
Programming Tools and Their Installation
Arduino Software
Arduino’s integrated development environment (IDE) is the platform where you’ll write and upload your code. You can download it for free from the Arduino website.
FastLED 라이브러리
FastLED is an Arduino library specifically designed for LED strip programming. It simplifies the coding process and is compatible with a wide range of LED chipsets. You can install it directly from the Arduino IDE.
Chipset and Platform Support
Before coding, please make sure that the FastLED library supports your LED strip’s chipset.
Understanding the Basics of LED Strip Programming
Overview of C++ Code for strip light LED programming
With the Arduino software and FastLED library installed, you’ll write your code in C++, a popular programming language. How to program led lights with arduino? Here’s a simple program that sets up an LED strip with 60 LEDs on pin 6 and fills the strip with red color:
#define NUM_LEDS 60
#define DATA_PIN 6
CRGB leds[NUM_LEDS];
void setup() {
FastLED.addLeds(leds, NUM_LEDS);
}
void loop() {
fill_solid(leds, NUM_LEDS, CRGB::Red);
FastLED.show();
}
Diving Deep: Exploring the Code Line by Line
This program begins by including the FastLED library, which gives access to its powerful functions. Next, two constants are defined: NUM_LEDS 그리고 DATA_PIN, representing the number of LEDs and the pin number where the LED strip is connected, respectively.
Then, an array leds of type CRGB is created to store the color data for each LED. In the setup function, the FastLED.addLeds function is called to initialize the LED strip. The parameters specify the type of LED strip (NEOPIXEL in this case), the data pin number, and the LEDs array.
그리고 loop function, which runs continuously, first fills the array with a solid color (red, in this case) using the fill_solid function. Finally, the FastLED.show function updates the actual LED strip to match the array data.
Your First LED Strip Program: Making an LED Blink
Now that we’ve walked through a basic LED strip program, let’s create a more interactive one: making an LED blink.
Crafting the Code
Here’s a simple program that makes the first LED on the strip blink red:
#define NUM_LEDS 60
#define DATA_PIN 6
CRGB leds[NUM_LEDS];
void setup() {
FastLED.addLeds(leds, NUM_LEDS);
}
void loop() {
leds[0] = CRGB::Red; // turn the LED on
FastLED.show();
delay(500); // wait for half a second
leds[0] = CRGB::Black; // turn the LED off
FastLED.show();
delay(500); // wait for half a second
}
Uploading the Code to the Arduino Board
With the code written, it’s time to upload it to the Arduino. Connect your board to your computer via USB, then click the upload button (the right-facing arrow) in the Arduino IDE. Once uploaded, your first LED should start blinking red!
Celebrating Your First Success: Watching Your LED Blink
There you have it – your first interactive LED strip program! Take a moment to celebrate this achievement. You’ve now programmed an LED strip to blink – a simple but significant step towards more intricate lighting designs.
Going Beyond Basics: Advanced Programming Concepts
Now that we’ve got the basics down, let’s dive into some more advanced programming concepts.
Understanding RGB Values and Brightness Pulse-Width Modulation
Each LED in an RGB LED strip combines three smaller LEDs – one red, one green, and one blue. We can create virtually any color by varying the brightness of these three colors.
Brightness is controlled using a technique called Pulse-Width Modulation (PWM), which involves switching the LED on and off very quickly, with the percentage of time spent on versus off determining the brightness. For example, if an LED is on 50% of the time and off 50% of the time, it will appear half as bright as an LED on 100% of the time.
Making Multiple LEDs Blink
Making multiple LEDs blink involves setting the color of the desired LEDs to CRGB::Black 그리고 CRGB::Red in a cycle. For example, if you wanted to make the first ten LEDs blink, you would do something like this:
leds[i] = CRGB::Red; // turn the LEDs on
}
FastLED.show();
delay(500); // wait for half a second
for(int i = 0; i < 10; i++) {
leds[i] = CRGB::Black; // turn the LEDs off
}
FastLED.show();
delay(500); // wait for half a second
Creating Complex LED Patterns and Effects
With the FastLED library, creating complex LED patterns and effects is relatively simple. Here, we’ll provide examples of three different effects: a rainbow cycle, a chase effect, and a snowflake effect.
Rainbow Cycle
A rainbow cycle is an effect where the colors of the rainbow cycle through the LEDs. Here’s how you could do it:
static uint8_t hue = 0;
for(int i = 0; i < NUM_LEDS; i++) {
leds[i] = CHSV(hue++, 255, 255);
}
FastLED.show();
delay(20);
}
Chase Effect
A chase effect is where a single lit LED appears to “run” down the strip. Here’s how you could do it:
static int lead_dot = 0;
leds[lead_dot++] = CRGB::Black; // turn the previous LED off
leds[lead_dot] = CRGB::Red; // turn the next LED on
FastLED.show();
delay(100);
if(lead_dot >= NUM_LEDS) lead_dot = 0;
}
Snowflake Effect
A snowflake effect is where random LEDs turn on and off to mimic falling snow. Here’s how you can do it:
for(int i = 0; i < NUM_LEDS; i++) { if(random(10) > 5) {
leds[i] = CRGB::White;
} else {
leds[i] = CRGB::Black;
}
}
FastLED.show();
delay(100);
}
Advanced LED Strip Programming Concepts
As you delve deeper into the world of LED strip programming, a few more sophisticated concepts come into play. These include variables, arrays, and functions, which offer you greater control over your LED strips. Variables allow you to store and manipulate data like the brightness or color of an LED. Arrays, on the other hand, let you manage multiple LEDs at once, opening up possibilities for intricate light patterns. Lastly, functions provide reusable code snippets that perform specific tasks, such as rotating colors or creating animation effects.
Troubleshooting Your Journey: Common Issues and Their Solutions
Just like any journey, LED strip programming comes with its own set of challenges. Thankfully, most of these hurdles are common and can be quickly resolved.
Common Errors and Their Solutions
One common issue is inconsistent LED brightness, often due to inadequate power supply. To fix this, ensure your power source can handle the total current draw of your LEDs. Another typical problem is LED strips not lighting up, usually because of incorrect wiring or a damaged LED. In such cases, double-check your connections and replace any non-functioning LEDs.
Best Practices for Avoiding Errors
To mitigate errors, it’s essential to verify your wiring before powering up and to regularly check your code for errors. Also, always disconnect your setup from power when making modifications and use resistors to prevent LEDs from burning out.
Unleashing Full Potential: Next Steps in LED Strip Programming
As you grow more comfortable with the basics of LED strip programming, it’s time to explore more advanced opportunities and unleash the full potential of your setup.
LED Power Draw and USB Current Limit: Balancing Performance and Safety
Balancing performance and safety is key. You must always consider the power draw of your LED strip and the USB current limit of your Arduino board. If the LED power draw exceeds the board’s limit, it could overheat or even fail.
Gamma Correction: Fine-Tuning Your Lighting Experience
Gamma correction helps fine-tune your lighting experience by making colors appear more consistent to the human eye. It corrects the non-linear relationship between the light intensity and the electrical voltage driving the LEDs.
Exploring the Full Potential of LED Strip Lights
From creating mesmerizing light shows synced to music to integrating your LED strips into a smart home system for automated control, the possibilities are endless when you fully explore LED strip programming.
자주 묻는 질문
LED 스트립을 프로그래밍할 수 있나요?
물론이죠! 아두이노 우노 보드와 같은 컨트롤러를 사용하여 LED 스트립을 프로그래밍할 수 있습니다. 아두이노 소프트웨어(IDE)와 같은 코딩 도구와 FastLED 같은 라이브러리를 사용하면 LED를 깜박이고 색상을 변경하고 다양하고 멋진 조명 디스플레이를 만들 수 있습니다.
리모컨으로 LED 스트립 조명을 어떻게 프로그래밍하나요?
리모컨으로 LED 스트립 조명을 프로그래밍하려면 호환되는 리모컨이 필요합니다. 컨트롤러는 LED 스트립에 연결된 IR 수신기와 통신한 다음 미리 프로그래밍된 지침을 수행합니다. 그러나 이 가이드는 주로 Arduino 보드를 사용한 LED 스트립 프로그래밍에 중점을 두며 원격 프로그래밍에 대해서는 다루지 않습니다.
RGB LED는 어떻게 프로그래밍하나요?
RGB LED를 프로그래밍하려면 빨간색, 녹색, 파란색 다이오드의 밝기를 개별적으로 제어하여 원하는 색상을 만들어야 합니다. 이는 일반적으로 Arduino 또는 유사한 마이크로 컨트롤러와 함께 펄스 폭 변조 기술을 사용하고 FastLED와 같은 적절한 소프트웨어 라이브러리를 사용하여 수행됩니다.
프로그래밍 가능한 LED는 어떻게 제작하나요?
프로그래밍 가능한 LED를 만들려면 Arduino와 같은 마이크로 컨트롤러, 적절한 전원 공급 장치, 연결 전선, 그리고 물론 LED 자체를 사용해야 합니다. 이러한 구성 요소를 조립하고 연결한 후에는 Arduino IDE와 같은 소프트웨어 도구를 사용하여 LED의 동작을 제어하는 코드를 작성할 수 있습니다.
프로그래밍 가능한 LED 스트립에는 어떤 종류가 있나요?
프로그래밍 가능한 LED 스트립에는 여러 유형이 있습니다. 가장 일반적인 것은 RGB 및 RGBW 스트립입니다. RGB 스트립에는 빨간색, 녹색, 파란색 LED가 포함되어 있으며, RGBW 스트립에는 미묘한 조명 효과를 위해 흰색 LED가 추가로 포함되어 있습니다.
FastLED 라이브러리란 무엇인가요?
FastLED는 프로그래밍 가능한 LED를 위한 강력한 오픈 소스 라이브러리로, 다양한 LED 칩셋 지원과 사용 편의성으로 특히 인기가 높습니다. 색상 조작, 밝기 제어 및 기타 LED 조명 효과를 위한 방법을 제공합니다.
프로그래밍 가능한 LED 스트립 조명으로 무엇을 할 수 있나요?
프로그래밍 가능한 LED 스트립 조명의 가능성은 거의 무한합니다. 눈부신 조명 디스플레이, 복잡한 색상 패턴, 동적 조명 효과 등을 만들 수 있습니다. 무드 조명, 장식용 또는 가시성 및 안전과 같은 보다 실용적인 용도로도 사용할 수 있습니다.
여러 개의 LED를 동시에 제어할 수 있나요?
예, 여러 개의 LED를 동시에 제어할 수 있습니다. 코드에 루프를 사용하면 여러 LED의 색상이나 밝기를 동시에 쉽게 변경할 수 있어 복잡하고 복잡한 조명 패턴을 만들 수 있습니다.
LED 스트립을 프로그래밍할 때 흔히 발생하는 문제는 무엇인가요?
LED 스트립을 프로그래밍할 때 흔히 발생하는 문제로는 잘못된 배선, 전원 공급 부족, 코딩 오류 등이 있습니다. 그러나 이러한 문제의 대부분은 신중한 문제 해결과 모범 사례 준수를 통해 쉽게 해결할 수 있습니다.
기본 LED 스트립 프로그래밍을 배우고 나면 다음 단계는 무엇인가요?
기본을 익히고 나면 더 배울 것이 많습니다! 더 복잡한 프로그래밍 개념을 탐구하고, 더 복잡한 조명 효과를 만들고, LED를 다른 기술과 통합하여 인터랙티브 조명 디스플레이를 만들 수도 있습니다. 프로그래밍 가능한 LED에는 한계가 없습니다!
결론: LED 스트립 프로그래밍으로 세상을 밝히다
여정을 마무리하면서 LED 스트립 조명을 프로그래밍하면 평범한 공간을 활기차고 역동적인 환경으로 변화시켜 무한한 창의력을 발휘할 수 있는 길을 열 수 있다는 것을 알 수 있습니다.
프로그래밍 여정 돌아보기
이 여정을 되돌아보면, 여러분은 LED 스트립 조명의 기본을 배우고 프로그래밍 도구를 익혔으며 멋진 조명 효과를 만들기 시작했습니다. 도전에 직면하기도 했지만, 장애물을 넘을 때마다 회복력을 키우고 기술 역량을 넓혔습니다.
앞으로의 계획: 다음 단계는 무엇인가요?
트랙백 & 핑백
댓글을 남겨주세요
토론에 참여하고 싶으신가요?자유롭게 기여해 주세요!
답글 남기기

Tom은 현재 다음의 영업 관리자입니다. 유니탑(중국) 유한공사. 그는 LED 조명 업계에서 2005년부터 근무하고 있습니다. 그는 영업 및 마케팅, 공장 관리 분야의 전문가입니다. 보디빌딩을 좋아하고 애플의 열렬한 팬이기도 합니다! 그는 열심히 일하는 사람이며 새로운 것을 배우고 시도하는 것을 좋아합니다.
이메일: tom@unitopledstrip.com WhatsApp: +86-18680307140


안녕하세요, 세 가지 색상을 표시하는 작은 LED 조명을 만들고 싶습니다. 색상이 4초, 7초, 8초 동안 회전합니다. 이 회전은 버튼을 누른 시점부터 4회 진행됩니다.
이런 것을 만들 수 있을까요?
감사합니다,
시어 칼트만
이메일로 연락을 드렸습니다. 그때 다시 논의해 보겠습니다.