Are you trying to figure out how to keep your LED strip lights glowing? Whether you’re questioning whether they need constant plugging or periodic charging, rest assured you’ve come to the right place. Let’s illuminate the facts about LED strip lights, dispelling myths and shedding light on the best ways to power them for optimal performance.
LED strip lights are powered directly from mains electricity or alternative sources like batteries and solar panels, eliminating the need for charging. They provide continuous illumination without the hassle of frequent recharging.
Continue exploring with us as we unpack various power solutions for LED strip lights, from straightforward plug-ins to innovative battery and solar options. Discover how to enhance the efficiency and aesthetics of your lighting setup, ensuring your spaces shine brilliantly. Whether it’s adding a cozy ambiance to your living room or a vibrant flair to your business, mastering these insights will transform your approach to lighting.
Understanding Power Requirements for LED Strip Lights
LED strip lights are an increasingly popular choice for home and commercial lighting due to their efficiency and versatility. Unlike many modern gadgets that require frequent charging, LED strip lights are designed for continuous operation through a direct power connection. This eliminates the need for charging but raises important considerations about how they are powered to ensure optimal performance and safety.
Power Adapters and Converters
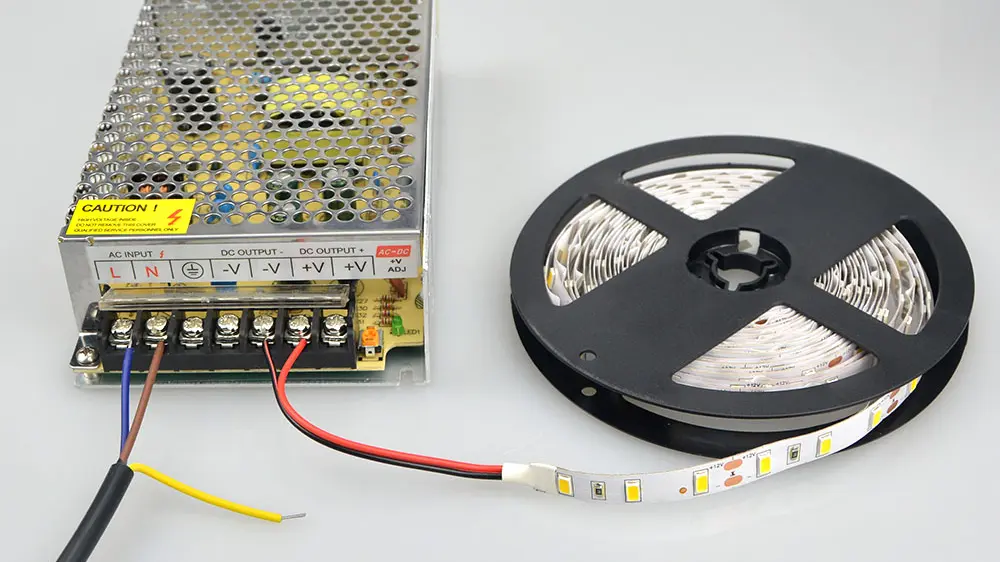
Most LED strip lights operate on low voltage, typically 12V or 24V DC, which makes the role of power adapters and converters crucial. These devices convert high-voltage AC from your mains electricity supply to a safer low-voltage DC output that LED strips can handle.
Choosing the Right Adapter:
Compatibility: It’s essential to match the power adapter’s output voltage exactly with your LED strip’s requirements. An incompatible adapter can cause inefficient lighting, potential damage, or hazards.
Capacity: The power adapter must also support the total wattage demanded by your strip lights. A good practice is to select an adapter that offers a wattage capacity 20% above what your setup requires, providing a buffer to handle occasional peaks in demand without overheating.
Voltage and Current Requirements
Correctly understanding and managing your LED strips’ voltage and current needs will help maintain their brightness and longevity.
Key Factors to Consider:
Voltage Drop: In longer runs of LED strips, the voltage can decrease as the distance from the power source increases, which might result in dimming lights towards the end of the strip. To prevent this, consider using a higher voltage setup or installing multiple power feeds along the length of the strip.
Amperage: The amperage or current draw should be, at most, what your wiring and power source can safely supply. Overdrawing current can lead to overheating and potential fire risks, especially in larger, more complex installations.
Safety First
When installing and operating LED strip lights, prioritizing safety is paramount. Here’s how to ensure a safe setup:
Dedicated Circuits: Connect your LED strips to a dedicated electrical circuit whenever possible to avoid overloading your home or building’s electrical system.
Proper Insulation: All connections and wiring should be properly insulated to prevent any chance of short circuits. This is particularly crucial in environments where moisture or physical damage to wiring might occur.
Certifications: Always opt for LED strips and associated hardware that have passed rigorous safety standards and carry the appropriate certifications. This is your assurance that the products are safe for long-term use.
Installation Best Practices for LED Strip Lights
Ensuring a flawless setup of LED strip lights not only enhances the aesthetic appeal of your space but also contributes to the longevity and functionality of the lights. Below are detailed guidelines to achieve professional-grade installation results, specifically addressing the needs of those wondering about the power needs and whether these lights need charging.
Installation Guidelines: A Step-by-Step Approach
The process of installing LED strip lights, while straightforward, requires attention to detail to ensure the best outcomes. Here’s how to approach the installation to ensure your lights perform optimally without frequent charging.
Preparation:
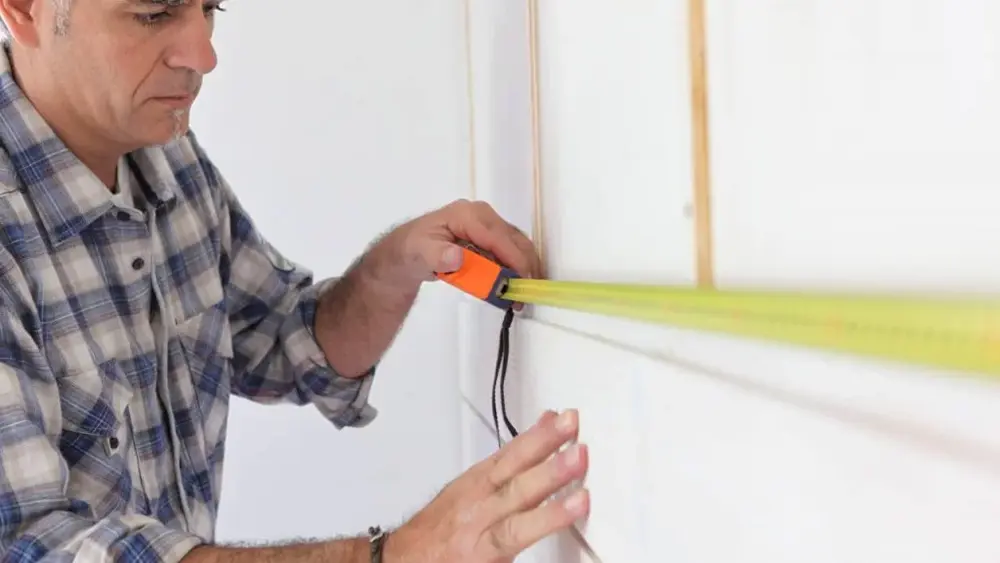
Measure Accurately: Before purchasing, measure the length of the area where you intend to install the lights. Consider any corners or cuts you must make, as LED strips typically can only be cut at designated points.
Gather Materials: Ensure you have all the necessary materials before starting. This includes the LED strip lights, power supply, connectors, mounting clips, and specific tools the manufacturer recommends.
Installation Process:
Surface Preparation: Clean the surface where the strips will be mounted. LED strips adhere best to clean, dry, and smooth surfaces. Use a mild cleaning solution to remove dust and grease and allow the surface to dry completely.
Test Before Installation: Connect the LED strips to the power supply and test all segments to ensure they work properly before final installation. This step helps identify any defective sections or connection issues.
Secure Installation: Peel the adhesive backing and stick the LED strip carefully along the desired path. Press firmly along the strip to ensure strong adhesion. For added security, especially in areas of movement or humidity, consider using mounting clips to secure the strips.
Choosing Installation Sites: Tips for Selecting the Best Locations and Surfaces
The choice of installation sites significantly affects the impact and efficiency of LED strip lights. Here’s how to select the best locations:
Under Cabinet Lighting: For kitchen applications, installing LED strips under cabinets provides excellent task lighting. Ensure the strip is hidden from direct sight for a seamless look.
Accent Lighting: Use LED strips to highlight architectural features or artwork. Install them in recessed coves or behind objects to create a backlight or halo effect.
Outdoor Lighting: When installing LED strips outdoors, choose products rated for outdoor use. Ensure they have appropriate IP ratings to withstand moisture and dust.
Power Supply Management: How to Maintain a Stable Power Supply and Avoid Common Errors
Effective power supply management is crucial for preventing voltage drops and ensuring consistent brightness, especially since LED strip lights are not charged but powered continuously.
Calculate Total Load: Determine the total wattage your LED strip installation will require and ensure your power supply can handle this load. Consider splitting the load between multiple power supplies for extensive installations.
Avoid Daisy Chaining: Instead of connecting multiple strips end-to-end, connect them back to a central power source. This configuration helps maintain consistent voltage and brightness across all strips.
Check Connections: Regularly inspect all connectors and junctions for loose connections, which can lead to voltage drops and flickering lights. Ensure all connections are tight and secure using appropriate connectors and soldering where necessary.
Troubleshooting Common Power Issues with LED Strip Lights
Even with meticulous installation, you might encounter some issues that affect the performance of your LED strip lights. Understanding how to troubleshoot these common problems ensures your LED installations maintain luminosity and functionality over time.
Flickering Lights: Steps to Diagnose and Fix Flickering Issues in Your LED Strip Lights
Flickering in LED strip lights can be more than just annoying—it may also reduce the lifespan of the LEDs. Here’s a detailed approach to effectively address this common issue:
Check the Power Supply: Often, a flickering issue arises from an insufficient or unstable power supply. Verify that the power supply’s wattage meets or exceeds the total wattage your LED strip lights need. If you find the supply lacking, upgrading to a higher-wattage power supply might be necessary.
Inspect Connections: Another frequent cause of flickering is loose or poor connections. Examine all connections between your LED strip segments and at the power source and controller. Tighten any loose connections and replace worn-out connectors to ensure optimal performance.
Dimmer Compatibility: If your setup includes a dimmer, ensure it is compatible with LED technology. Many dimmers designed for incandescent bulbs do not perform well with LEDs, leading to flickering. Upgrading to an LED-compatible dimmer often resolves this issue effectively.
Secure Connections: How to Ensure All Connections Are Secure and Functional
Secure and reliable connections are fundamental for the smooth operation of your LED strip lights. Here are key strategies to ensure connection integrity:
Use High-Quality Connectors: Always opt for high-quality, reliable connectors that snugly fit your LED strips. Poor-quality connectors may loosen over time and lead to operational issues.
Soldering for a Permanent Solution: Consider soldering the connections in setups where the configuration is permanent or unlikely to need adjustments. This method provides a more stable and durable connection than clip-on connectors. It is recommended for areas exposed to movement or environmental variables.
Regular Maintenance Checks: Routine checks are crucial, especially in setups exposed to vibrations or frequent handling. Periodically inspect all connections as part of your maintenance routine to avoid unexpected failures or issues.
Voltage Drops: Managing These Drops to Prevent Loss of Brightness in Longer Installations
Voltage drops in LED strip installations can lead to uneven lighting, with noticeable dimming at the end of the strip. Here are some strategies to manage this issue effectively:
Use a Higher Voltage: Consider using 24V LED strips instead of the more common 12V. Higher voltage strips are better equipped to handle long distances without significant voltage drops.
Multiple Power Feeds: Instead of running a single long strip, divide your installation into shorter segments. Power each segment independently from both ends or a central point to ensure an even power distribution and minimize voltage drops.
Thicker Wiring: Employ thicker gauge wires for your connections, particularly over longer distances. Thicker wires offer lower resistance, which helps in maintaining consistent voltage levels across the installation.
Enhancing the Lifespan and Efficiency of LED Strip Lights
Maximizing the lifespan and efficiency of LED strip lights hinges on effective maintenance and selecting quality components. By implementing key best practices, you can ensure your LED installations are more energy-efficient and last longer.
Energy-Efficiency: Best Practices
Effective energy management is crucial for LED strip lights to ensure they are both cost-effective and environmentally friendly:
High-Efficacy LEDs: Opt for LEDs with higher luminous efficacy, which provide more brightness for less power, making them energy-efficient. This choice helps reduce electricity consumption while maintaining optimal light output.
PWM Dimming: To dim your LED strips, implement pulse-width modulation (PWM). This technology allows you to adjust the brightness of your lights without significantly decreasing energy efficiency. PWM dimming reduces power usage when full brightness is not necessary and extends the life of the LEDs by reducing thermal stress.
Efficient Power Supplies: Select power supplies that match your LED strip setup’s voltage and current requirements. A power supply with a higher efficiency rating not only conserves energy but also decreases the heat generated during operation, which can enhance the overall lifespan of the LED strips.
Routine Maintenance
Maintaining your LED strips ensures they continue to operate at peak efficiency and prevents premature failure:
Regular Cleaning: Dust and residue can accumulate on the surface of LED strips, impeding light output and increasing the likelihood of overheating. Regularly cleaning your LED strips with a soft, dry cloth can prevent this buildup and maintain the brightness and efficiency of the lights.
Monitor Heat Levels: LEDs are susceptible to damage from excessive heat. Periodically check your LED installations to ensure they are not overheating. Enhancing ventilation around the strips or incorporating heat sinks can help dissipate heat more effectively, thus preserving the integrity of the LEDs.
Inspect Wiring: Wiring can become frayed or exposed over time, posing a risk of short circuits and other electrical issues. Regular inspections allow you to identify and address any wiring issues before they lead to more serious problems. Repair or replace damaged wiring promptly to maintain both the safety and functionality of your LED lighting.
Selecting Quality Products
Investing in high-quality LED products is essential for long-term satisfaction and performance:
Research and Reviews: Before purchasing, research various LED brands and products. Look for items that have garnered positive reviews for reliability and performance. Reputable brands often deliver on their promises of quality and durability.
Technical Specifications: Consider technical aspects like the Color Rendering Index (CRI), color temperature, and IP ratings when selecting LED strips. A higher CRI offers better color accuracy, crucial for applications where natural color reproduction is essential. Appropriate color temperature and IP ratings ensure the LEDs perform well in their intended environment.
Warranty and Support: Always choose products with robust warranties and reliable customer support. These elements indicate a manufacturer’s confidence in their products and commitment to customer satisfaction.
Exploring Power Alternatives and Innovations for LED Strip Lights
The landscape of LED lighting is rapidly evolving, offering improvements in lighting applications and how these systems are powered. Innovations in power sources for LED strip lights make these systems more flexible, environmentally friendly, and adaptable to users’ changing needs.
Alternative Power Options: From Batteries to Solar Power—Options That Keep Your Lights Running Without Traditional Power Sources
Traditional LED strip lights typically rely on a direct connection to household electricity. However, alternative power sources are broadening their deployment and use possibilities, enhancing their appeal for both mobile and stationary applications.
Battery-Powered LED Strips:
Mobility and Flexibility: Battery-powered LED strips offer significant advantages for installations in locations without easy access to power outlets. They are handy for temporary setups at events, outdoor spaces, or vehicles, providing considerable flexibility in how and where LED lighting can be utilized.
Types of Batteries: The choice of battery is critical and can vary greatly depending on the required longevity and the intensity of the lighting needed. Options range from standard AA batteries, suitable for small, short-term lighting, to advanced lithium-ion packs capable of sustaining longer and more robust use. Each type of battery offers its own set of cost, energy density, and rechargeability advantages, allowing users to tailor their lighting solutions to specific project requirements.
Solar-Powered LED Strips:
Eco-Friendly Lighting: As sustainability becomes a higher priority globally, solar-powered LED strips are increasingly popular for outdoor lighting. These systems harness solar energy during the day to power the lights after dark, significantly reducing the carbon footprint associated with traditional energy sources.
Installation Considerations: Successful implementation of solar-powered LED strips requires careful planning. The system typically involves a solar panel, a charge controller, a battery, and LED strips. Correct placement of the solar panel is crucial, as optimal sunlight exposure is necessary to charge the battery effectively throughout the day.
Smart Technology: How Advancements in Technology Can Lead to Smarter and More Efficient Lighting Solutions
Integrating smart technologies transforms LED strip lighting by making these systems more responsive and easier to control.
Connectivity and Control:
Wireless Controls: With advancements such as Bluetooth and Wi-Fi, LED strips can now be remotely controlled using smartphones or voice assistants. This technology allows for adjustments in lighting without physical interaction, providing both convenience and a higher level of customization.
Integration with Home Automation Systems: LED strips can also be integrated into comprehensive home automation systems, allowing for sophisticated scenarios where lighting adjusts automatically based on time of day or detected activity within a space.
Enhanced Customization:
Adjustable Settings: Modern LED controllers offer the ability to dim and adjust the color temperature and hue of the lights. This capability enables users to set the mood of a room with precision, adapting the lighting to different activities or times of day.
Programming and Scheduling: These smart LED strips can be programmed to display specific patterns or to change according to a schedule. This feature is handy in commercial settings where lighting serves a functional and aesthetic purpose, contributing to branding and customer experience.
Connecting LED Strip Lights to Various Power Sources
Understanding the different power source options for LED strip lights is essential for ensuring their functionality and safety. Whether you’re illuminating a home project or a commercial space, properly connecting these lights to the most suitable power source will enhance their efficiency and durability.
Power Source Options: Choosing the Right Option for Your Needs
LED strip lights are celebrated for their versatility, partly due to the variety of power sources they can utilize. Selecting the right power option is crucial for the specific needs of your installation:
Wall Sockets (Standard AC Power): This is the most straightforward method, where the LED strip comes with a power adapter that plugs directly into household AC outlets. It’s particularly reliable for indoor settings where outlets are readily accessible.
USB Power:
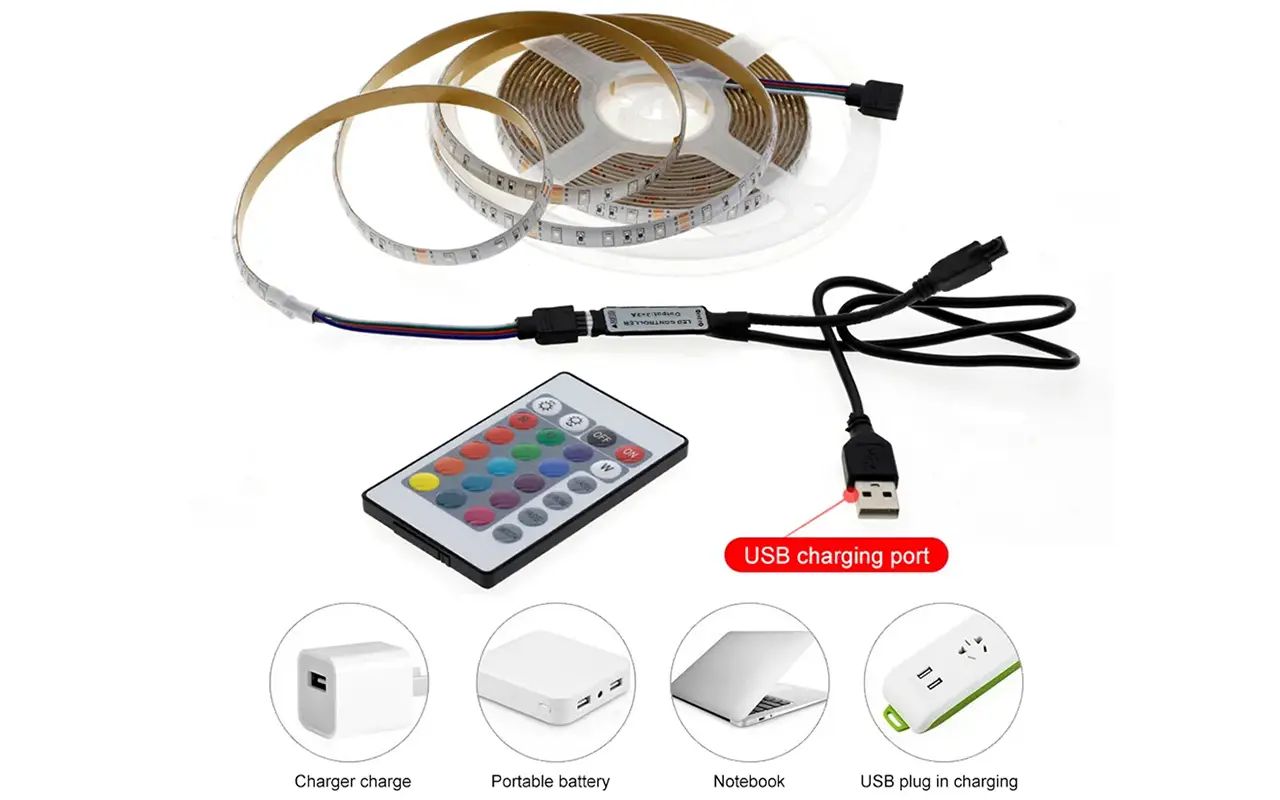
Portability: Ideal for smaller, portable projects or temporary setups, USB-powered LED strips can be connected to any device with a USB port, such as computers, power banks, or wall adapters.
Power Limitations: It’s important to note that USB ports usually offer lower power output, which can restrict the length and brightness of the LED strips compared to those powered by standard wall adapters.
Battery Power:
Mobility: Offering the greatest mobility, battery-powered LED strips are perfect for installations in areas without nearby power outlets, including outdoor settings or mobile installations.
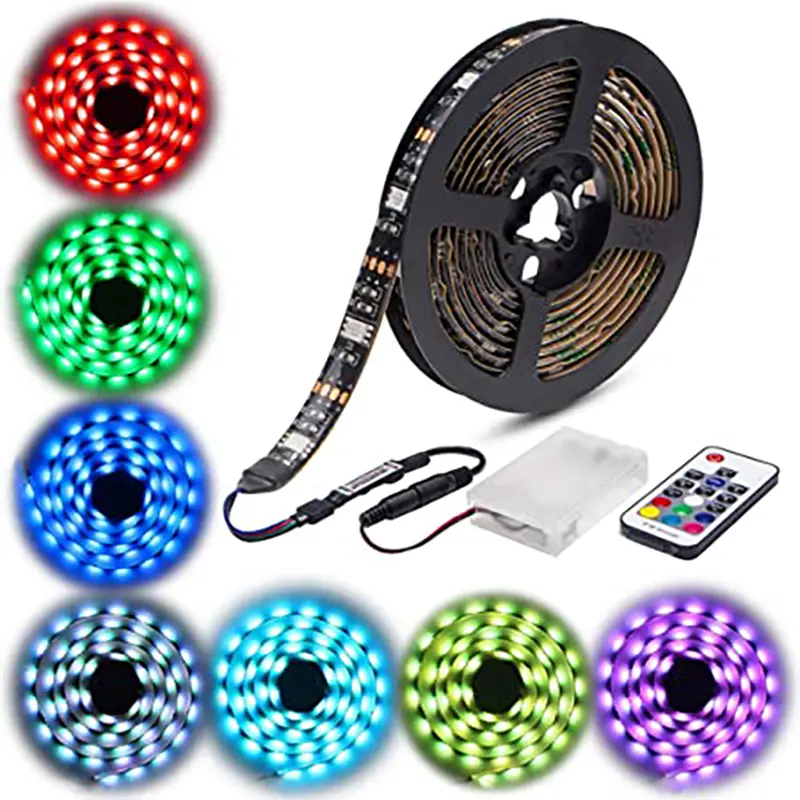
Battery Types: The choice of batteries can range from standard disposable batteries for short-term or less frequent use to rechargeable battery packs for longer or more permanent setups, depending on the required longevity and brightness.
Connection Steps: Practical Steps to Connect Your LED Strip Lights Safely and Effectively
Proper connection practices must be followed:
Preparing the Strips: Check that your LED strip has pre-applied adhesive and is compatible with the chosen power source regarding voltage and connection type.
Making the Connections:
Direct Connection: Use the included adapter or controller for wall sockets and USB-powered strips, ensuring all connections are tight to avoid loose contact.
Battery Connections: When using battery power, connect your LED strip to the appropriate battery pack, ensuring polarity (positive and negative) is correctly aligned.
Testing Before Installation: Before permanently mounting the strips, connect and test all components to ensure everything lights up correctly and there are no flickering sections.
Safety Precautions: Important Measures to Ensure Safe Installation and Operation
Safety is paramount when installing and operating LED strip lights. Here are key precautions to ensure a safe setup:
Inspect for Damage: Carefully check all components for any damage before installation. Using damaged parts can lead to electrical shorts or fire hazards.
Prevent Overloading: Ensure that the total power demand does not exceed the capacity of your wiring and power source to avoid risks of overheating and potential fire.
Proper Insulation: Use heat-shrink tubing or electrical tape to securely insulate all exposed wires and connections, safeguarding against short circuits and other electrical risks.
Solar and Wireless LED Strip Lights: A Sustainable Choice
Adopting solar and wireless technologies for LED strip lights reflects a move towards more sustainable and convenient lighting solutions:
Solar-Powered LED Strips: These are excellent for outdoor use, where the strips are powered by solar panels during the day and light up at night. Ensure the solar panel is positioned for optimal sunlight exposure and is kept clean for maximum efficiency.
Wireless LED Strips: Wireless LED strips can be powered by batteries or USB and managed via remote control or smartphone apps, making them ideal for areas where traditional wiring is impractical or undesirable.
자주 묻는 질문
What are the best power sources for LED strip lights?
LED strip lights are versatile as a power source. They can be connected to wall sockets using a standard power adapter, powered through USB ports for smaller setups, or even run on battery packs for portable applications. Solar power can also be utilized to create eco-friendly outdoor lighting solutions.
Can I use a USB power bank to run my LED strip lights?
USB power banks can power LED strip lights, making them a fantastic option for mobile lighting solutions or temporary installations. However, ensuring the power bank can deliver sufficient amperage to handle the length and type of LED strip you use to maintain brightness and functionality is important.
How do I prevent my LED strip lights from flickering?
First, ensure your LED strip lights are connected to a stable power source that provides consistent voltage and current to prevent flickering. Check all connections for tightness and corrosion, and consider using a power supply with a higher wattage rating than the total wattage of your LED strips. If using dimmers, make sure they are compatible with LEDs.
What safety precautions should I take when installing LED strip lights?
Safety is paramount when installing LED strip lights. Always ensure the power source matches the LED’s voltage requirements, avoid overloading circuits, and use a power supply with the correct output. Additionally, ensure all connections are secure and insulated to prevent short circuits. Consider using water-resistant LED strips with appropriate IP ratings for installations in damp areas.
Are solar-powered LED strip lights a good option for outdoor lighting?
Absolutely! Solar-powered LED strip lights are excellent for outdoor settings as they are environmentally friendly and reduce energy consumption. These systems include solar panels that charge during the day and power the lights at night. Just ensure the solar panels are positioned to receive maximum sunlight, and the system includes a battery with adequate capacity to meet your lighting needs.
Conclusion: Empowering Your Lighting Experience
We wrap up with key insights to empower you to optimize the functionality and ambiance of your space with LED strip lights. Make informed decisions, enjoy sustainable solutions, and embrace the future of lighting with confidence.
As we explore the dynamic world of LED strip lighting, we must partner with a trusted manufacturer at the forefront of innovation and quality. 유니탑, one of China’s leading manufacturers of LED 스트립 조명 그리고 LED 네온 플렉스, is committed to delivering cutting-edge lighting solutions that meet the highest standards of excellence. Unitop’s expert team is ready to provide tailored support and guidance if you have further questions or specific lighting requirements. Don’t hesitate to 연락하기 and experience the professional service and superior products that make Unitop a standout in the LED industry. Contact us today to illuminate your space with confidence and creativity.
관련 문서

Tom은 현재 다음의 영업 관리자입니다. 유니탑(중국) 유한공사. 그는 LED 조명 업계에서 2005년부터 근무하고 있습니다. 그는 영업 및 마케팅, 공장 관리 분야의 전문가입니다. 보디빌딩을 좋아하고 애플의 열렬한 팬이기도 합니다! 그는 열심히 일하는 사람이며 새로운 것을 배우고 시도하는 것을 좋아합니다.
이메일: tom@unitopledstrip.com WhatsApp: +86-18680307140



댓글을 남겨주세요
토론에 참여하고 싶으신가요?자유롭게 기여해 주세요!