Are you confused about whether LED strips require resistors? Get ready to illuminate your understanding as we delve into LED technology’s and circuitry’s intricacies.
LED strips typically require resistors to regulate current flow and prevent LED damage. Understanding when and how to use resistors is crucial for ensuring the longevity and efficiency of your LED strip installations.
Keep reading to uncover the essential details about LED strips and resistors that will empower you to make informed decisions for your lighting projects.
Which LEDs Require Resistors?
Understanding the intricacies of LED technology is crucial for ensuring optimal performance and longevity in lighting applications. While all LEDs require some form of current limitation, distinguishing between those with built-in resistors and those that require external components is essential. Let’s explore how to identify which LEDs need resistors and which ones don’t.
LEDs with Built-in Resistors
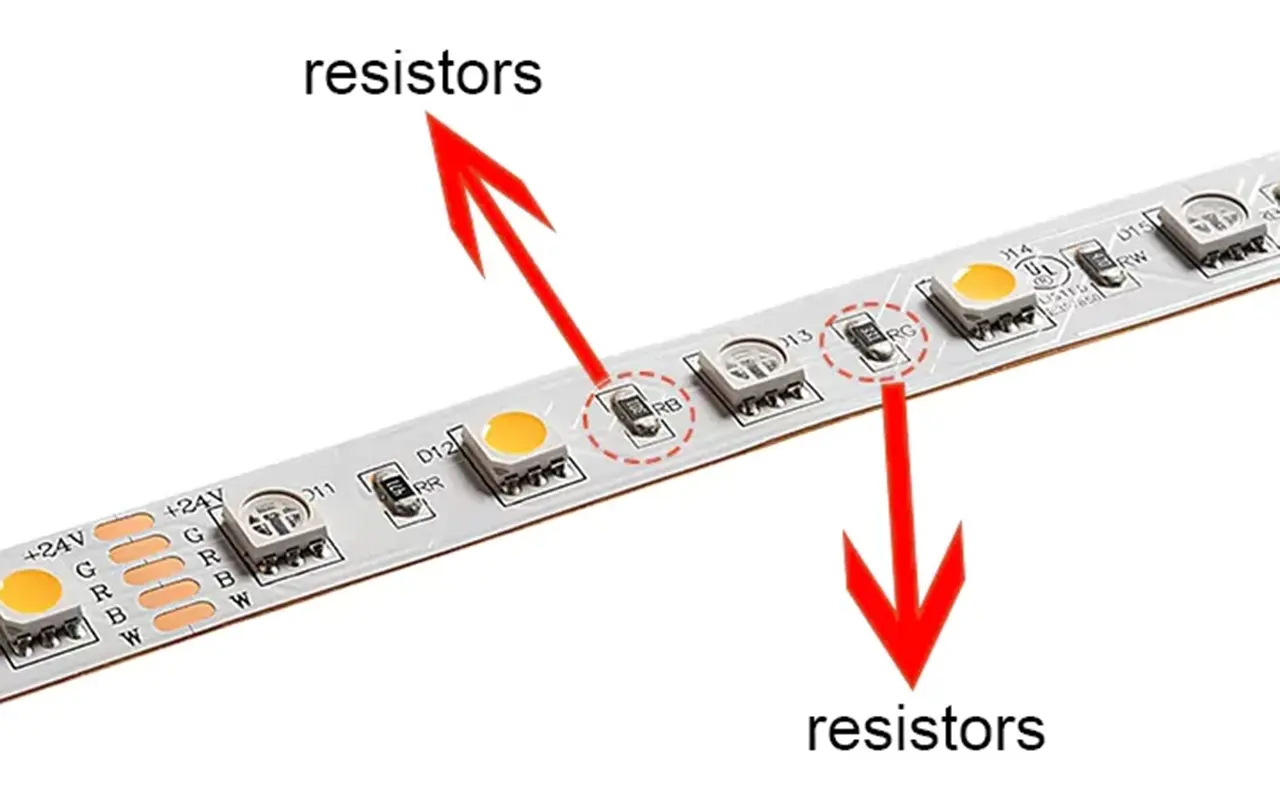
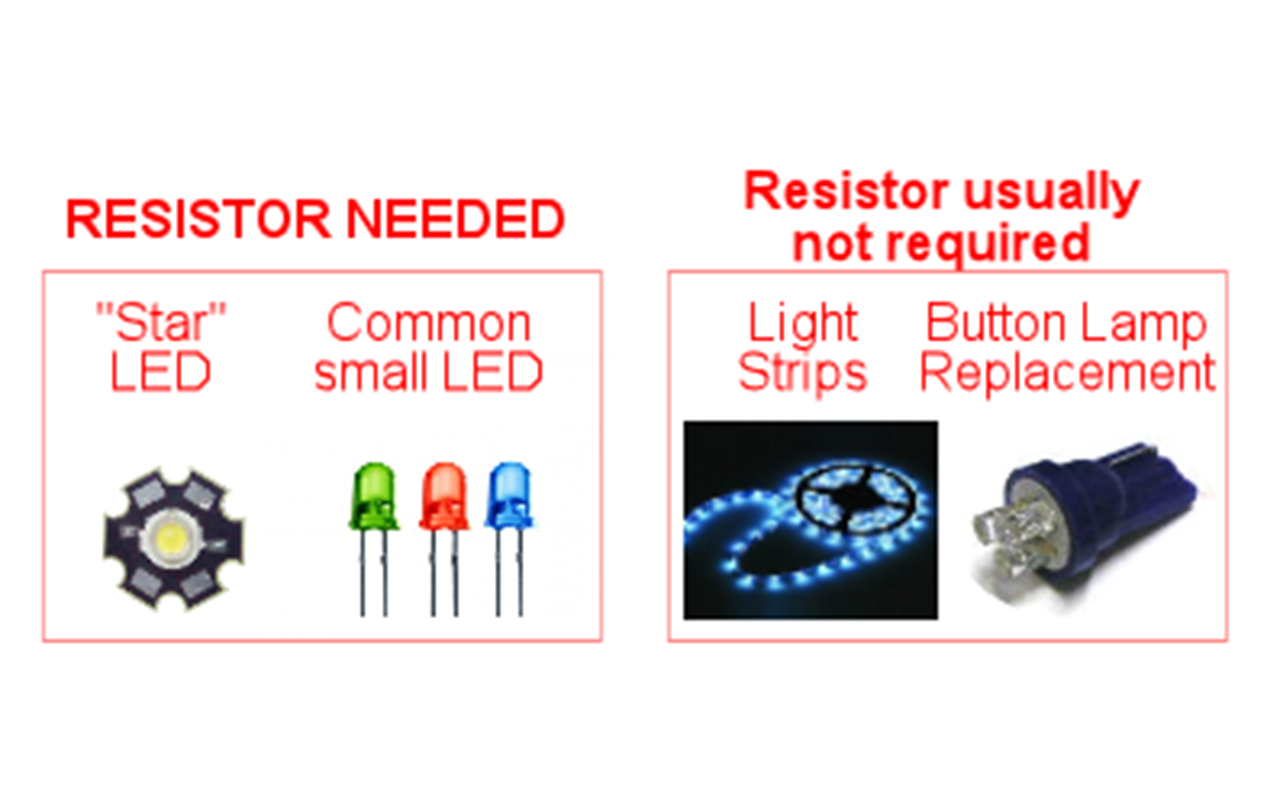
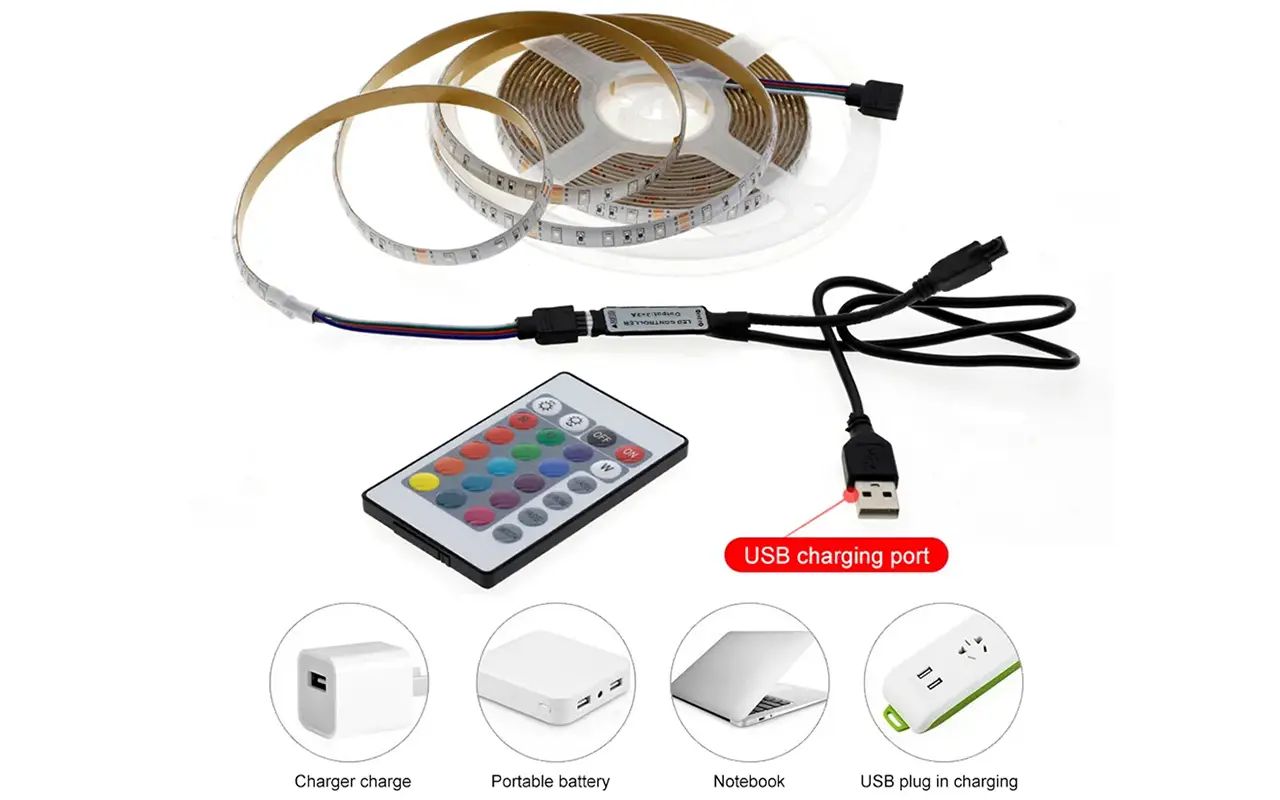
Certain LEDs, particularly those incorporated into finished products or light strips, come equipped with built-in resistors. These LEDs are designed to operate safely and efficiently without the need for additional external components. When purchasing LEDs as part of a complete product or light strip, you can generally rely on the manufacturer to have integrated any necessary resistors, simplifying the installation process.
LEDs Requiring External Resistors
On the other hand, LEDs purchased as individual components often require external resistors for proper current regulation. This includes “star” LEDs, common small LEDs, and certain specialty LED replacement bulbs. When using these LEDs in standalone applications, it’s essential to incorporate external resistors into the circuit to prevent overcurrent conditions and ensure stable operation.
Exceptions and Special Cases
While the general rule is that LEDs purchased as standalone components require external resistors, there are exceptions to this guideline. For example, LEDs used with specific output ports on the Pinscape main expansion board, known as “Small LED” ports, feature built-in current limitations and do not necessitate external resistors. However, it’s essential to note that this exception applies exclusively to the “Small LED” ports and does not extend to other output ports.
In summary, understanding the resistor requirements of LEDs is critical for designing effective lighting solutions. By identifying whether LEDs come equipped with built-in resistors or require external components, you can ensure the safe and efficient operation of your lighting installations. Whether you’re working with finished products or standalone components, taking the time to assess resistor needs will help you achieve optimal performance and longevity in your LED applications.
Wiring Resistors with LED Strips
When it comes to integrating resistors into LED strip circuits, attention to wiring detail is paramount. Proper placement and connection of resistors not only ensure optimal performance but also enhance the safety of your lighting installations. Let’s delve into the process of seamlessly wiring resistors with LED strips to achieve the desired results.
Understanding Resistor Placement
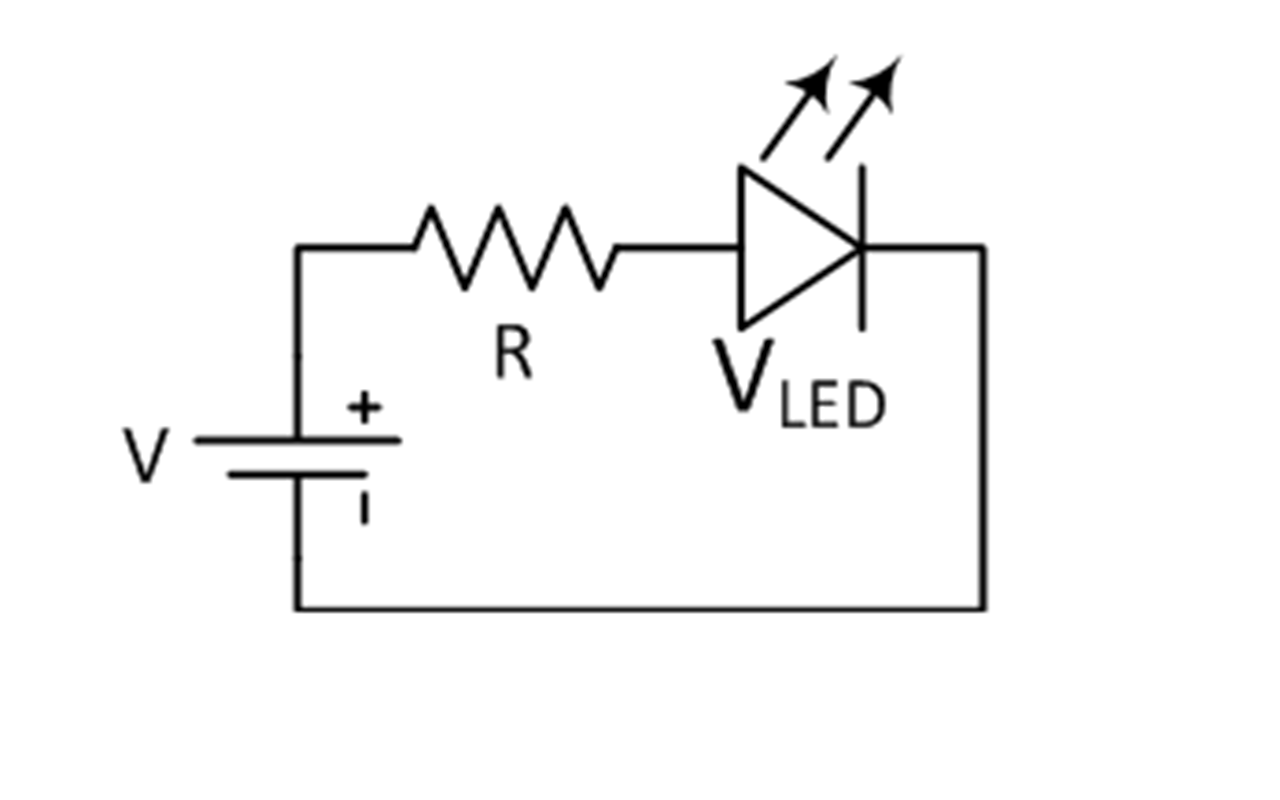
Resistors are typically placed in series with LED strips to regulate the flow of current. This series configuration ensures that the LEDs receive the appropriate voltage and current, preventing overloading and potential damage. When determining where to position resistors within your LED strip circuits, consider factors such as the length of the strip, the voltage requirements of the LEDs, and the overall design of the lighting setup.
Ensuring Secure Connections
Proper wiring connections are critical for the effective operation of LED strip circuits. When incorporating resistors, it’s essential to ensure secure and stable connections between the components. Use high-quality wiring materials and connectors to minimize the risk of loose connections or electrical faults. Additionally, consider securing the wiring and components in place using adhesive or mounting hardware to prevent movement or damage during use.
Maximizing Efficiency and Longevity
By meticulously wiring resistors with LED strips, you can maximize the efficiency and longevity of your lighting installations. A well-designed and properly wired circuit ensures consistent performance and minimizes the risk of premature component failure. Take the time to carefully plan and execute the wiring layout, paying close attention to detail to optimize the overall performance and safety of your LED lighting setup.
Expert Tips for Wiring Success
Utilize wire strippers to ensure clean and precise cuts when preparing the wiring for connection.
Double-check the polarity of the connections to ensure that the positive and negative terminals are correctly aligned.
Test the circuit thoroughly before final installation to identify any potential issues or wiring errors.
Consider consulting with a professional electrician or lighting specialist for complex wiring setups or installations requiring precise calculations.
Properly wiring resistors with LED strips is essential for achieving optimal performance and safety in lighting applications. By understanding resistor placement, ensuring secure connections, and following expert tips for wiring success, you can create reliable and efficient LED lighting installations that enhance the ambiance and functionality of any space.
Choosing the Right Power Supply
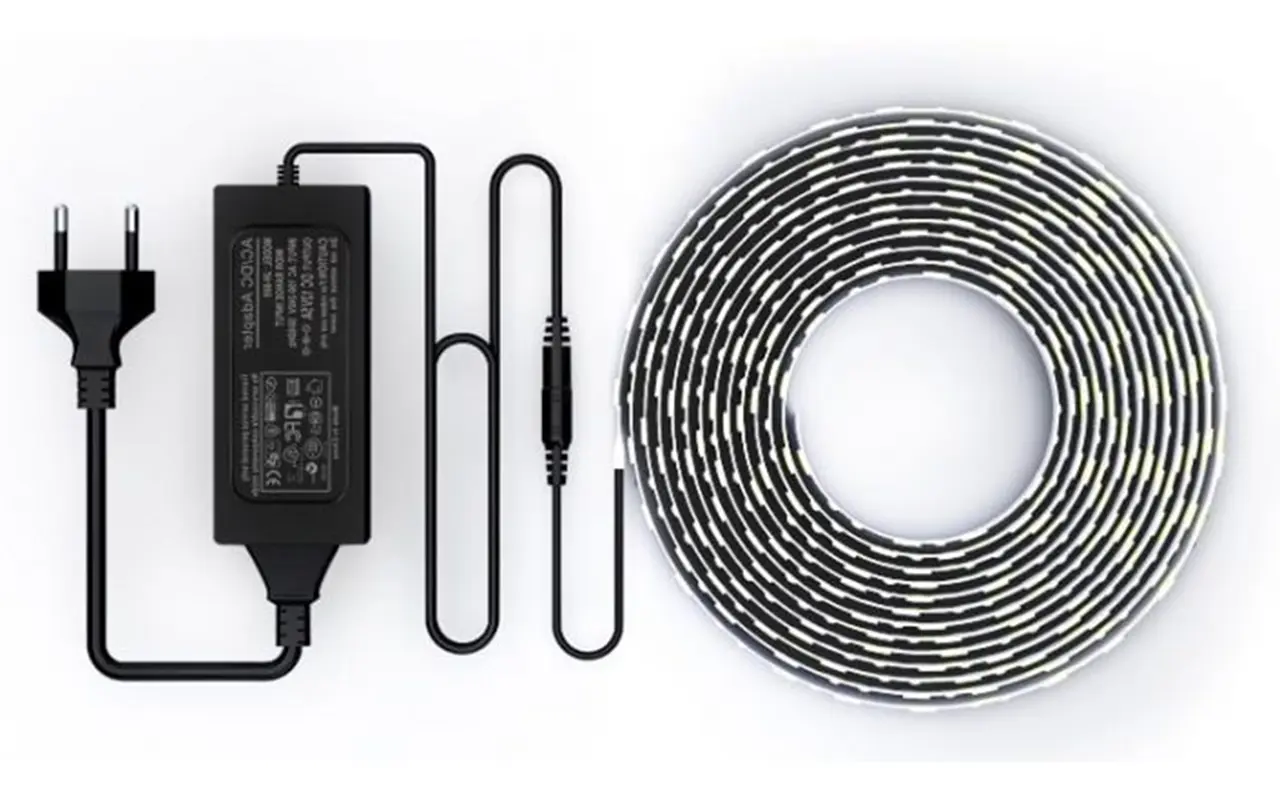
Selecting the appropriate power supply for your LED strips is a critical aspect of any lighting project. The power supply serves as the backbone of your LED system, providing the necessary voltage and current to ensure optimal performance and longevity. Here’s a detailed guide on how to choose the right power supply to avoid voltage mismatches and optimize energy efficiency.
Understanding Voltage and Current Requirements
Before selecting a power supply, it’s essential to understand the voltage and current requirements of your LED strips. LED strips typically operate at specific voltage levels, such as 12V or 24V, and have a defined current rating, measured in amps (A) or milliamps (mA). Ensure that the power supply voltage matches the voltage requirements of your LED strips to prevent overloading and potential damage.
Matching Power Supply Voltage
Matching the voltage of the power supply to the voltage requirements of the LED strips is crucial for proper operation. Using a power supply with a voltage that is too high can lead to overloading and premature failure of the LEDs, while a voltage that is too low may result in insufficient brightness or erratic behavior. Refer to the manufacturer’s specifications or datasheets to determine the voltage requirements of your LED strips accurately.
Vermogensvereisten berekenen
Once you know the voltage and current requirements of your LED strips, you can calculate the power requirements using the formula P = V × I, where P is power (in watts), V is voltage (in volts), and I is current (in amps). This calculation helps ensure that the power supply can deliver enough power to meet the demands of your LED strips without exceeding its capacity.
Considerations for Current Limiting
In addition to matching the voltage, it’s essential to consider the current-limiting capabilities of the power supply. LED strips require a stable and consistent current supply to maintain uniform brightness and prevent fluctuations. Choosing a power supply with built-in current regulation or using external current-limiting resistors can help ensure stable performance and extend the lifespan of your LED strips.
Optimize Energy Efficiency
Selecting an energy-efficient power supply can help minimize electricity consumption and reduce operating costs. Look for power supplies with high-efficiency ratings, such as those certified by organizations like ENERGY STAR. These power supplies convert electrical energy into light more efficiently, resulting in less waste heat and lower energy bills over time.
Choosing the right power supply is essential for the success of your LED lighting project. By matching the voltage and current requirements of your LED strips, calculating power requirements accurately, and considering factors such as current limiting and energy efficiency, you can ensure optimal performance, longevity, and energy savings for your LED installations.
Calculating Resistor Values
Unlocking the mystery of resistor selection is crucial for optimizing your LED strip projects. By understanding how to calculate the right resistor values, you can ensure proper current regulation and protect your LEDs from potential damage. Let’s dive into the step-by-step process of calculating resistor values, empowering you to customize your lighting setups with confidence.
Understanding Ohm’s Law
Ohm’s Law, named after the German physicist Georg Simon Ohm, relates the voltage, current, and resistance in an electrical circuit. The formula, V = IR, states that the voltage (V) across a conductor is equal to the current (I) flowing through it multiplied by the resistance (R) of the conductor.
Determining LED Forward Voltage
Before calculating resistor values, it’s essential to determine the forward voltage of your LEDs. The forward voltage is the voltage required to illuminate the LED and can vary depending on the type and specifications of the LED. Consult the datasheet or manufacturer specifications to obtain this information accurately.
Selecting Desired LED Current
Next, decide on the desired current for your LEDs. The current rating typically ranges from 10mA to 30mA for standard LEDs, but it’s crucial to check the specifications for your specific LEDs. The higher the current, the brighter the LED will shine, but exceeding the maximum rated current can lead to overheating and reduced lifespan.
Applying Ohm’s Law
Once you have the forward voltage and desired current, you can use Ohm’s Law to calculate the resistor value needed to limit the current flowing through the LED. Rearrange the formula V = IR to solve for resistance (R), where R = (V_source – V_LED) / I_LED.
V_source: The supply voltage powering the LED circuit.
V_LED: The forward voltage of the LED.
I_LED: The desired current for the LED.
Example Calculation:
Suppose you have a 12V power supply and an LED with a forward voltage of 3.2V, and you want to drive the LED with a current of 20mA (0.02A).
R = (12V – 3.2V) / 0.02A
R = 8.8V / 0.02A
R = 440Ω
Selecting the Nearest Standard Resistor Value
Once you have calculated the resistor value, select the nearest standard resistor value that is equal to or greater than the calculated value. Common resistor values include 220Ω, 330Ω, 470Ω, and so on. Using a resistor with a slightly higher value than calculated ensures that the LED receives slightly less current, providing a margin of safety.
By understanding the process of calculating resistor values using Ohm’s Law, you can tailor your LED strip projects to meet your specific requirements with precision. Remember to consult datasheets and manufacturer specifications for accurate forward voltage and current ratings, and always select standard resistor values for reliable performance. With this knowledge, you can confidently design and customize LED lighting setups for various applications.
Advanced Considerations for LED Strip Applications
While basic resistor integration is essential for LED strip applications, there are advanced techniques that can significantly enhance functionality and versatility. Let’s delve into these cutting-edge technologies and applications to elevate your LED strip projects.
Pulse-Width Modulation (PWM) for Dynamic Dimming
Pulse-width modulation (PWM) is a sophisticated technique that allows for dynamic control of LED brightness levels. By rapidly switching the LEDs on and off at varying pulse widths, PWM enables precise dimming control without compromising efficiency or color quality. This technique is particularly useful in applications where adjustable brightness levels are desired, such as ambient lighting, mood lighting, or decorative effects. With PWM, you can create captivating lighting displays that adapt to different environments and user preferences.
Constant Current Drivers for Uniform Brightness
Constant current drivers are specialized power supplies designed to maintain a consistent current output regardless of fluctuations in voltage or load. Unlike traditional power supplies, which deliver a fixed voltage, constant current drivers ensure that each LED receives the precise amount of current required for optimal performance. This results in uniform brightness levels across the entire LED strip, even when multiple strips are connected in series or parallel. Constant current drivers are especially beneficial in large-scale installations where maintaining consistent illumination is critical, such as architectural lighting, signage, or stage productions.
Integration of Smart Lighting Controls
Incorporating smart lighting controls into LED strip applications can unlock a world of possibilities for customization and automation. With the advent of wireless technologies like Bluetooth, Wi-Fi, or Zigbee, you can remotely control and program your LED strips using smartphones, tablets, or voice commands. Smart lighting systems offer features such as color changing, scheduling, motion sensing, and integration with other smart home devices, allowing you to create immersive lighting experiences tailored to your needs and preferences. Whether it’s accentuating architectural elements, setting the mood for entertainment, or enhancing productivity in workspaces, smart lighting controls provide endless opportunities for creativity and convenience.
Advanced Thermal Management Solutions
As LED strip applications become more complex and demanding, effective thermal management becomes increasingly crucial to ensure reliable performance and longevity. Advanced thermal management solutions, such as heat sinks, thermal pads, or active cooling systems, help dissipate excess heat generated by LEDs and electronic components, preventing overheating and premature failure. By maintaining optimal operating temperatures, these thermal management techniques ensure consistent light output, color stability, and overall reliability, even in challenging environments or high-power applications. Investing in robust thermal management solutions is essential for maximizing the lifespan and efficiency of your LED strip installations, particularly in commercial or industrial settings where reliability is paramount.
By embracing advanced techniques such as pulse-width modulation, constant current drivers, smart lighting controls, and advanced thermal management solutions, you can unleash the full potential of LED strip applications. These cutting-edge technologies offer unparalleled flexibility, efficiency, and reliability, enabling you to create stunning lighting designs that captivate and inspire. Whether you’re illuminating homes, businesses, or public spaces, integrating these advanced techniques into your LED strip projects will elevate them to new heights of performance and sophistication.
FAQ's
Do all LED strips require resistors?
No, not all LED strips require external resistors. Some LED strips come with built-in resistors, while others may need external resistors for proper current regulation. Refer to the manufacturer’s specifications to determine if resistors are necessary for your LED strips.
How can I tell if my LED strips have built-in resistors?
One way to determine if your LED strips have built-in resistors is to check the product specifications provided by the manufacturer. LED strips that come pre-assembled with resistors typically indicate this in their product descriptions or datasheets.
Can I use LED strips without resistors?
It depends on the specific LED strips you are using. LED strips with built-in resistors may not require additional resistors, but LED strips without built-in resistors will likely need external resistors for proper current regulation and to prevent damage to the LEDs.
What happens if I don’t use resistors with my LED strips?
Without resistors, LED strips may experience unstable performance, inconsistent brightness, or even damage to the LEDs due to excessive current flow. Using resistors helps regulate the current and ensures the longevity and reliability of your LED strip installations.
How do I know which resistor values to use for my LED strips?
Calculating the appropriate resistor values for your LED strips involves considering factors such as the LED voltage and current requirements, as well as the power supply voltage. You can use online calculators or consult with a knowledgeable supplier to determine the correct resistor values for your specific application.
Can I connect multiple LED strips without resistors?
Connecting multiple LED strips without proper current regulation can lead to uneven brightness, voltage drop, and potential damage to the LEDs. It’s recommended to use resistors or other current-limiting devices when connecting multiple LED strips in series or parallel to ensure consistent performance.
Are there any safety concerns associated with using resistors with LED strips?
When used correctly, resistors pose minimal safety risks. However, it’s essential to follow proper installation practices and ensure that the resistors are rated for the voltage and power requirements of your LED strips to avoid overheating or other potential hazards.
Can I dim LED strips that have resistors?
Yes, LED strips with built-in resistors can typically be dimmed using compatible dimming devices or controllers. However, it’s essential to verify compatibility and follow the manufacturer’s guidelines to ensure proper operation and avoid any damage to the LEDs or the dimming equipment.
Are there alternatives to resistors for controlling LED strip brightness?
Yes, besides resistors, you can use pulse-width modulation (PWM) controllers or constant current drivers to control LED strip brightness. These alternative methods offer more precise and dynamic control over brightness levels and can be suitable for different lighting applications.
Can I install LED strips outdoors without using resistors?
While it’s possible to install LED strips outdoors without resistors, it’s not recommended, especially in environments where temperature and humidity fluctuations are common. Using resistors helps protect the LEDs from voltage spikes and ensures stable performance and longevity, making them essential for outdoor LED strip installations.
Conclusie
In conclusion, whether you’re embarking on a home lighting project or designing an intricate commercial display, understanding the role of resistors in LED strip installations is paramount. By following the guidelines outlined in this blog post, you can ensure the optimal performance and longevity of your LED lighting systems.
If you have further questions or specific requirements, don’t hesitate to reach out to Unitop, een van China's toonaangevende fabrikanten van LED-strip verlichting en LED neon flex. Our team of experts is dedicated to providing top-notch solutions tailored to your needs. Contacteer ons today to illuminate your space with confidence and style.

Tom is nu de Sales Manager van Unitop (China) Co.. Hij is in de LED Verlichting industrie sinds 2005. Hij is een expert in verkoop & marketing, en fabrieksmanagement. Hij houdt van bodybuilding, en hij is ook een gekke Apple-fan! Hij is een hardwerkende man en houdt ervan te leren en nieuwe dingen te proberen.
Email: tom@unitopledstrip.com WhatsApp: +86-18680307140


Laat een reactie achter
Wil je meedoen aan de discussie?Voel je vrij om bij te dragen!