Unlock the full potential of your LED strip lights with our expert guide on powering them without a traditional plug. Our tried-and-true methods will provide simple, effective solutions to achieve the perfect lighting setup for any space. Discover the convenience and versatility of using LED strip lights without a traditional plug. This guide provides simple and effective methods to power your LED strips, ensuring you achieve the perfect lighting solution for any setting.
To use LED strip lights without a plug, connect them to a battery pack, USB power bank, or solar panel system, directly wire them to an electrical circuit or use a portable power station. Each method provides a versatile and effective solution for powering your LED strips in various settings.
Explore detailed instructions and tips to power your LED strip lights without a plug. Read on to discover each method in depth and find the best solution for your lighting needs.
Powering LED Strip Lights with a Battery Pack
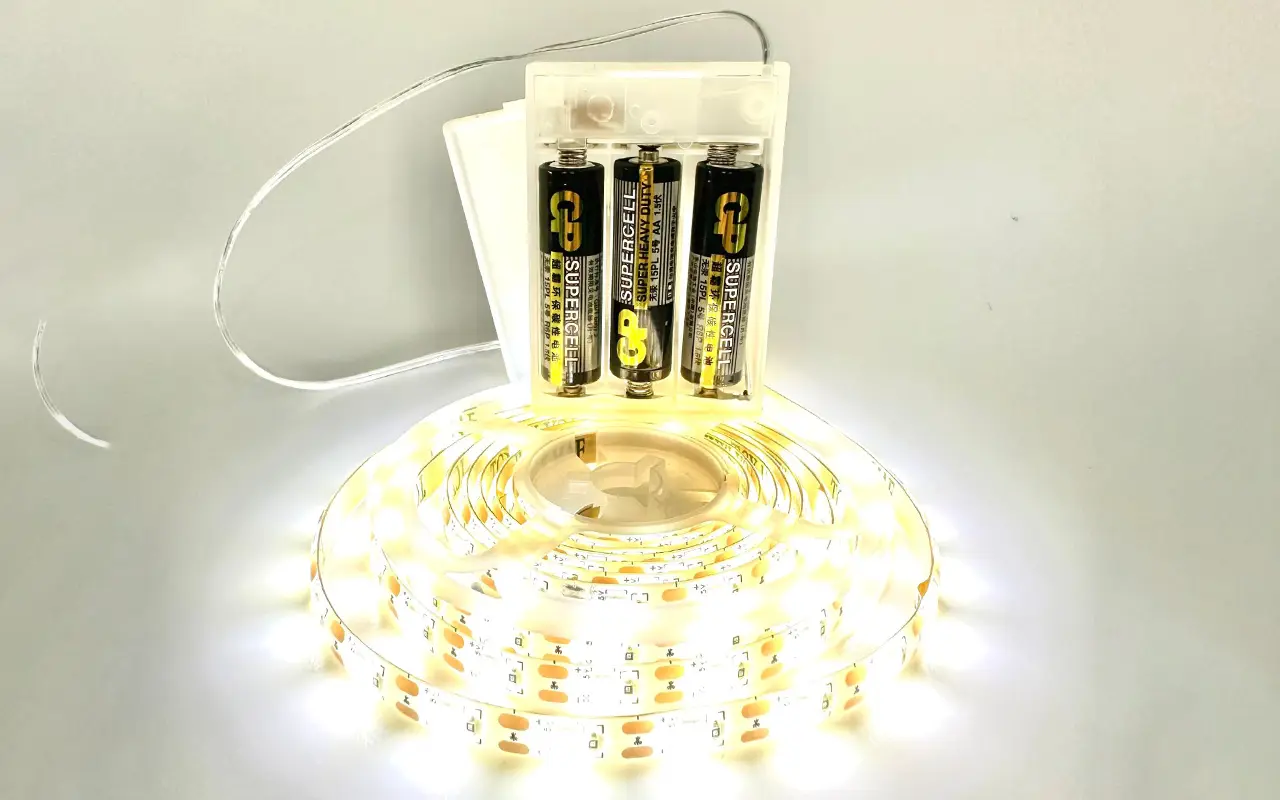
Using a battery pack is a practical and versatile solution for powering LED strip lights without relying on a traditional plug. This method is especially useful for outdoor settings, temporary installations, or areas without easy access to power outlets. Here’s a detailed guide to help you set up your LED strip lights with a battery pack.
Choose the Right Battery Pack
The first step is selecting a suitable battery pack that matches the voltage requirement of your LED strip. Most LED strips operate on either 12V or 24V. It’s crucial to ensure the battery pack can deliver this voltage to avoid damaging the lights or providing insufficient power. Additionally, the battery pack’s capacity, usually measured in milliamp hours (mAh), should be considered. A higher mAh rating means the battery can power the LED strips longer.
For instance, if you have a 12V LED strip, look for a 12V battery pack with a capacity that meets your needs. If you’re planning an extended use, such as for an event or a long-term outdoor setup, opt for a battery pack with a higher capacity to avoid frequent recharges.
Connect the LED Strip
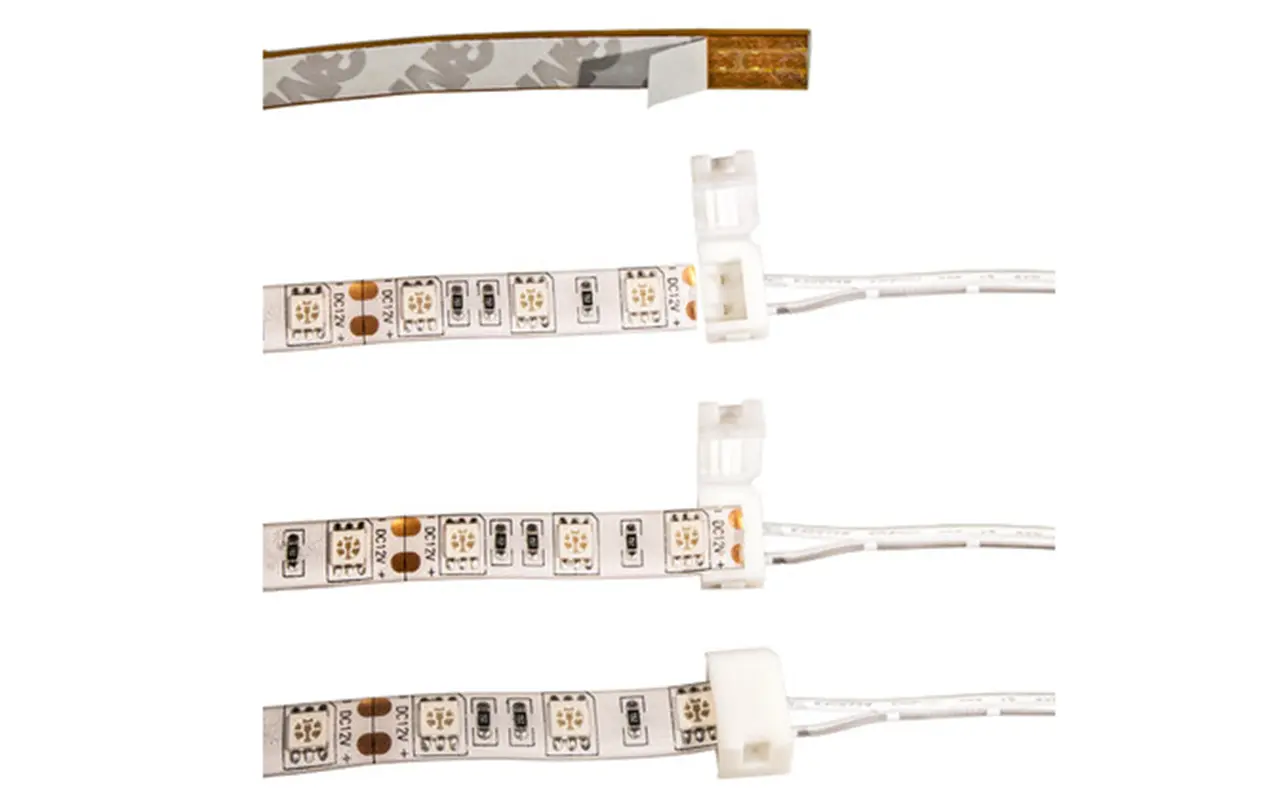
Once you have the appropriate battery pack, the next step is to connect the LED strip. Most LED strips have a positive (+) and negative (-) terminal. Using compatible connectors, link these terminals to the corresponding terminals on the battery pack. Ensure the connections are tight and secure to prevent any power interruptions.
For added convenience, you can use quick-connect terminals or solder the connections for a more permanent setup. Quick-connect terminals are handy for temporary setups as they allow easy disconnection and reconnection, while soldering provides a robust and durable connection ideal for long-term use.
Secure the Connection
Securing the connections is essential after connecting the LED strip to the battery pack. Loose connections can lead to flickering lights or intermittent power loss. Electrical tape wraps the connections tightly, ensuring no exposed wire could cause a short circuit. For a more permanent and secure solution, solder the connections and cover them with heat shrink tubing.
Test the Setup
Before finalizing your installation:
Test the setup to ensure everything is working correctly.
Turn on the battery pack and check if the LED strip lights up evenly and consistently.
Double-check the connections and ensure the battery pack is charged if the lights don’t turn on. Once the LED strip is functioning correctly, you can proceed to fix the strip.
Adjust and Fix the LED Strip
Adjust the placement of the LED strip to achieve the desired lighting effect. Whether you’re highlighting architectural features, creating ambient lighting, or decorating for an event, proper positioning is key to achieving the best results. Use adhesive backing, mounting clips, or channels to secure the LED strip.
Benefits of Using a Battery Pack
Battery packs offer significant portability and flexibility, making them ideal for various applications. They are perfect for situations where traditional power sources are unavailable or impractical. For example, they can light up tents during camping trips, decorate outdoor spaces for events, or add accent lighting to areas without power outlets.
Using a battery pack lets you enjoy the convenience of LED strip lights without being tethered to a wall outlet. This method enhances the versatility of your lighting solutions and provides a reliable and portable power source for a wide range of applications.
Using a USB Power Bank
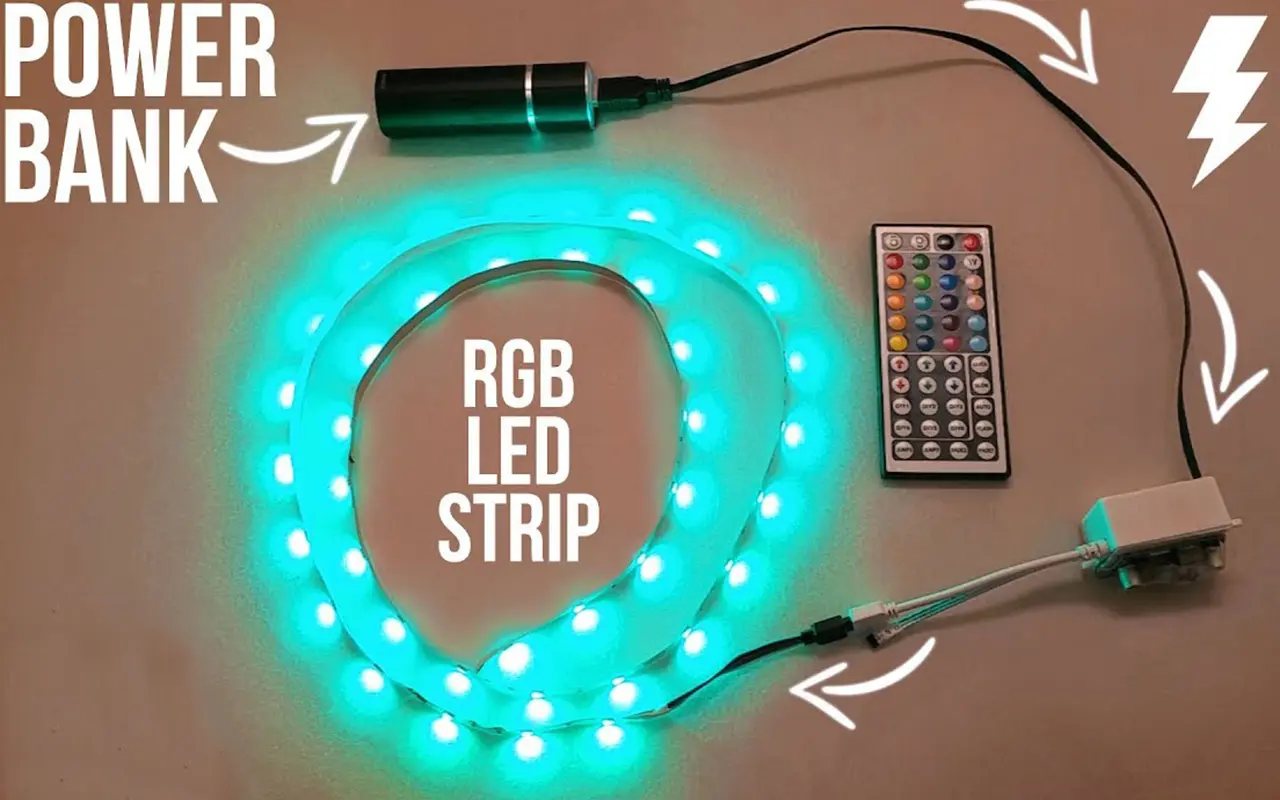
A USB power bank offers a convenient and portable solution for powering LED strip lights without a traditional plug. This method is particularly useful for small projects, temporary setups, or areas where power outlets are not readily accessible. Here’s a detailed guide on using a USB power bank to effectively power your LED strip lights.
Check Voltage Compatibility
The first step is to ensure that your LED strip is compatible with a USB power bank’s output voltage, typically 5V. Most USB power banks are designed to charge devices like smartphones and tablets, which operate at 5V. Therefore, your LED strip should also be rated for 5V to avoid potential issues.
If your LED strip operates at a higher voltage (12V or 24V), you will need a step-down converter to reduce the voltage to 5V. However, it’s best to use LED strips specifically designed to run on 5V for simplicity and compatibility.
Acquire a USB Adapter
You will need a USB to DC adapter to connect your LED strip to a USB power bank. This adapter converts the USB output to a DC connector that matches the input connector of your LED strip. These adapters are relatively inexpensive and readily available online or at electronics stores.
Ensure the connector size matches your LED strip’s input jack when purchasing a USB-to-DC adapter. Most adapters come with multiple tips to fit different sizes, making it easier to find a compatible one.
Connect the LED Strip to the Adapter
Once you have the appropriate adapter, connect the LED strip to the USB adapter. Insert the DC connector into the input jack of the LED strip. Ensure the connection is snug and secure to prevent disconnection or power loss during use.
For added stability, you can use electrical tape to reinforce the connection. This is particularly useful if the setup will be moved around frequently, such as for portable lighting solutions or temporary installations.
Plug Into the Power Bank
Next, plug the USB adapter into the USB port of the power bank. Most power banks come with multiple USB ports, allowing you to connect more than one LED strip if needed. Once connected, press the power button on the power bank to start supplying power to the LED strip.
Power On
Turn on the power bank and check if the LED strip lights up. If the LED strip does not turn on, double-check the connections and ensure the power bank is fully charged. Adjust the placement of the LED strip to achieve the desired lighting effect, whether for decorative purposes, task lighting, or accent lighting.
Ideal for Portable Lighting Solutions
A USB power bank is perfect for small projects and portable lighting solutions. For example, you can use this setup to add ambient lighting to a bookshelf, under-cabinet lighting in the kitchen, or even as a backlight for your TV. The portability of the power bank allows you to move the LED strip lights to different locations easily, making it a versatile option for various applications.
USB power banks are also rechargeable, meaning you can keep your LED strip lights running for extended periods without needing a constant power source. Recharge the power bank when it runs out of juice, and you’re good to go again.
Solar Panels for Sustainable Lighting
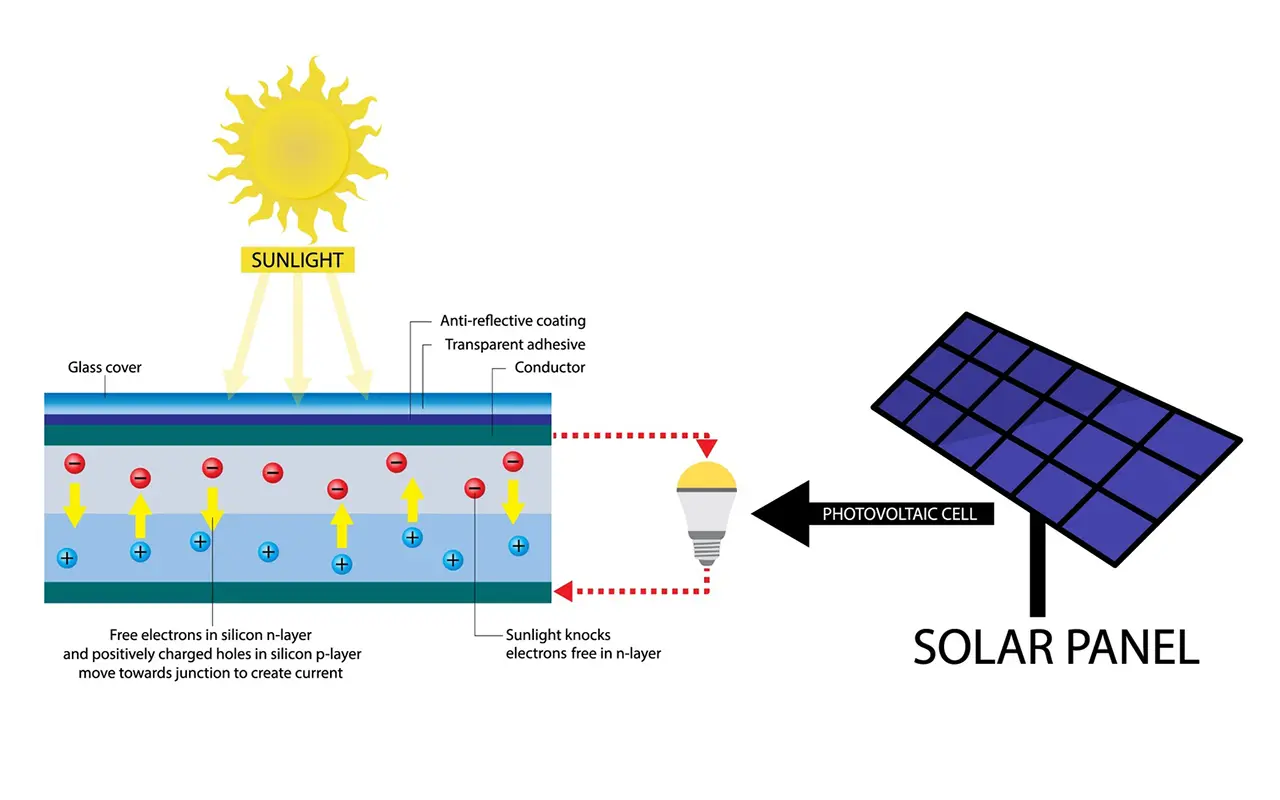
Using solar panels to power LED strip lights is an eco-friendly option and a highly practical one for areas without access to electrical outlets. This method harnesses renewable energy, perfect for outdoor installations, remote locations, or green energy enthusiasts. Here’s a step-by-step guide to installing your LED strip lights with solar power.
Select a Solar Panel System
The first step in this process is selecting the right solar panel system. The solar panel must match your LED strip lights’ voltage and power requirements. Most LED strips run on 12V or 24V, so choose a solar panel to deliver these voltages. Additionally, ensure the solar panel has enough wattage to support the power consumption of the LED strips. For example, if your LED strip consumes 10 watts per meter and you have 5 meters of strip, you’ll need a panel to produce at least 50 watts of power.
Install a Charge Controller
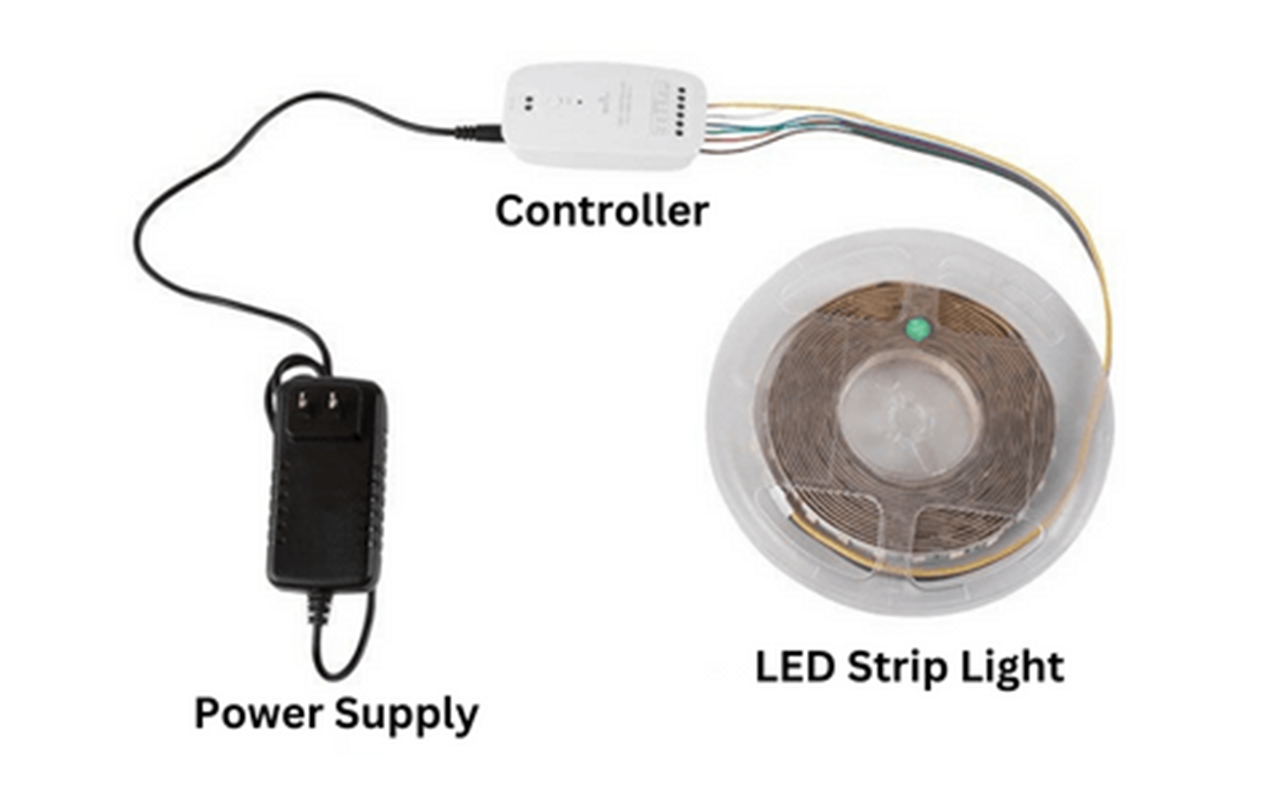
A crucial component in this setup is the solar charge controller. This device regulates the power flow from the solar panel to the rechargeable battery, preventing overcharging and ensuring a stable power supply. Connect the charge controller between the solar panel and the battery. The charge controller typically has marked terminals for the solar panel, battery, and load (LED strip lights). Follow the manufacturer’s instructions to ensure correct installation.
Connect the LED Strip
Next, attach the LED strip lights to the rechargeable battery via the charge controller. This step involves connecting the positive and negative terminals of the LED strip to the corresponding terminals on the battery. Ensure the connections are secure to avoid any power interruptions. Proper connectors or soldering of the wires can help create a stable and reliable connection.
Position the Solar Panel
Proper solar panel placement is essential for maximizing sunlight exposure and ensuring efficient energy collection. Position the solar panel in a location that receives maximum sunlight throughout the day, such as a rooftop, a garden, or an open field. The panel should be tilted at an angle corresponding to your geographical latitude to capture the most sunlight. Avoid placing the panel in shaded areas or where obstructions might block sunlight.
Test the System
It’s time to test the system after setting up the solar panel, charge controller, battery, and LED strip lights. Turn on the LED strip lights to check if they receive power and function correctly. If the lights do not turn on, recheck all connections and ensure the solar panel receives sufficient sunlight. Adjust any components as necessary to ensure optimal performance.
Ideal for Outdoor Installations
Solar-powered LED strip lights offer a sustainable and independent lighting solution for outdoor installations. Whether you’re lighting up a garden path, enhancing the ambiance of a patio, or providing illumination for a remote area, solar power provides a reliable and environmentally friendly option. This method eliminates the need for long extension cords and reduces reliance on traditional power sources, making it a cost-effective and green solution.
Hardwiring LED Strip Lights
Hardwiring your LED strip lights to an existing electrical circuit provides a reliable and permanent solution. This method is ideal for indoor installations where you want a long-term lighting setup without the hassle of plugging and unplugging. Here’s a detailed guide on how to hardwire your LED strip lights effectively.
Turn Off Power
Safety is paramount when dealing with electrical installations. Before you begin:
Ensure that the power to the circuit you’ll be working on is turned off.
Locate the appropriate circuit breaker in your electrical panel and switch it off.
Double-check by testing the circuit with a voltage tester to confirm that no power is running through the wires.
This precaution helps prevent electrical shocks and other hazards.
Prepare the Wiring
Once you’ve ensured the power is off, prepare the wiring for the connection. Start by stripping the ends of the LED strip wires and the wires from the electrical circuit. Use a wire stripper to remove about half an inch of insulation from each wire end. This exposes the conductive material, allowing you to make secure connections. Be careful not to damage the wires while stripping the insulation.
Make Connections
With the wires prepared, it’s time to make the connections. Connect the positive wire (usually red) from the LED strip to the positive wire from the electrical circuit. Similarly, connect the negative wire (usually black) from the LED strip to the negative wire from the circuit. You can use wire nuts to twist the wires together securely. Alternatively, solder the wires together for a more permanent and robust connection. Ensure that the connections are tight and secure to avoid any power interruptions.
Secure the Wiring
After making the connections, securing the wiring is crucial to prevent any short circuits or loose connections. Use electrical tape to wrap the wire nuts or the soldered joints thoroughly. This insulates the connections and adds an extra layer of protection.
Test the Lights
Once everything is secured, turn the power back on to test the LED strip lights. Go back to the electrical panel and switch the circuit breaker back on. Please turn on the LED strip lights to ensure they are functioning correctly. If the lights do not turn on, double-check the connections to ensure everything is wired correctly. Troubleshoot any issues by verifying that all connections are secure and that there are no breaks in the wiring.
Ideal for Indoor Installations
Hardwiring LED strip lights is particularly suitable for indoor installations where a permanent lighting solution is desired. This method is perfect for under-cabinet lighting in kitchens, accent lighting in living rooms, or illuminating hallways and staircases. Hardwiring eliminates the need for visible power cords, providing a clean and professional look. It also ensures that the lighting setup is stable and reliable, reducing the need for frequent adjustments or maintenance.
Using Portable Power Stations
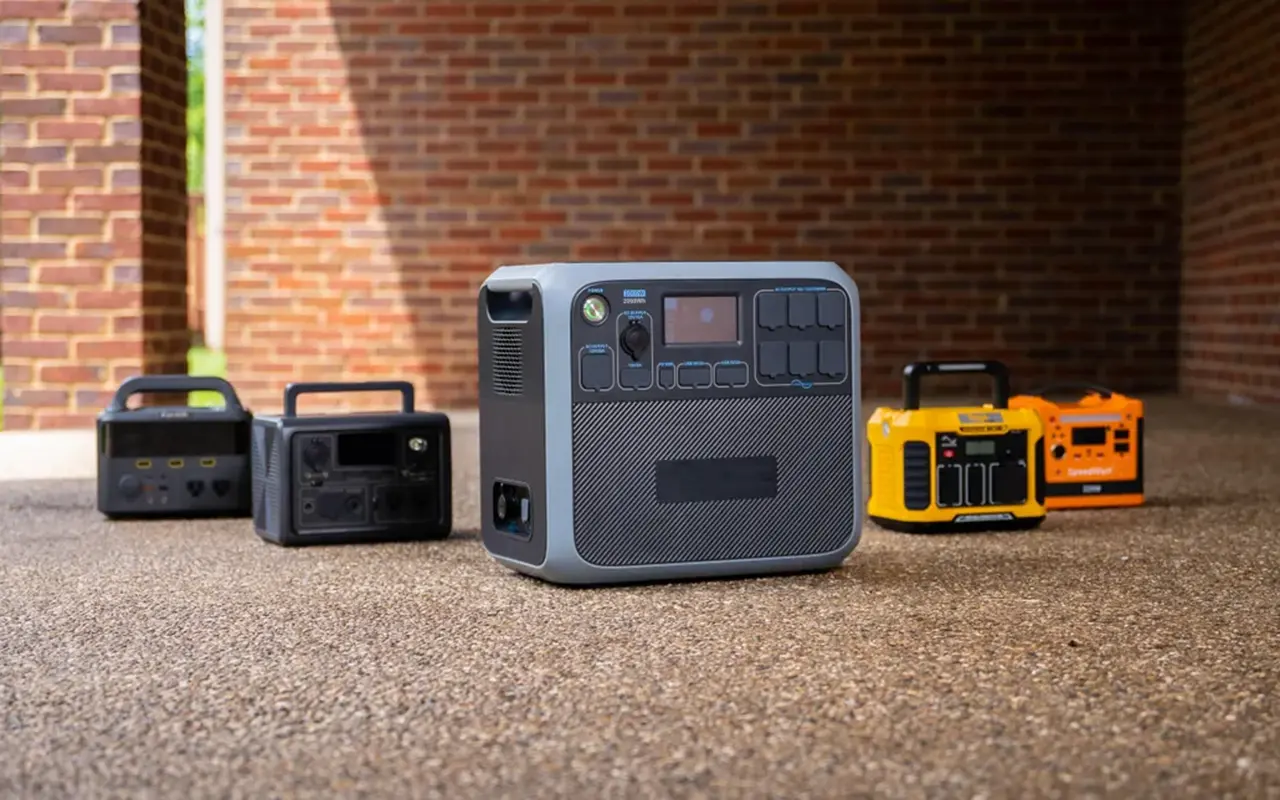
Portable power stations provide a flexible and reliable solution for powering LED strip lights without a traditional plug. These units are large, rechargeable batteries with multiple output options, making them perfect for various scenarios. Here’s how to use a portable power station to power your LED strip lights effectively.
Check Compatibility
Before using a portable power station, it’s crucial to ensure that it can supply the necessary voltage and current for your LED strip lights. Most portable power stations have multiple output options, including USB ports, DC outputs, and AC outlets. Check the specifications of your LED strip lights to determine their power requirements, typically indicated in volts (V) and watts (W). For example, if your LED strip lights require 12V and 24W, ensure the power station has a 12V output with sufficient wattage capacity.
Connect the LED Strip
Once you’ve confirmed compatibility, connect the LED strip to the power station. Use the appropriate connectors to link the LED strip’s power input to the power station’s output port. You’ll likely need a DC connector cable if your LED strip has a DC input. Plug LED strips with USB inputs into the power station’s USB port. Ensure all connections are secure to avoid any power interruptions.
Turn On the Power Station
After connecting the LED strip:
Turn on the power station.
Activate your output port—most power stations have buttons or switches to control each output individually.
Once activated, check if the LED strip lights up.
Double-check the connections and ensure the power station is adequately charged if it doesn’t. Adjust the placement of the LED strip to achieve your desired lighting effect, whether it’s for decoration, task lighting, or creating ambiance.
Ideal for Various Scenarios
Portable power stations are ideal for many applications, offering both portability and reliability. They are particularly useful for outdoor events, camping trips, and other scenarios where traditional power sources are unavailable. For instance, you can use a portable power station to light up a campsite, provide ambient lighting at a backyard party, or illuminate a remote worksite. The portability of these units allows you to move them easily and use them in different locations as needed.
Additional Considerations
When using LED strip lights without a plug, several other important factors must be considered to ensure your setup is efficient, safe, and effective. These considerations include using battery adapters for voltage conversion, connecting with DC connectors, and calculating the expected battery life.
Battery Adapters for Voltage Conversion
If the available battery doesn’t match the voltage requirements of your LED strip, you can use a battery adapter to convert the voltage. Battery adapters come in two main types: step-up and step-down converters. A step-up converter increases the voltage, while a step-down converter reduces it. For instance, a step-up converter can increase the voltage to the required level if you have a 5V battery, but your LED strip requires 12V.
These converters ensure that your LED strip receives the correct voltage, which is crucial for its proper operation and longevity. The LED strip may only function correctly or be damaged with the appropriate voltage. Always ensure that the converter you choose matches the power ratings of your battery and LED strip to avoid compatibility issues.
Connecting with DC Connectors
Secure connections are essential for maintaining a stable power supply to your LED strip lights. DC connectors are commonly used to connect power sources to LED strips. These connectors ensure a reliable and safe connection, minimizing the risk of power loss or damage. It’s important to match the connector size and type with your LED strip and power source when using DC connectors to ensure compatibility.
Calculating Battery Life
Ensure your battery-powered LED strip lights last as long as needed; it’s essential to calculate the expected battery life. This involves understanding the power consumption of your LED strips and the capacity of your battery pack. Accurate calculations help you plan for an adequate power supply, avoiding unexpected power outages during use.
Key Factors in the Calculation
Two key factors determine the battery life of your LED strip lights: the total battery capacity and the power consumption of the LED strips. Battery capacity is typically measured in milliamp hours (mAh) or watt hours (Wh), while LED strip power consumption is measured in watts per meter (W/m). Knowing these values lets you calculate the battery’s length under specific conditions.
The Mathematical Model
To calculate battery life, use the formula:
Battery Life (hours) = Battery Capacity (mAh) / (LED Strip Power Consumption (W) / Voltage (V))
This formula estimates how long your LED strip lights will run on a fully charged battery.
Example Calculation
Let’s say you have a 12V LED strip with a power consumption of 24W and a battery pack with a capacity of 5000mAh. Using the formula, you can calculate the battery life as follows:
Battery Life (hours) = 5000mAh / (24W / 12V)
= 5000 / 2
= 2.5 hours
This means the battery pack can power the LED strip lights for approximately 2.5 hours before recharging. This calculation is crucial for planning your lighting setup, especially for events or applications requiring continuous lighting.
Вопросы и ответы: Ответы на ваши вопросы
Q: What are the different methods to power LED strip lights without a plug?
A: You can power LED strip lights without a plug using a battery pack, USB power bank, solar panel system, hardwiring to an electrical circuit, or a portable power station. Each method offers unique benefits depending on your setup and requirements.
Q: Can I use a battery pack to power my LED strip lights?
A: A battery pack is a popular and portable solution. Ensure the battery pack matches the voltage requirements of your LED strip, and securely connect the positive and negative terminals. This method is ideal for temporary or outdoor installations.
Q: How do I connect LED strip lights to a USB power bank?
A: To connect LED strip lights to a USB power bank, ensure the LED strip operates at 5V. Use a USB to DC adapter that matches the connector of your LED strip, and plug it into the power bank. This setup is perfect for small projects and portable lighting needs.
Q: Is it possible to power LED strip lights with solar panels?
A: Absolutely. Solar panels can provide a sustainable power source for LED strip lights. You’ll need a solar panel, a charge controller, and a rechargeable battery. Connect the components, place the solar panel in a sunny location, and enjoy eco-friendly lighting.
Q: How can I hardwire LED strip lights to an electrical circuit?
A: Hardwiring LED strip lights involves connecting the strip directly to an electrical circuit. Ensure the power is off, strip the wire ends, connect the wires securely using wire nuts or solder, and then turn the power back on to test the lights. This method is suitable for permanent indoor installations.
Q: What are the benefits of using a portable power station for LED strip lights?
A: Portable power stations offer versatility and reliability for powering LED strip lights. They are ideal for events, camping, or any scenario where portability is crucial. Ensure the power station matches your LED strips’ voltage and current requirements for optimal performance.
Q: How do I ensure the longevity of my battery-powered LED strip lights?
A: Match the battery pack’s capacity with the LED strip’s power consumption to maximize battery life. Secure connections to prevent power interruptions, and use voltage converters if necessary to match the strip’s voltage requirements.
Q: What should I consider when choosing a battery pack for my LED strip lights?
A: When selecting a battery pack, ensure it matches the voltage requirement of your LED strip (typically 12V or 24V) and has sufficient capacity to power your lights for the desired duration. A higher mAh rating indicates longer battery life.
Q: Are there any eco-friendly options for powering LED strip lights?
A: Yes, solar panels are an excellent eco-friendly option. They harness sunlight to power LED strip lights, reducing reliance on traditional electricity sources. This setup is perfect for outdoor areas or locations without easy access to power outlets.
Q: What additional accessories might I need to set up LED strip lights without a plug?
A: Depending on your chosen power source, you might need USB to DC adapters, solar charge controllers, rechargeable batteries, and DC connectors. These accessories ensure secure and efficient connections for uninterrupted power to your LED strip lights.
Заключение
In conclusion, powering LED strip lights without a traditional plug opens possibilities for creative and functional lighting solutions. Each method offers unique advantages tailored to your specific needs, from battery packs and USB power banks to solar panels, hardwiring, and portable power stations. Whether you’re aiming for a temporary setup, an eco-friendly solution, or a permanent installation, the options provided in this guide will help you achieve the perfect lighting ambiance. By understanding and leveraging these alternative power sources, you can enjoy the versatility and convenience of LED strip lights in any setting, indoors or outdoors.
For those seeking reliable and high-quality Светодиодные ленты и Светодиодный неоновый флекс, Unitop stands out as a top choice. As one of China’s leading manufacturers, Unitop has built a strong reputation for innovation, quality, and expertise in the LED industry. Our advanced products are designed to meet the highest standards, ensuring durability and superior performance. We encourage you to связаться с нами immediately if you have further questions or specific lighting requirements. Our dedicated team is ready to provide expert advice and support, helping you find the best solutions for all your lighting needs. Trust Unitop to light up your world with excellence and reliability.

В настоящее время Том является менеджером по продажам в Юнитоп (Китай) Ко, Лимитед. Он был в Светодиодное освещение промышленности с 2005 года. Он является экспертом в области продаж и маркетинга, а также управления производством. Он любит бодибилдинг, а также является безумным фанатом Apple! Он трудолюбивый парень и любит учиться и пробовать новое.
Электронная почта: tom@unitopledstrip.com WhatsApp: +86-18680307140


Ответить
Хотите присоединиться к обсуждению?Не стесняйтесь вносить свой вклад!