The ambiance of a space can be significantly transformed with just a tweak in the lighting. While overhead lights have their place, a soft glow from a hidden source can sometimes add a magical touch, making the environment cozy and inviting.
Good lighting isn’t just about aesthetics. It impacts our mood, performance, and mental health. A well-lit kitchen, for instance, can invigorate the morning routine. At the same time, a softly lit dining area can provide a tranquil spot to unwind.
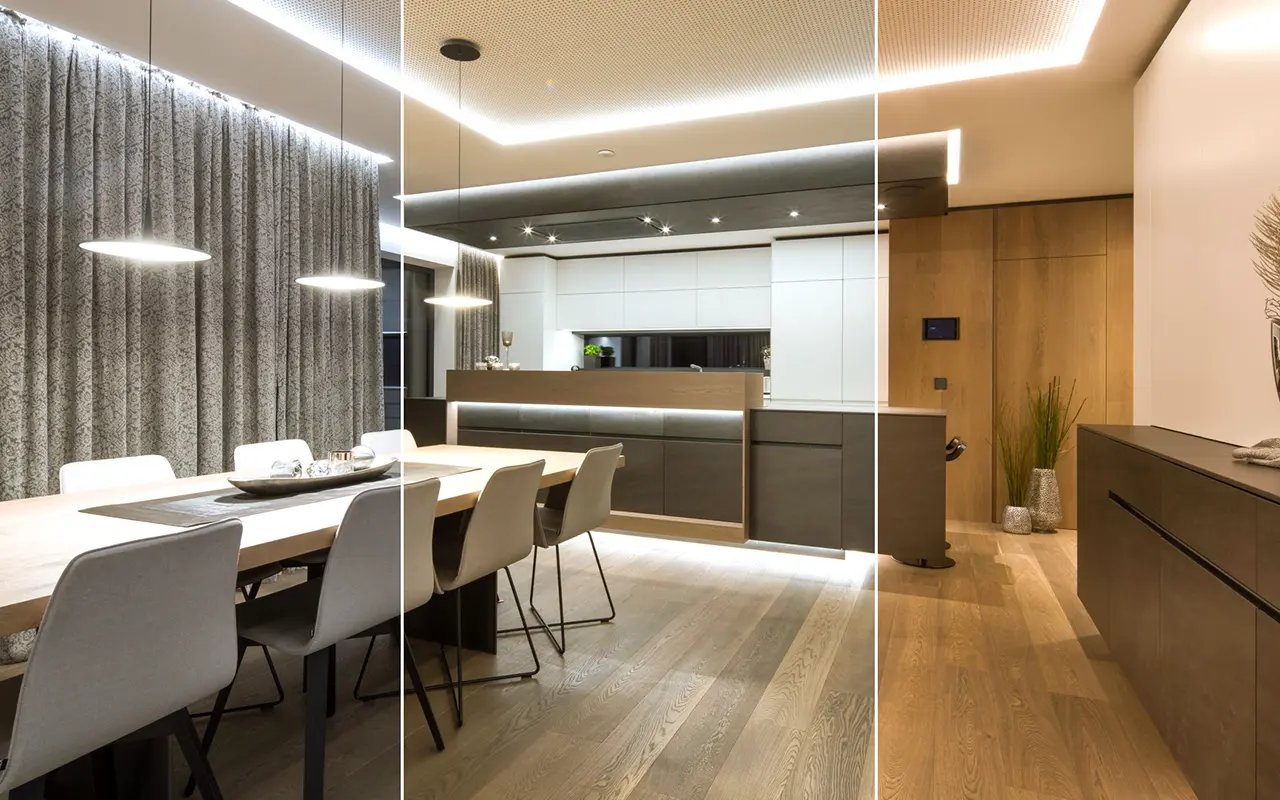
LED strips are a game-changer in modern lighting design. They are energy-efficient, long-lasting, and versatile. Installing them under counters not only caters to functional lighting but also accentuates the aesthetics, adding a modern and elegant touch to your space.
This easy guide is a simple guide on how you can install LED strip lights under counters in your kitchen.
Preparation Before Installation
Embarking on installing LED strips under your counters requires a blend of preparation and a dash of excitement. A well-prepared endeavor smoothens the process and elevates the outcome, marrying functionality with aesthetics.
Selecting the Right LED Strips
The market has many LED strips, each boasting unique features and benefits. The proper selection is paramount as it sets the tone for your space both in terms of brightness and color. It’s akin to choosing the right palette before painting a masterpiece.
LED Şerit Çeşitleri
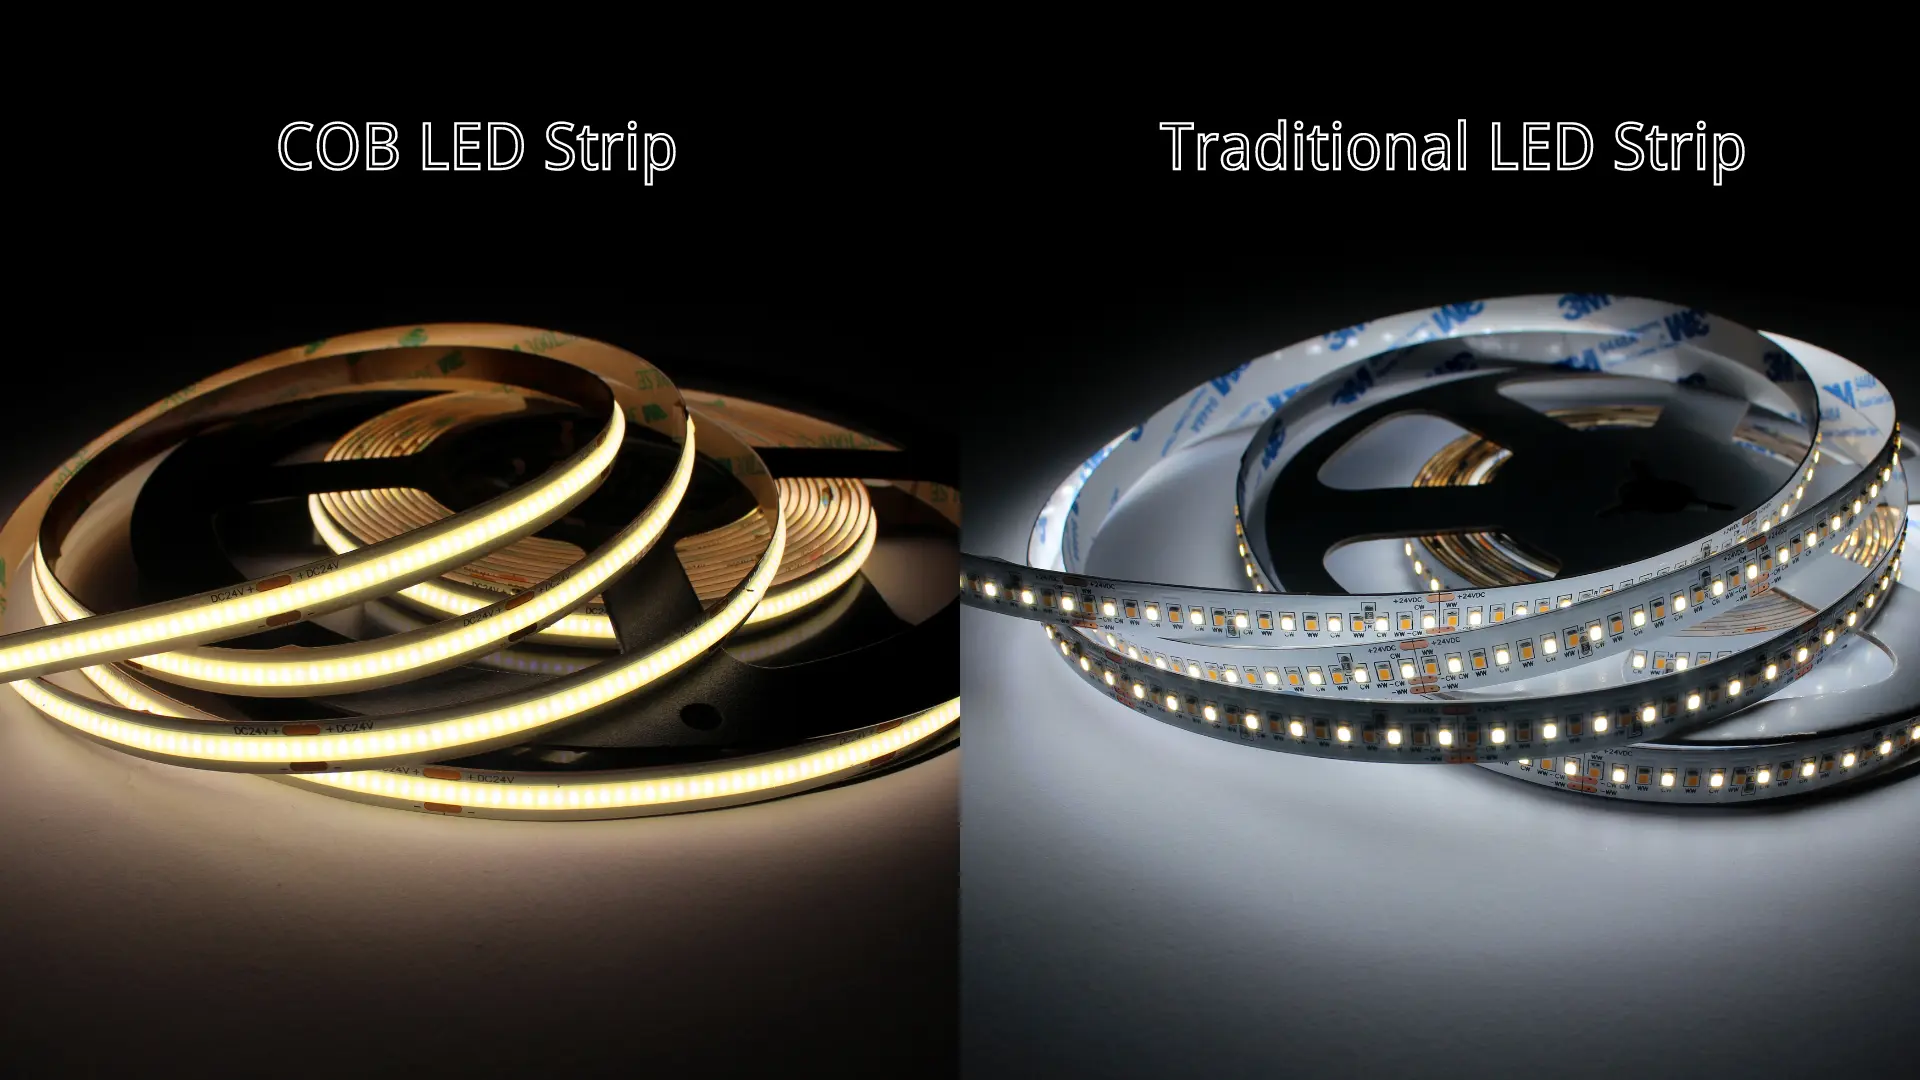
The spectrum of LED strips ranges from static color-changing to programmable LEDs. However, COB (Chip on Board) LED strips are the hallmark choice for the elegance and subtlety required for under-counter lighting. They are lauded for their uniform light distribution and sleek profile, which nestles impeccably under counters, casting a gentle glow.
Considerations Based on Counter Material and Location
Every counter tells a different story, dictated by its material and location. The adhesive prowess of LED strips may flirt differently with a wooden surface compared to a granite one. Similarly, proximity to a power source is a practical aspect that can’t be overlooked. Examining these facets beforehand lays down a path without hurdles during the installation.
Gathering Necessary Tools and Materials
A craftsman is only as good as his tools. Having the right tools and materials at your beck and call is the precursor to a hassle-free installation. It’s about creating a conducive environment where your DIY spirit can flourish.
List of Tools
Here’s a compiled checklist to ensure you’re battle-ready:
- Measuring tape: Ensure the LED strips fit like a glove for precise measurements.
- Sharp scissors or a cutter: To trim the LED strips at the designated cut lines.
- Wire strippers: A must-have to prepare the wires for connections.
- Wire nuts: To secure wire connections, ensuring they remain intact over time.
- Solderless connectors: For those who prefer a solder-free, clean, and easy connection.
Where to Purchase or Rent Them
Arming yourself with the right tools is just a click or a short drive away. Local hardware stores are treasure troves filled with all the necessary tools. For the digital savvy, online platforms like Amazon and Home Depot are your go-to destinations. They not only provide a vast array of options but also deliver right to your doorstep, making the process utterly convenient. So, whether you decide to purchase or rent, both avenues are laden with options to equip you for the task ahead.
Adım Adım Kurulum Kılavuzu
With the preparation out of the way, it’s time to roll up your sleeves and immerse in the heart of the installation. Every step is a stride towards transforming your space into a vibrant spectacle, with LED strips accentuating the contours of your counters.
Double-Check Your Lights Before Cutting or Installing
A stitch in time saves nine. Ensuring the operational integrity of your LED strips before taking the plunge will save you from any post-installation blues. Connect them to a power source, light them up, and ensure they shine bright and suitable.
Taking Measurements and Making Cuts
Precision is the hallmark of professionalism. Accurate measurements are the blueprint that guides your scissors as you trim the LED strips to the desired length.
Measuring the Length Needed
The narrative of your counters is told by the inches and feet. Unroll the measuring tape and record the length and breadth where the LED strips will reside. Every inch measured is a step toward a flawless installation.
Deciding on the Positioning
It’s not just about the length but where the light will cast its glow. Ponder upon the positioning, visualize the trajectory of light as it escapes from the LED strips, and bathe your counter in a soft glow.
Preparing the Strip-to-Power Connection
Connecting your LED strips and the power source builds the bridge between darkness and light. Prepare the strip-to-power connection, ensuring it can channel the electricity seamlessly.
Connecting Two Lengths of LED Strip
When the counter takes a turn, so must your LED strips. Connecting two lengths allows the light to flow uninterrupted, mirroring the contours of your counter.
Strip-to-Strip Connector
The strip-to-strip connector is your ally in maintaining a continuous stream of light. Utilize it to navigate through corners, ensuring the LED strips are harmonized.
Strip-to-Strip “No Wire” Connectors
When the journey of your LED strips is longer, the “no wire” connectors step in, ensuring the connection remains seamless and the aesthetic remains intact.
Testing and Mounting the LED Strips
A test run is imperative before the LED strips find their permanent abode under your counters. It’s the rehearsal before the grand premiere.
Cleaning and Drying the Surface
A clean, dry surface resembles a blank canvas, ready to hold the LED strips firmly. Wipe away any residue and bid farewell to moisture, and you have the perfect setting for the installation.
Marking the Positions
With a marker in hand, sketch the path the LED strips will traverse. The roadmap will guide you as you adhere the strips to the surface.
Adhering the Strips to the Surface
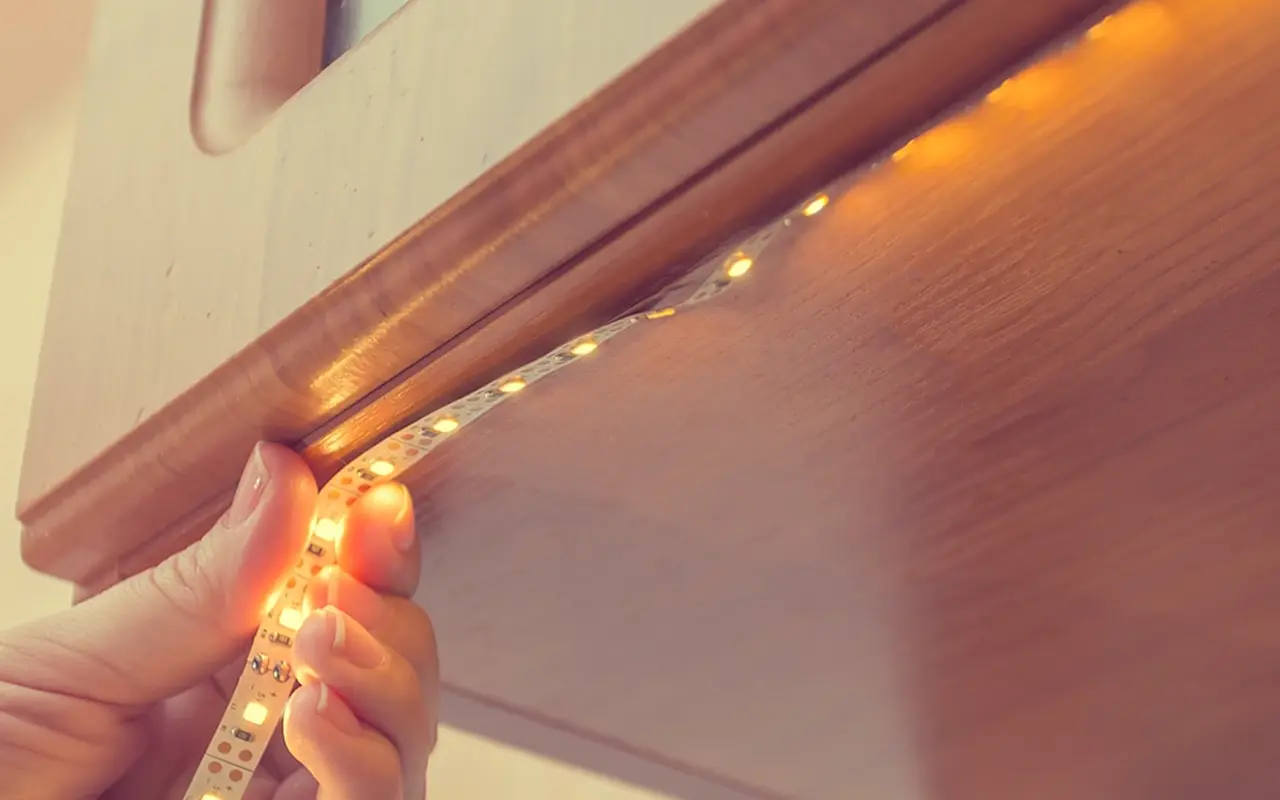
The moment of adhesion is a silent pledge of where the LED strips will reside, casting their glow. Peel the adhesive backing, align with the markings, and press firmly.
Connecting to the Power Source
The lifeblood of the LED strips flows from the power source. Ensure a secure connection, laying the groundwork for the LED strips to light up at your command.
Testing the Lights
As you flip the switch, witness the transformation. The LED strips should spring to life, casting a soft glow under your counters validating the effort invested in every preceding step.
Optional Customizations
The beauty of LED strip lighting lies in its ability to illuminate and its adaptability. Embrace the versatility by exploring optional customizations that resonate with your aesthetic and functional preferences.
Installing a Dimmer
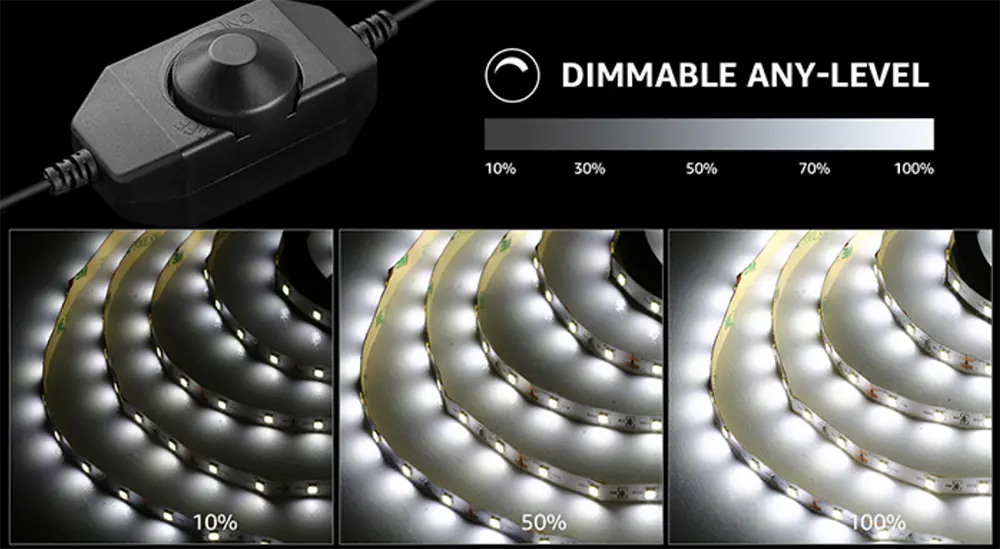
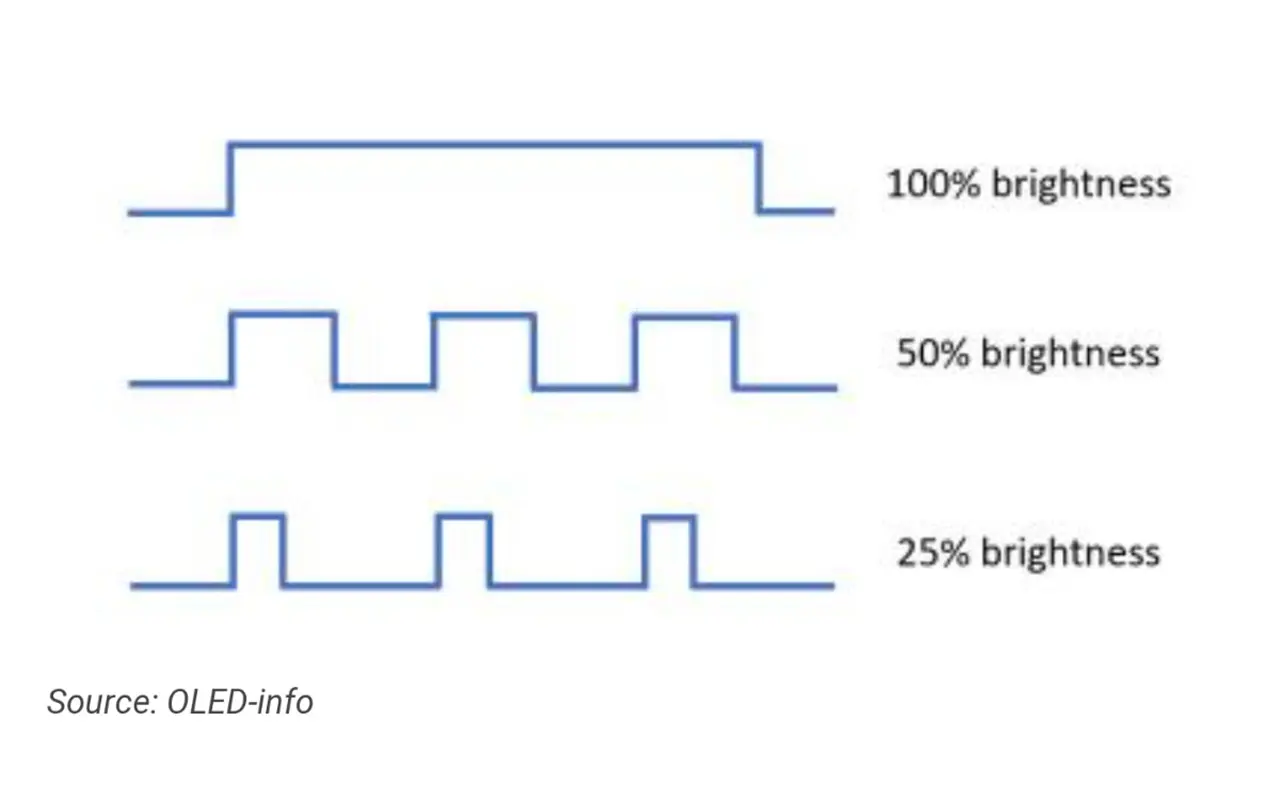
A dimmer is not just a device; it’s your command over the ambiance. With it, you can dial up the brightness to liven the atmosphere or dim it for a cozy, intimate setting.
Types of Dimmers
Your choice of dimmer reflects your style and the level of control you desire over the lighting. Rotary dimmers offer a classic, tactile experience. In contrast, touch dimmers or smart dimmers provide a modern, sleek interface with the brightness of your space.
Installation Steps
The journey to having a dimmer in place begins with choosing a location that’s both convenient and accessible. Follow the manufacturer’s guidelines diligently, ensuring each connection is secure. Your reward is a dimmer that stands ready to adjust the brightness of your LED strips with a touch or a turn.
Exploring Color Changing Options
Color is the spice of lighting, a whimsical element that adds an extra dimension to the ambiance. Unleash the artist in you by exploring color-changing options that transform your counters into a canvas.
Available Products
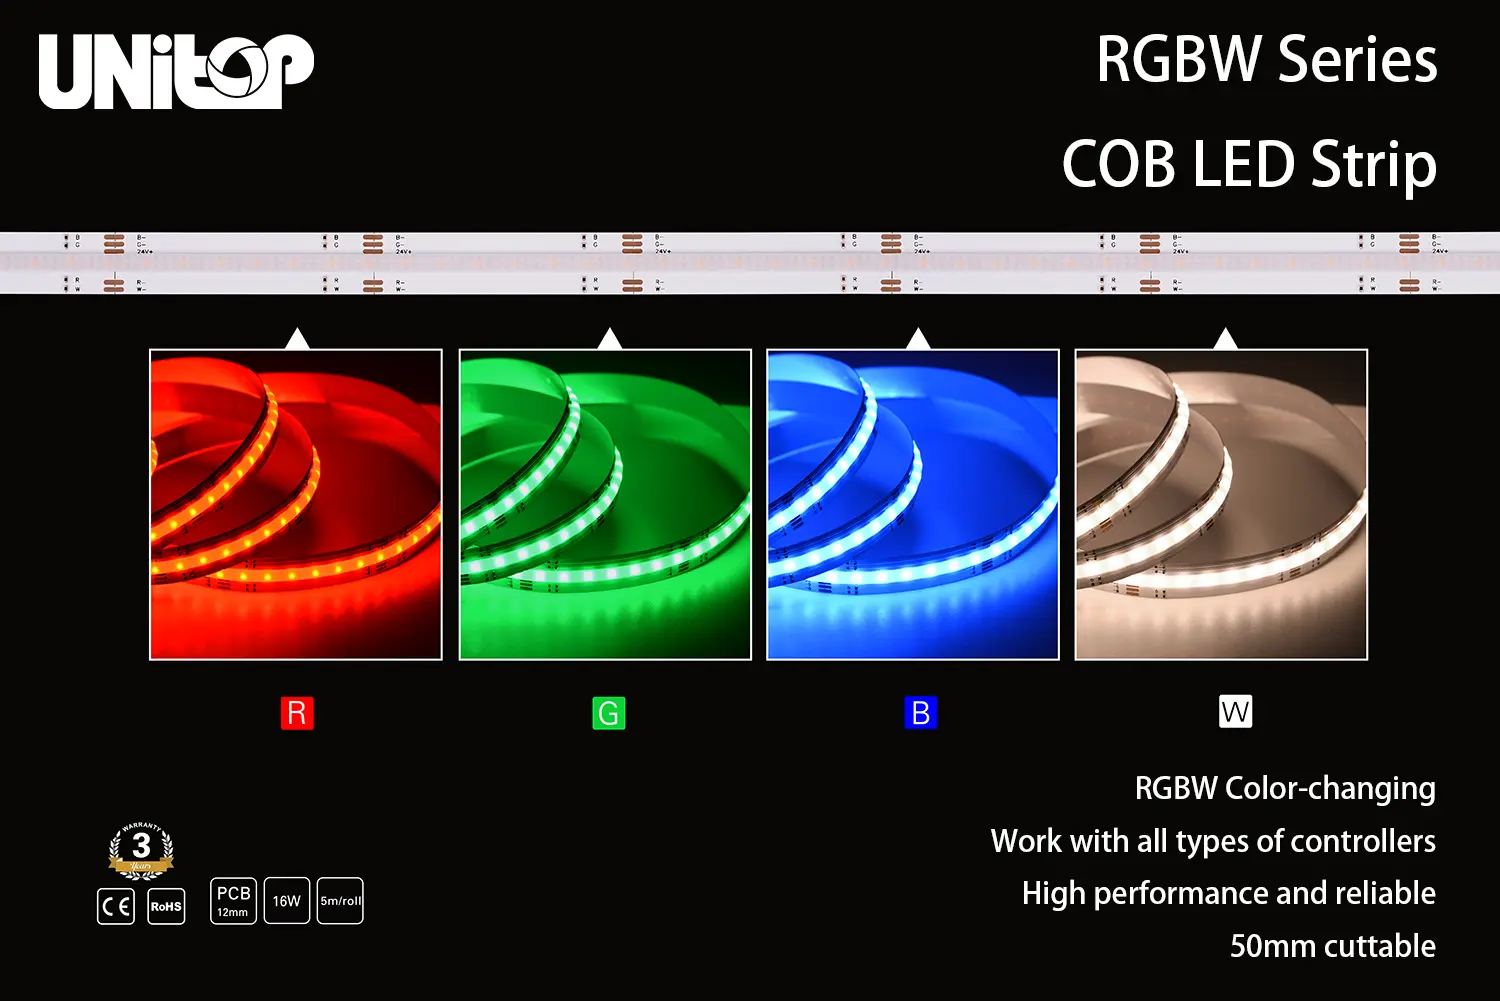
The market is ripe with options like RGB (Red, Green, Blue) or tunable white LED strips that empower you to play with color. RGB strips offer a vibrant palette of colors, while tunable white LED strips allow you to traverse the spectrum of white light from a warm, golden glow to a cool, crisp light.
How to Install and Use
Diving into the world of color begins meticulously glancing through the product manual. Each step in the installation process is a stride towards having a dynamic, color-changing lighting setup. Adhere to the operational instructions, and you’re on the threshold of a space that changes color with your mood or the occasion. Your counters become the stage for a spectacular light show, with you as the director.
Sık Karşılaşılan Sorunların Giderilmesi
Even the best-laid plans may encounter hitches, but worry not, for many common issues with LED strip installations have straightforward solutions. A little patience and troubleshooting understanding go a long way in resolving these snags.
Addressing Flickering Lights
Flickering lights, though irksome, are usually a sign of minor issues in the setup, often easy to rectify once identified.
Possible Causes
The ghost of flickering lights may haunt your LED strip installation due to loose connections, an inadequate power supply, or an incompatible dimmer switch. Each of these can disrupt the steady flow of electricity that LED strips crave for stable illumination.
Solutions
Start by inspecting all connections, ensuring they are snug and secure. A loose wire could be the sole culprit behind the flickering drama. If the power supply is the suspect, verify its adequacy for the length and type of LED strips you have; it might be time for an upgrade. Lastly, an incompatible dimmer can also be a party pooper. Ensure your dimmer and LED strips speak the same electrical language, or consider getting a compatible dimmer to restore peace to your lighting setup.
Resolving Unresponsive Dimmer Issues
A dimmer that has suddenly developed a will of its own is not rare in the world of LED strip lighting. But fear not, as most times, it’s an issue that bends to the will of simple troubleshooting steps.
Common Troubleshooting Steps
Begin your quest for resolution by examining all connections leading to and from the dimmer. A misbehaving wire could be the source of your woes. If all cables are in order, the dimmer could be the rogue element, especially if it’s been a loyal servant for many years. Replacing it with a new, compatible dimmer could restore order. Lastly, a compatibility check is in order. Ensure that the dimmer, LED strips, and power supply are in harmony, for a mismatch could lead to an unresponsive dimmer. Each step brings you closer to regaining control over your lighting ambiance, guiding you toward a well-lit, flicker-free haven.
Sonuç
You’ve metamorphosed your space into a modern, well-lit haven with a dash of effort and a sprinkle of patience. The journey from unboxing the LED strips to basking in their soft glow is rewarding. Your counters now exude a warm, inviting ambiance, setting the stage for many cozy evenings or productive afternoons.
A quick saunter down memory lane to recap the pivotal steps ensures you’ve left no stone unturned in your installation quest:
1. Selecting the apt LED strips and gathering the necessary tools.
2. Accurate measurement and meticulous cutting.
3. Preparing the strip-to-power connections and navigating through corners with strip connectors.
4. Cleaning, marking positions, and adhering the strips under the counters.
5. Connecting to the power source and ensuring the lights dazzle as expected.
6. Personalizing with dimmers or color-changing options, if desired.
Now, it’s time to step back with a coffee and revel in the new atmosphere your under-counter LED lighting has concocted. The soft luminescence augments the aesthetic appeal and adds a functional charm to your space. Whether it’s adding vibrance to your early morning hustle or casting a serene glow on your midnight snack escapades, the newly installed LED strips are now an integral part of your home’s character. So here’s to many illuminated moments ahead!
In your journey to luminous spaces, partnering with the best is paramount. Unitop, one of China’s leading LED şerit ışıklar ve LED neon flex manufacturers, stands as a beacon of quality and innovation in the LED domain. For further inquiries or bespoke LED solutions, your pathway to brilliance is just a contact away with Unitop. Embrace the glow of professionalism and expertise; your luminous dreams are ready to be realized.
İlgili Makaleler

Tom şu anda Unitop (Çin) Co, Limited. Bir süredir LED Aydınlatma 2005'ten beri sektörde. Satış & pazarlama ve fabrika yönetimi konularında uzmandır. Vücut geliştirmeyi seviyor ve aynı zamanda çılgın bir Apple Hayranı! Çalışkan bir adamdır ve yeni şeyler öğrenmeyi ve denemeyi sever.
E-posta: tom@unitopledstrip.com WhatsApp: +86-18680307140



Cevapla
Tartışmaya katılmak ister misiniz?Katkıda bulunmaktan çekinmeyin!