LED strip lights are popular in homes and businesses. They are flexible and save energy. However, as with any technology, they’re prone to issues that require troubleshooting. This guide explains the most common problems with LED strips and how to fix them.
Homeowners and businesses need to understand the common issues with LED strip lights. A LED strip that is well taken care of can save money and keep your space looking nice and working well.
Common Issues Affecting LED Strip Lights
An Introductory Note on Why LED Strip Lights Fail
LED strip failure can occur from manufacturing issues, improper installation, or regular use. Knowing what to look for can save you time and hassle.
Problem 1: Why Are My LED Strip Lights Flickering?
Causes
Voltage Issues: One of the most common reasons for flickering LED strip lights is an inconsistency in voltage. Voltage fluctuations can cause the LEDs to respond by flickering, casting a less-than-desirable light output.
Poor Wiring: Substandard or damaged wiring can introduce electrical resistance, impacting the current flow to the LEDs and leading to flickering issues.
Damaged LED Chips: Aging or physically damaged LED chips can compromise the overall circuitry, making the lights susceptible to flickering.
Solutions
Adjust Voltage: Use a voltmeter to check if the voltage aligns with the manufacturer’s specifications for your LED strip. If there’s a mismatch, adjust the settings on your power supply.
Check Wiring: Perform a comprehensive wiring check to identify any loose or damaged connections. If found, either tighten the connections or replace the wiring altogether.
Replace Damaged Chips: Target and replace any visibly damaged LED chips causing the flickering, restoring the circuit’s integrity.
Problem 2: Why Is the Brightness on My LED Strip Inconsistent?
Causes
Power Imbalance: Variations in brightness often signal a power imbalance across the LED strip, generally due to uneven voltage distribution.
Long Strip Lengths: Extended lengths of LED strips are prone to voltage drop, which manifests as reduced brightness towards the end of the strip.
Aging LEDs: LEDs can dim over time due to wear and tear, resulting in uneven brightness across the strip.
Solutions
Use Amplifiers: Installing amplifiers at certain intervals along the LED strip can help balance out the voltage distribution, ensuring consistent brightness.
Multiple Power Supplies: Utilizing more than one power supply for notably long strips can mitigate voltage drop and brightness inconsistency.
Replace Aging LEDs: If some sections are dimmer due to aged LEDs, consider replacing those specific portions to maintain a uniform brightness.
Problem 3: What Causes Color Inconsistencies in LED Strip Lights?
Causes
Poor Color Mixing: Inconsistent colors can arise due to hardware issues, like poor color mixing mechanisms within the LED strip.
Defective RGB Controller: A malfunctioning RGB controller can disrupt color consistency.
Software Glitches: Sometimes, the issue may be as simple as a software bug causing erratic color changes.
Solutions
Reset Settings: Try reverting to the factory settings to see if that solves the color inconsistency.
Replace RGB Controller: If the default settings don’t work, your next move should be to replace the faulty RGB controller.
Update Firmware: Ensure your LED strip’s firmware is up-to-date to prevent software-related color inconsistencies.
Problem 4: Why Won’t My LED Strip Lights Turn On?
Causes
Dead Power Supply: If your LED strip lights aren’t turning on, a dead power supply could be the issue.
Faulty Switch: A malfunctioning switch can also prevent the LED strip from powering up.
Disconnected Wires: Sometimes, a simple disconnection in the wiring could be the reason behind the lack of power.
Solutions
Replace Power Supply: Inspect your power supply to see if it’s functional. Replace if needed.
Test and Replace Switch: A quick switch test can tell you if it’s time for a replacement.
Inspect Wiring: Make sure all connections are secure and fully inserted.
Problem 5: My LED Strip Lights Are Overheating
Causes
Lack of Cooling: Overheating can result from insufficient cooling measures, creating a potential fire hazard.
Overvoltage: Supplying too much voltage than required can cause the LED strip to overheat.
Extended Usage: Running LED strips for long periods without breaks can lead to overheating issues.
Solutions
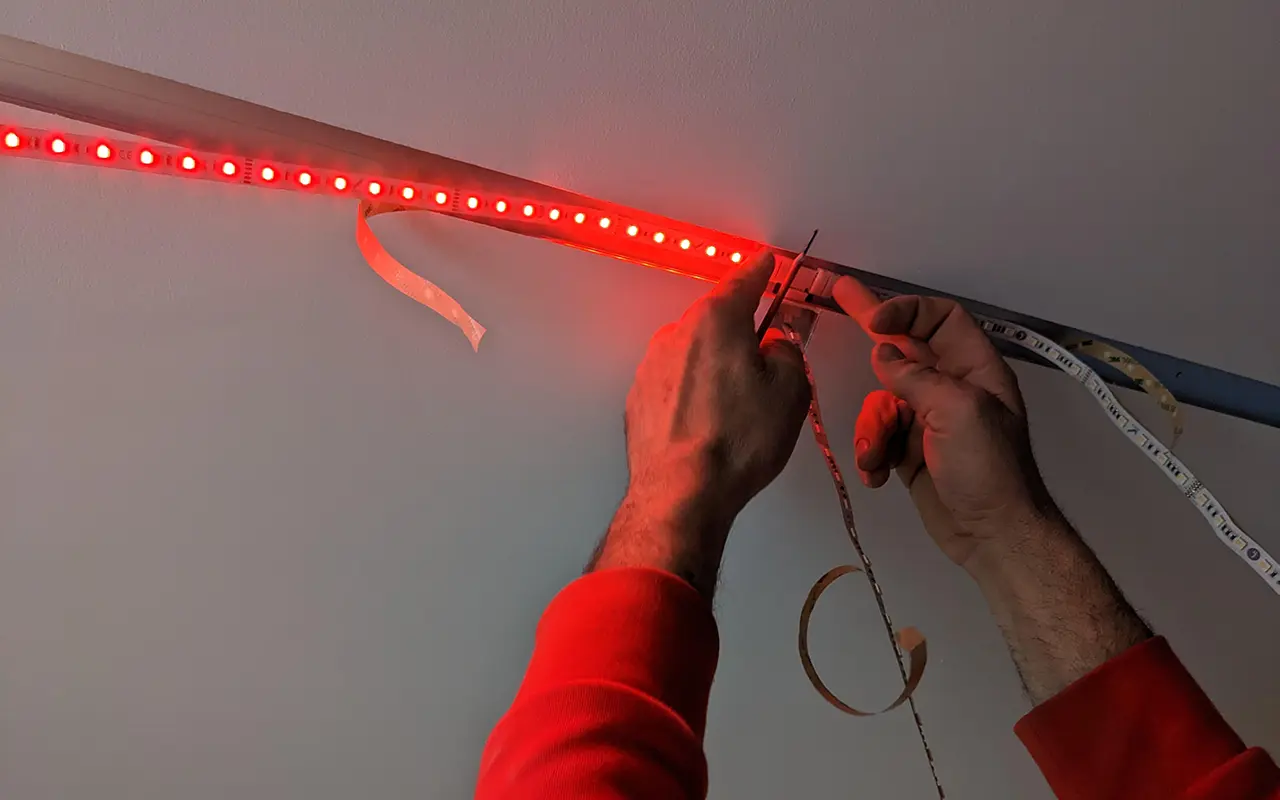
Use Heat Sinks: Implementing heat sinks/aluminum profiles can effectively disperse excess heat, reducing the chances of overheating.
Adjust Voltage: Ensure your voltage settings align with the LED strip specifications to avoid overheating.
Limit Operation Time: Do not run the LED strips continuously for extended periods; give them time to cool off.
Problem 6: LED Strip Lights Have Dead Pixels
Causes
Faulty LEDs: The most straightforward reason for dead pixels is simply that the LED lights themselves are faulty. This could be due to manufacturing errors or a malfunction after a period of use.
Damaged Circuits: Damaged or malfunctioning circuits can interrupt the flow of electricity, leading to individual or multiple dead pixels along the strip.
Manufacturing Defects: In some unfortunate cases, the product itself may have left the factory with these issues. Quality control lapses can result in dead pixels even before the strip is turned on for the first time.
Solutions
Replace LEDs: The first step is to identify the faulty LEDs and replace them. Most LED strips are designed for easy individual LED replacement.
Repair Circuits: If the circuit board is damaged, you may need to solder it or get a professional to replace the circuitry.
Return for Warranty Claim: If your LED strip is under warranty, consider making a claim. Manufacturers often cover dead pixels under their policies.
Problem 7: LED Strip Lights Connectivity Issues
Causes
Poor Connections: Connectors or wiring might be loose, frayed, or improperly seated, disrupting the electrical current.
Obstructions: Physical barriers like furniture or walls can interfere with signal transmission if you’re using wireless LED strip lights.
Interference: Other electronic devices can emit frequencies that disrupt your LED strip’s connectivity.
Solutions
Reseat Connectors: Ensure all connections are secure and appropriately seated to restore an uninterrupted electrical current.
Remove Obstructions: For wireless LED strips, ensure the line of sight is clear from the controller to the LED strip.
Isolate Interference Sources: Identify and move other electronics that could be causing disruptions. Alternatively, consider using a frequency that doesn’t conflict with other devices.
Problem 8: LED Strip Lights Emit Burnt Smell
Causes
Electrical Malfunction: A burnt smell often indicates a severe issue like an electrical malfunction, which poses an immediate safety risk.
Overheating: Constantly running the LED strip at maximum brightness can lead to overheating and, consequently, a burnt smell.
Short Circuits: A short circuit in the LED strip or power supply can also emit a burnt smell and is a severe issue.
Solutions
Unplug and Inspect: Immediately unplug the LED strip and inspect for burnt components.
Replace Damaged Components: Identify and replace any components that show visible signs of damage.
Consult an Electrician: If you can’t identify the problem, it’s time to consult a certified electrician for a comprehensive examination.
Problem 9: LED Strip Lights Emit Buzzing Noise
Causes
Bad Power Supply: If the power supply is not up to standard, it can cause a buzzing noise due to instability.
Voltage Mismatch: A mismatch between the voltage output from the power supply and the LED strip can cause a buzzing sound.
Defective LEDs: In rare cases, LEDs can be faulty, emitting noise.
Solutions
Replace Power Supply: Invest in a high-quality power supply that matches your LED strip specifications.
Adjust Voltage: Ensure your power supply’s voltage matches your LED strip’s voltage requirements.
Replace Defective LEDs: After identifying the problematic LEDs, replace them to eliminate the buzzing noise.
Problem 10: LED Strip Lights Have Intermittent Lighting
Causes
Loose Wiring: Wires that need to be securely fastened can interrupt the light display.
Fluctuating Voltage: A constantly changing voltage can lead to intermittent lighting, affecting performance.
Overloaded Circuits: When too many devices are connected to the same circuit, the circuit may overload, causing intermittent lighting.
Solutions
Secure All Wires: Double-check all wire connections and fasten any loose ends.
Stabilize Voltage: A voltage stabilizer can help maintain a consistent supply, enhancing LED performance.
Avoid Circuit Overload: Calculate the total wattage your circuit can handle and ensure you’re staying within it.
Problem 11: LED Strip Lights Have Poor Wi-Fi Connection
Causes
Wi-Fi Interference From Other Devices: Your LED strip lights might experience poor Wi-Fi connectivity due to multiple devices fighting for the same bandwidth. Think smartphones, smart TVs, and even microwave ovens.
Poor Wi-Fi Signal Strength: An LED strip far from the Wi-Fi router can suffer from a weakened signal, causing spotty performance or even disconnection.
Outdated Firmware: Sometimes, the software that powers your LED strip needs to be updated, reducing its ability to maintain a stable Wi-Fi connection.
Solutions
Change Wi-Fi Channels to Avoid Interference: Switching to a less crowded Wi-Fi channel can make all the difference. Use a Wi-Fi analyzer app to identify the best channel for your setup.
Move the Router Closer to the LED Strip: The closer your router is to your LED strip, the stronger the signal will be. Aim to minimize the distance and physical obstructions between them.
Update Firmware: Visit the manufacturer’s website for the latest firmware update. These updates often include performance enhancements and bug fixes.
Problem 12: Cannot Reset LED Strip Lights
Causes
Controller Glitch: Sometimes, the controller itself may malfunction, preventing the reset process.
Faulty Reset Button: If pressing the reset button accomplishes nothing, the button could be damaged or non-responsive.
User Error: Incorrect reset procedures can also be the culprit. You’re unlikely to achieve a successful reset if you don’t follow the steps precisely.
Solutions
Perform a Hard Reset: In some cases, performing a hard reset—which often involves unplugging the LED strip, waiting a set time, and plugging it back in—can resolve the issue.
Check and Replace the Reset Button: If the button isn’t functioning, you may need to replace it or have it repaired by a professional.
Follow the Reset Instructions Carefully: Consult the user manual or the manufacturer’s website to ensure you follow the recommended reset steps.
Problem 13: LED Strip Lights Show No Red Color
Causes
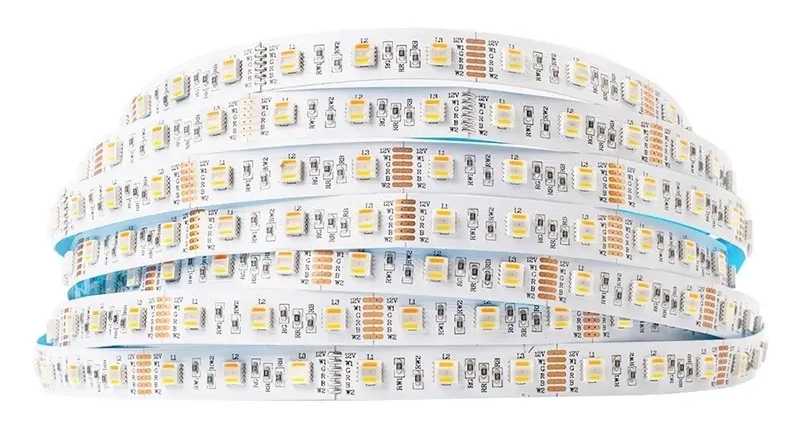
RGB Channel Fault: The absence of red could be due to a malfunction in the Red channel of the RGB (Red, Green, Blue) spectrum on your LED strip.
Damaged LED Diodes: Individual LEDs can be faulty or damaged, affecting the display of the red color.
Wiring Issues: Poor or incorrect wiring can also result in an absence of red in the light spectrum.
Solutions
Replace the Faulty RGB Channel: Replacing the RGB chip responsible for emitting the red light might be necessary.
Check and Replace Damaged Diodes: To find the problem, check each diode and replace any that don’t work properly.
Inspect and Correct Wiring: Ensure that all wires are correctly connected and in good condition. A loose wire can interrupt the RGB channel, causing color inconsistencies.
Problem 14: LED Strip Lights Incorrect Alexa Commands
Causes
Miscommunication Between Alexa and LED Strip: A misconfigured connection can sometimes lead to command errors between Alexa and your LED strip.
Incorrect Setup: Improper initial setup can also cause misunderstandings between the Alexa device and the LED strip.
Voice Recognition Issues: If Alexa needs help understanding you, it may execute the wrong commands for your LED strip.
Solutions
Reconfigure Alexa and LED Strip Connection: Ensure that the LED strip is correctly synced with Alexa by revisiting the setup process.
Double-Check Setup: Review each initial setup step to find and fix any errors causing command issues.
Train Alexa for Better Voice Recognition: Using the Alexa app, you can run through voice training exercises to improve Alexa’s ability to understand you.
Problem 15: LED Strip Lights Dimming Issues
Causes
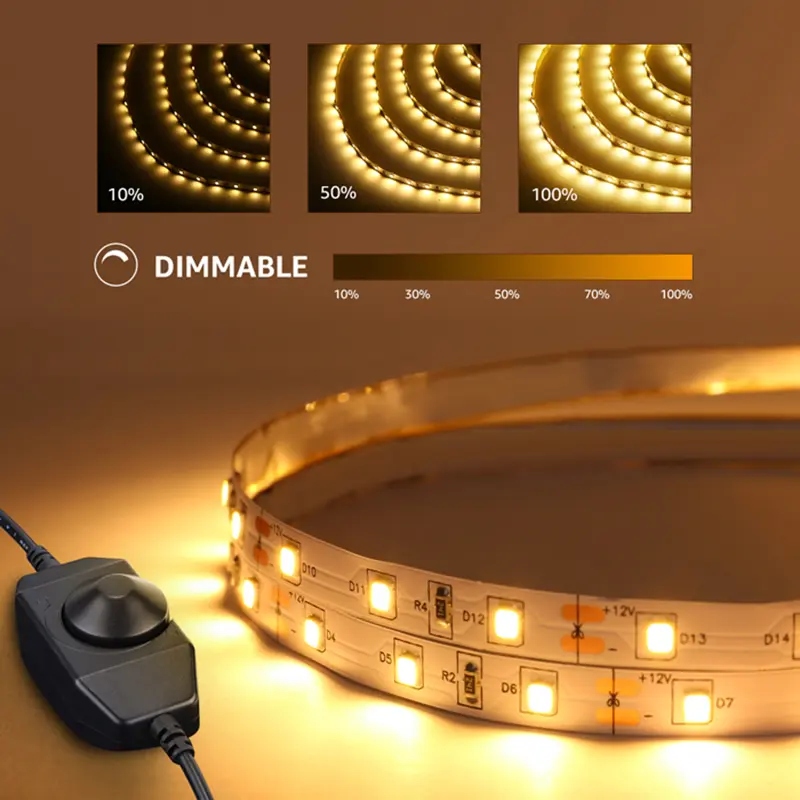
Incompatible Dimmer: Using a dimmer that isn’t compatible with your LED strip can result in inconsistent or non-existent dimming.
Fluctuating Voltage: An inconsistent voltage supply can cause flickering or unstable dimming on your LED strip.
Software Bugs: Sometimes, a glitch in the LED strip’s software can cause dimming issues.
Solutions
Replace with a Compatible Dimmer: Consult your LED strip’s manual to find a dimmer that is guaranteed to be compatible.
Stabilize Voltage: Use a voltage stabilizer or a regulated power supply to provide consistent power to the LED strip.
Update or Reset Software: Check for software updates from the manufacturer or perform a software reset to clear any bugs affecting dimming.
Problem 16: LED Strip Lights Flashing at Startup
Causes
Power Surge: Voltage spikes in your electrical system can lead to flashing LED strip lights during startup. Other power-hungry devices can cause these surges in your home.
Bad Power Supply: An inferior or damaged power supply unit (PSU) can fail to provide consistent power, causing the LED strip lights to flash when turned on.
Initial Calibration: Some LED strips undergo a brief calibration process during startup, which might present as flashing lights.
Solutions
Use Surge Protection: Invest in high-quality surge protectors to shield your LED strip lights from harmful voltage spikes.
Replace Power Supply: If you suspect the PSU is the culprit, switch it to a reliable unit compatible with your LED strips.
Wait for Calibration to Complete: A simple wait-and-see approach is recommended if the flashing is due to initial calibration. If it persists, consult the manufacturer’s support.
Problem 17: LED Strip Lights Sudden Shutdowns
Causes
Overcurrent: An excessive flow of electricity can trigger safety mechanisms, causing abrupt LED strip shutdowns.
Overheating: Poor ventilation or high ambient temperature can cause LED strips to overheat, leading to automatic shutoffs.
Unstable Power Supply: Inconsistent power delivery can also lead to unexpected shutdowns of your LED strips.
Solutions
Install Resistors to Manage the Current: Incorporating resistors in the circuit can help control the current and prevent overflows.
Improve Ventilation: Ensure that the LED strips are installed in well-ventilated areas to minimize overheating.
Stabilize Power Supply: Utilize voltage stabilizers to provide a consistent electrical supply to the LED strip lights.
Problem 18: LED Strip Lights Control App Crashes
Causes
Software Bugs: Programming errors in the app could cause it to crash frequently.
Incompatibility: If the app is designed for something other than your mobile device’s OS, crashes are likely.
Mobile Device Issues: Your smartphone or tablet itself may have issues causing app instability.
Solutions
Update the Control App: Always keep the control app up-to-date. Manufacturers frequently roll out bug fixes and stability improvements.
Check Device Compatibility: Ensure your mobile device meets the minimum requirements specified for the app.
Reinstall App: Uninstalling and then reinstalling the app can sometimes resolve persistent issues.
Problem 19: LED Strip Lights Fail to Sync with Music
Causes
Software Issue: Sometimes, the software responsible for the music-syncing feature may need fixing or updating.
Poor Microphone Sensitivity: If your LED strips use a built-in microphone to sync with the music and it’s not sensitive enough, syncing issues can occur.
Incorrect Settings: You may have chosen settings that aren’t compatible with the music-sync feature.
Solutions
Update or Reset the Software: The latest software versions often come with patches that fix existing issues.
Calibrate Microphone: Access the app’s settings to calibrate the microphone for better sensitivity.
Double-Check Settings: Ensure that you have selected the correct mode or settings for music synchronization.
Problem 20: Moisture Damage in LED Strip Lights
Causes
Water Exposure: Contact with water can cause immediate or gradual damage to your LED strip lights.
Poor Sealing: Improper sealing leaves the LED strips vulnerable to water and moisture.
High Humidity: Areas with high moisture content in the air can also damage LED strips over time.
Solutions
Seal LED Strips with Silicone: Use silicone sealant to create a water-resistant barrier around your LED strips.
Use Water-Resistant Strips: Opt for LED strips that are designed to be water-resistant for installation in moisture-prone areas.
Control Environmental Humidity: Employ a dehumidifier in the room where your LED strips are installed to maintain a moisture-free environment.
Problem 21: LED Strip Lights High Energy Consumption
Causes
Excessive Brightness: Cranking up the brightness on your LED strip lights not only illuminates your space but also your energy bill. Higher brightness levels mean more power consumption.
Inefficient LEDs: All LEDs are not created equal. Older LED models use more power than newer ones, which are more efficient.
Continuous Usage: Keeping the LED strip lights on 24/7 is a surefire way to see a spike in your electricity costs.
Solutions
Lower Brightness Levels: You can save energy by dimming your LED strip lights, while still keeping them bright.
Use Energy-Efficient LEDs: Opt for LEDs that have a high lumens-per-watt ratio. These not only cut down your electricity bill but also offer better brightness.
Implement Timers to Reduce Usage: Using smart plugs or built-in timer functionalities can automate your LED lights, turning them off when not needed.
Problem 22: LED Strip Lights Show Non-uniform Colors
Causes
Unequal RGB Inputs: If your LED strip lights display inconsistent colors, unequal RGB (Red, Green, Blue) inputs might be the culprit.
Calibration Issues: Improper color calibration can lead to LEDs showcasing an off-kilter color spectrum.
Inconsistent LED Quality: Some LEDs on the strip need to be improved in quality, causing discrepancies in color output.
Solutions
Balance RGB Inputs: Utilizing an application or remote that offers RGB customization will let you balance colors manually.
Calibrate Colors: Some LED strips come with a calibration function; use it to harmonize the colors.
Replace Inconsistent LED Sections: If certain portions of the LED strip are discolored, consider replacing those sections with new, high-quality LEDs.
Problem 23: LED Strip Lights Color Calibration Off
Causes
Wrong Settings: Mishandling the settings menu could leave you with inaccurate colors.
Firmware Bugs: If the device firmware is buggy, your color output could be affected.
Inaccurate Sensors: Faulty or low-grade sensors can miscalibrate the color outputs.
Solutions
Manually Calibrate Colors: Dive into the settings to manually adjust the color to your preference.
Update Firmware: Manufacturers often release firmware updates that can resolve existing glitches, including color calibration issues.
Check and Adjust Sensors: If your LED strips come with built-in sensors, ensure they function correctly. You may need to clean or replace them.
Problem 24: LED Strip Lights Remote Won’t Pair
Causes
Signal Interference: Electronics or other nearby devices could be interfering with the remote’s signal.
Out-of-Range: Being too far away from the LED strip could make pairing unsuccessful.
Faulty Remote: Sometimes, the issue lies with the remote itself being damaged or dysfunctional.
Solutions
Pair Closer to the LED Strip: Bring the remote closer to the LED strip and attempt to pair again.
Check for Signal Interference: Identify and remove or reposition devices that could be causing signal interference.
Replace Faulty Remote: If the remote is at fault, purchase a new one compatible with your LED strip lights.
Problem 25: LED Strip Lights Emit Light Leaks
Causes
Poor Installation: Hasty or incorrect installation could leak light along the LED strip at various points.
Damaged LED Casing: A cracked or damaged casing can also cause light to escape where it shouldn’t.
Subpar LED Quality: Lower-grade LEDs often have inferior casings that are prone to light leakage.
Solutions
Use Channel Guides for Installation: Investing in channel guides can make the installation process foolproof, reducing the chances of light leaks.
Replace Damaged Casing: If you identify damaged casings, consider replacing those sections of the LED strip.
Use Higher-Quality LEDs: Opt for premium LED strips that come with robust casings designed to eliminate light leaks.
Problem 26: LED Strip Lights Power Fluctuations
Causes
Bad Power Source: If you use an unstable power source, your LED strip lights might blink or dim unexpectedly.
Loose Connections: Loose or frayed wires can cause inconsistent energy flow, leading to intermittent light behavior.
Overloaded Circuits: If you connect too many powerful devices to your circuit, it can cause power fluctuations.
Solutions
Use a Stable Power Source: Invest in a reliable and steady power source. Uninterruptible Power Supplies (UPS) can provide stable power and act as a safeguard.
Tighten Electrical Connections: Check and secure all electrical connections. If in doubt, consult an electrician for a professional diagnosis and solution.
Ensure Circuit Isn’t Overloaded: Be mindful of the devices connected to the same circuit as your LED strip lights. Use a circuit tester to determine if you’re approaching overload.
Problem 27: LED Strip Lights Short Life Span
Causes
Overuse: Running your LED strip lights for extended periods can reduce their life span, leading to quicker burnout.
Inadequate Heat Dissipation: LEDs produce heat, and without proper ventilation, this heat can accumulate, reducing the longevity of the lights.
Cheap Quality LEDs: Cheap LEDs last less time because they are made with worse materials and craftsmanship.
Solutions
Limit Usage: Utilize smart timers to automatically switch off the lights after a certain period, thereby extending their life span.
Improve Ventilation: Make sure there are enough heat sinks or ventilation around the LED strip setup. This will help the heat to go away effectively.
Invest in Quality LEDs: Don’t compromise on quality. High-grade LEDs might cost more upfront but save you in the long run with their extended life span.
Problem 28: LED Strip Lights Emit Flicker During Dimming
Causes
Driver Mismatch: Incompatible drivers can create flickering issues, particularly during dimming operations.
Voltage Instability: Inconsistent voltage supply can lead to flickering when you try to dim your LED strip lights.
Software Glitches: Firmware or software inconsistencies can result in erratic dimming behavior, causing flickers.
Solutions
Use a Compatible Driver: Ensure you’re using a driver that is fully compatible with your LED strip lights to achieve smooth dimming.
Stabilize Voltage: A stable power supply can mitigate voltage-related flickering issues. Consider installing a voltage stabilizer if necessary.
Update or Reset Software: Keep your LED strip’s firmware up-to-date. A simple software reset can also solve many flickering issues.
Problem 29: LED Strip Lights Emit Static Sound
Causes
Electrical Noise: Electrical interference or “noise” can produce an annoying static sound from your LED strip lights.
Poor Quality Power Supply: Low-grade power supplies might not filter out electrical noise, contributing to the static sound.
Bad Grounding: A poorly grounded system can also result in electrical noise and static sound.
Solutions
Use Electrical Noise Filters: Installing noise filters can reduce electrical interference and minimize static sound.
Replace Power Supply: A good power supply can remove electrical noise, reducing static sound.
Check and Improve Grounding: Proper grounding can eliminate many electrical issues, including static noise. Consult an electrician for best practices.
Problem 30: LED Strip Lights Don’t Respond to Remote
Causes
Dead Batteries: The most common cause for remote failure is a lack of power due to dead batteries.
Signal Obstruction: Objects or walls between the remote and the LED strip can disrupt the signal, making the remote unresponsive.
Faulty Remote Sensor: If the sensor on the LED strip is faulty, the remote cannot communicate with it.
Solutions
Replace Batteries: Check the remote’s batteries and replace them if needed. It’s a simple but often overlooked step.
Remove Any Obstructions: Ensure no objects block the signal path between the remote and the LED strip lights.
Replace or Repair the Remote Sensor: If the issue persists, inspect the LED strip’s sensor. It may need to be repaired or replaced.
Problem 31: LED Strip Lights Emit Static Shock
Causes
Static Buildup: When LED strip lights rub against materials like plastic or glass, they can collect static electricity.
Dry Environment: If the air is not humid, static electricity can build up and you might get shocked.
Insufficient Grounding: Without proper grounding, static electricity can build up more quickly on the strip lights, posing a risk of shocks.
Solutions
Use Anti-Static Mat: Place an anti-static mat beneath the LED strip lights to minimize the buildup of static electricity.
Increase Humidity: Consider using a humidifier in the room where the LED strip lights are installed. Higher humidity can help disperse static electricity.
Ensure Proper Grounding: Ensure your LED strip lights are properly grounded to minimize the risk of static buildup. If you need more clarification, consult an electrician for professional guidance.
Problem 32: LED Strip Lights Show Delay in Response
Causes
Latency in the Control System: The built-in control system may have inherent latency that delays responsiveness.
Weak Wi-Fi Signal: In smart LED systems, a weak Wi-Fi signal can create a lag in command execution, making your lights slow to react.
Overloaded Processor: If the smart controller’s processor is overwhelmed, it could cause noticeable delays in light response.
Solutions
Check Connections: Check all connections between the control system and LED strips for any physical issues causing delay.
Strengthen Wi-Fi Signal: Move your router closer to the LED system or use a Wi-Fi extender to boost the signal, thus reducing lag.
Reduce System Load: To make your smart controller faster, close any extra apps or tasks that are running.
Problem 33: LED Strip Lights Don’t Sync with External Devices
Causes
Compatibility Issues: The LED strip lights might not be compatible with the external devices you’re trying to connect them to.
Outdated Firmware: Old firmware can lead to sync failures due to incompatible or missing functionalities.
Network Issues: Weak or unstable network conditions can hamper effective syncing between devices.
Solutions
Check Device Specs: Ensure your LED strip lights are compatible with the external device. Look for certified compatibility marks.
Update Firmware: Update both your LED system and the external device to the latest firmware versions to enable seamless integration.
Resolve Network Issues: Check your network stability and eliminate any connectivity bottlenecks causing syncing issues.
Problem 34: LED Strip Lights Poor Adhesion
Causes
Bad Adhesive: The built-in adhesive may be of low quality, failing to maintain a strong bond over time.
Dirty Surface: You must clean the surface before mounting to maintain the adhesive’s effectiveness.
Adhesive Deterioration: Over time, even good-quality adhesives can lose their sticking power due to environmental factors.
Solutions
Use Additional Adhesives: Apply supplemental high-quality adhesive tape or glue to ensure a long-lasting bond.
Clean the Surface Before Mounting: Thoroughly clean and dry the mounting surface to improve adhesion quality.
Use Adhesive Primer: Consider applying an adhesive primer before mounting the LED strips for challenging surfaces.
Problem 35: LED Strip Lights Emit No Blue Light
Causes
Blue Channel Fault: A malfunction in the blue channel of your LED strip could be the root cause of the absence of blue light.
Driver Issue: A faulty or incompatible driver can disrupt the blue channel’s functionality, leading to a lack of blue illumination.
Connection Problem: Loose or corroded connections could disrupt the flow of electricity to the blue LEDs.
Solutions
Replace Blue Channel: If the blue channel is faulty, it may require replacement. Check the manufacturer’s guidelines for this process.
Check/Replace Driver: Inspect the driver for any issues. If needed, replace it with a compatible unit to restore full functionality.
Secure Connections: Review all wiring connections to the blue channel and tighten any loose or corroded connectors.
Problem 36: LED Strip Lights Emit Rattling Sound
Causes
Loose Internal Components: LED strip lights may make a rattling sound if the inside parts come loose. This can happen from being used a lot or if they were made poorly.
Vibrating Casing: Suppose the casing or enclosure around the LED strip needs to be adequately secured. In that case, it may vibrate at specific frequencies, producing a rattling sound.
Defective LEDs: Individual LED bulbs that have become defective might make a rattling noise as they lose their structural integrity.
Solutions
Tighten Internal Components: Use a screwdriver or the right tool to fix loose parts and stop the noise. Make sure the power is off before doing this.
Secure Casing: Check the casing or enclosure for looseness and secure it with the appropriate hardware to prevent vibrations.
Replace Defective LEDs: If the rattling sound originates from specific LED bulbs, consider replacing them to resolve the issue.
Problem 37: LED Strip Lights Not Responsive to Mobile App
Causes
App Bugs: Your LED control app may have glitches that prevent smooth communication with your LED strips.
Wi-Fi Issues: If your Wi-Fi network is unstable, this could disrupt the app’s ability to control the LED strip lights.
Outdated App Version: If you use an old version of the control app, it might not work well or have all the features.
Solutions
Update or Reinstall the App: Keep your app updated to the latest version. If issues persist, try reinstalling the app.
Check Wi-Fi Signal: Ensure a stable Wi-Fi connection by moving closer to the router or using a signal booster.
Clear App Cache: Clear the app’s cache to remove any temporary files that might be causing performance issues.
Problem 38: LED Strip Lights Show Yellowing
Causes
Aging: Over time, the materials used in LED strips may naturally degrade, leading to yellowing.
Heat Exposure: Constant exposure to high temperatures can cause the strip material to turn yellow.
UV Radiation: Exposure to UV rays can also accelerate the yellowing process, especially if the LED strips are not made of UV-resistant materials.
Solutions
Replace Aged Strips: If the LED strips are old, consider replacing them with new, higher-quality ones that are less likely to yellow.
Reduce Heat Exposure: Try to minimize the LED strips’ exposure to heat by avoiding placement near heat sources.
Use UV-Resistant Materials: To avoid yellowing, choose UV-resistant LED strips for installations in sunlight.
Problem 39: LED Strip Lights Blink in Sequence
Causes
Software Glitch: The software controlling your LED strips might be experiencing a glitch, causing the lights to blink in sequence.
Timer Settings: Incorrect timer settings could also make the LED strips blink in a pattern.
Circuit Issues: If the wiring or circuit parts are not working properly, the lights might blink in a certain order.
Solutions
Reset Software: Try resetting the software or control system responsible for the LED strips to fix glitches.
Correct Timer Settings: Please review and adjust timer settings to ensure they are programmed as desired.
Check Circuitry: Inspect the circuitry and replace any damaged components or fix any wiring issues that could be causing the problem.
Problem 40: LED Strip Lights Emit Smoke
Causes
Overheating: Inadequate ventilation or proximity to heat sources can cause the LED strip lights to overheat and emit smoke.
Electrical Short: A short circuit within the electrical system can cause overheating and subsequent smoke emission.
Defective Components: Faulty LEDs or other internal components may emit smoke as they fail.
Solutions
Turn Off and Inspect Immediately: If you notice smoke, immediately turn off the LED strip lights and inspect for any visible damage.
Replace Faulty Components: Identify and replace any defective components that could be causing the problem.
Check for Proper Ventilation: Ensure the LED strip lights are well-ventilated and not near any heat sources to reduce the risk of overheating.
Problem 41: LED Strip Lights Fail to Connect to Wi-Fi
Causes
Incorrect Wi-Fi Settings: If your LED strip lights aren’t connecting to Wi-Fi, one common issue might be incorrect network settings. You should have remembered the Wi-Fi password or selected the wrong network frequency (2.4GHz vs. 5GHz).
Router Overload: If too many devices are connected to one router, it can cause network congestion. This makes it hard for your LED strips to have a stable connection.
Signal Interference: Thick walls or other devices can disrupt Wi-Fi, making it lose connection.
Solutions
Reconfigure Wi-Fi Settings: Double-check your network credentials. Ensure you’re connecting to the correct network and inputting the valid password.
Restart Router: Restarting a router can fix connection problems by refreshing its memory and reconnecting.
Remove Interference Sources: Find and move or remove any devices that might disrupt the Wi-Fi signal. You could also try using a Wi-Fi extender to make the signal stronger.
Problem 42: LED Strip Lights Turn Off Randomly
Causes
Incorrect Timer Settings: If your LED lights turn off unexpectedly, it might be because your timer settings are wrong. This can cause them to shut down early.
Power Fluctuations: Voltage dips or spikes in your power supply could lead to inconsistent lighting behavior.
Faulty Sensors: Faulty or overly sensitive motion or light sensors can cause your LED strip lights to turn off without notice.
Solutions
Disable or Correct Timer Settings: Review your timer settings and adjust them as necessary. Turn off the timer feature if you don’t require it.
Stabilize Power Supply: To keep your LED lights safe from power fluctuations, get a surge protector or UPS device.
Check Sensors: Test your motion or light sensors to ensure they are functioning correctly. Replace them if they are faulty.
Problem 43: LED Strip Lights Emit a Humming Sound
Causes
Voltage Mismatch: If your LED strip lights are humming, a likely cause is a mismatch between the voltage of the lights and the power supply.
Poor-Quality Transformer: A low-quality or failing transformer can also produce a humming sound.
Harmonic Distortion: Electrical noise from other devices on the same circuit can cause harmonic distortion, resulting in a humming sound.
Solutions
Use a Matched Power Supply: Ensure that your power supply matches the voltage requirements of your LED strip lights.
Replace Transformer: To get rid of the humming sound, buy a good transformer that matches your LED strip lights.
Use Harmonic Filters: You may employ harmonic filters that reduce electrical noise to mitigate harmonic distortion.
Problem 44: LED Strip Lights Are Too Dim
Causes
Low Voltage Supply: Inadequate voltage can result in dim LED lights.
Fading LEDs: LED quality can degrade over time, leading to dimming.
Poor Connections: Loose or corroded connections can also contribute to dim lighting.
Solutions
Use a Higher Voltage Power Supply: Opt for a power supply with sufficient voltage for your LED strip lights.
Replace Fading LEDs: If LEDs have faded over time, replace them with new, high-quality LEDs.
Secure Connections: Check and tighten any loose or corroded electrical connections.
Problem 45: LED Strip Lights Are Too Bright
Causes
High Voltage Supply: Supplying too much voltage to the LED strips can result in excessive brightness.
Lack of Resistors: The current may be effectively controlled with adequate resistors, leading to brighter lighting.
Incorrect Settings: User-defined settings in the control module could also make the lights overly bright.
Solutions
Use a Lower Voltage Power Supply: Switch to a power supply with lower voltage ratings to match your LED light requirements.
Install Resistors: Incorporate the appropriate resistors to control the current flow, reducing brightness.
Adjust Settings: Adjust the brightness on your control module or app to get the light level you want.
FAQs
What Causes LED Strip Lights to Malfunction Often?
LED strip lights may have problems with Wi-Fi, timers, or voltage. It’s essential to first identify the specific problem before seeking a solution. Often, issues can be resolved with a quick setting adjustment or component replacement.
How to Breathe Life Back into Unresponsive LED Strip Lights?
Check your power source and connections if your LED strip lights aren’t turning on. A hard reset often solves the issue. If not, it might be time to replace specific components like the power supply or controller.
Are LED Strip Lights Designed to Last? What’s Their Lifespan?
LED strip lights usually last a long time, but excessive use, high voltage, or damage can shorten their lifespan. To prolong their life, use them in moderation and adhere to the manufacturer’s guidelines.
What to Do When LED Strips Show Weird Color Patterns?
Inconsistent colors often stem from unequal RGB inputs or incorrect settings. Calibrating colors through your control device or balancing RGB inputs usually fixes the issue.
Is it Common for LED Strip Lights to Flicker or Dim?
Flickering or dimming can be due to driver mismatch or a poor power source. Ensure your LED strip lights are connected to a compatible and stable power source to avoid such issues.
Why Would LED Strip Lights Emit Unusual Sounds?
Humming or rattling sounds often signal a voltage mismatch or loose internal components. Correcting the voltage or tightening the parts can eliminate these noise issues.
How Do I Revive LED Strips That Are Half Lit?
If only half of your LED strip is illuminated, you might be dealing with a damaged section or a power issue. Replacing the faulty section or ensuring a stable power source usually brings back full illumination.
How Can I Test the Integrity of My LED Power Supply?
You can use a multimeter to check the voltage output to ascertain if your LED power supply works correctly. Make sure the readings align with the power supply’s specifications.
How to Correct Voltage Drops in LED Strip Lights?
Voltage drops can manifest as dimming or color inconsistency. You can correct this by using a higher-capacity power supply or installing a voltage booster.
What Precautions Should Be Taken to Avoid LED Strip Burnouts?
Never exceed the recommended voltage and current to avoid LED strip burnouts. Make sure to install resistors where needed and use a surge protector to safeguard against power spikes.
Conclusion
LED strip lights offer many advantages but are not immune to problems. This guide is your go-to resource for troubleshooting common issues. With this knowledge, you can enjoy a hassle-free experience with your LED strips.
Navigating LED strip light issues can be complex, but knowledge is power. If you still need help with hurdles, look no further than Unitop, one of China’s leading pioneers in LED strip lights and LED neon flex. With unparalleled expertise and cutting-edge solutions, we’re your go-to for any LED challenges. Don’t hesitate to contact us now to illuminate your world correctly. Your LED journey deserves the best, and Unitop is committed to delivering just that.

Tom is now the Sales Manager of Unitop (China) Co., Limited. He has been in the LED Lighting industry ever since 2005. He is an expert in sales & marketing, and factory management. He likes bodybuilding, and he is also a crazy Apple Fan! He is a hard-working guy and loves to learn and try new things.
Email: tom@unitopledstrip.com WhatsApp: +86-18680307140



Leave a Reply
Want to join the discussion?Feel free to contribute!