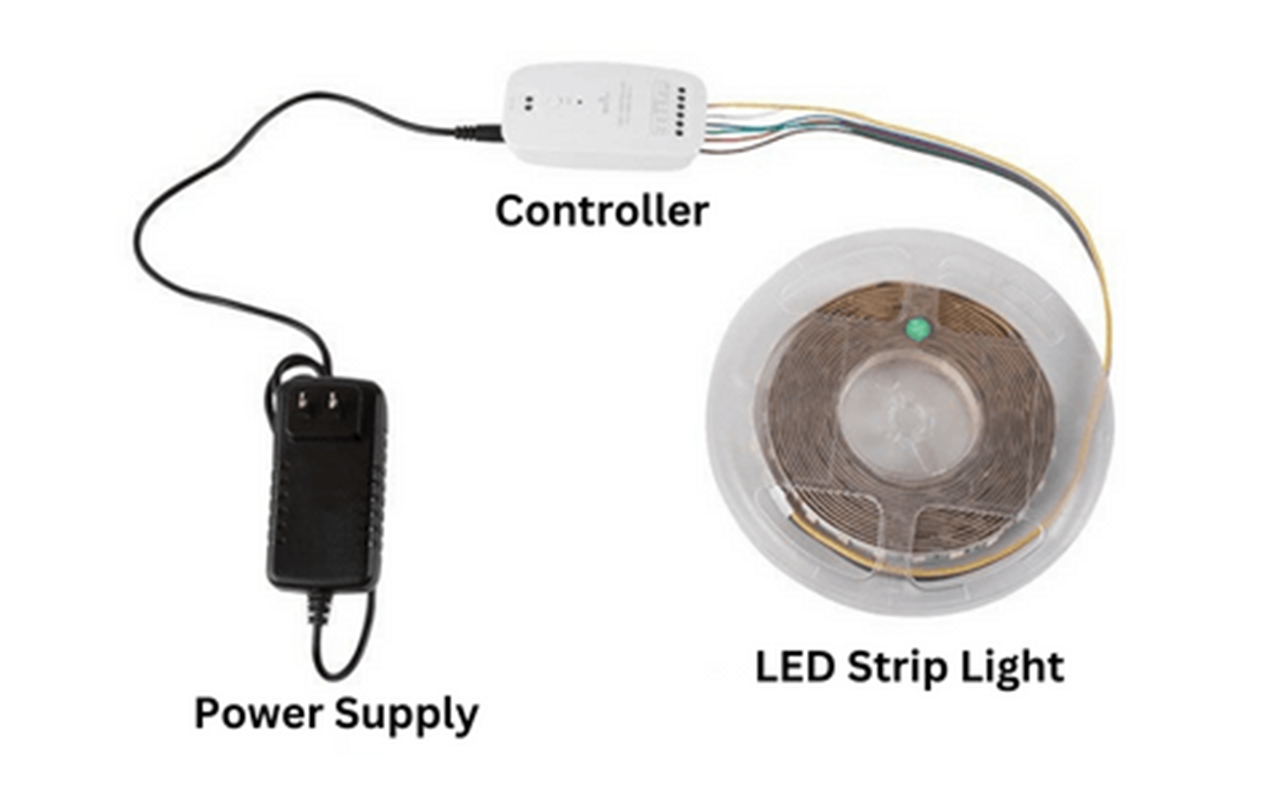
Розкрийте весь потенціал ваших світлодіодних стрічкових світильників за допомогою нашого експертного посібника з їхнього живлення без традиційної вилки. Наші перевірені методи забезпечать прості та ефективні рішення для досягнення ідеального освітлення будь-якого простору. Відкрийте для себе зручність і універсальність використання світлодіодних стрічкових світильників без традиційної вилки. У цьому посібнику наведено прості та ефективні методи живлення світлодіодних стрічок, які допоможуть вам досягти ідеального освітлення для будь-якого приміщення.
Щоб використовувати світлодіодні стрічки без вилки, підключіть їх до акумулятора, USB-пам'яті або сонячної батареї, під'єднайте безпосередньо до електромережі або використовуйте портативну електростанцію. Кожен з цих способів є універсальним та ефективним рішенням для живлення світлодіодних стрічок у різних умовах.
Ознайомтеся з детальними інструкціями та порадами, як увімкнути світлодіодну стрічку без вилки. Читайте далі, щоб дізнатися більше про кожен метод і знайти найкраще рішення для ваших потреб в освітленні.
Живлення світлодіодних стрічок за допомогою акумуляторної батареї
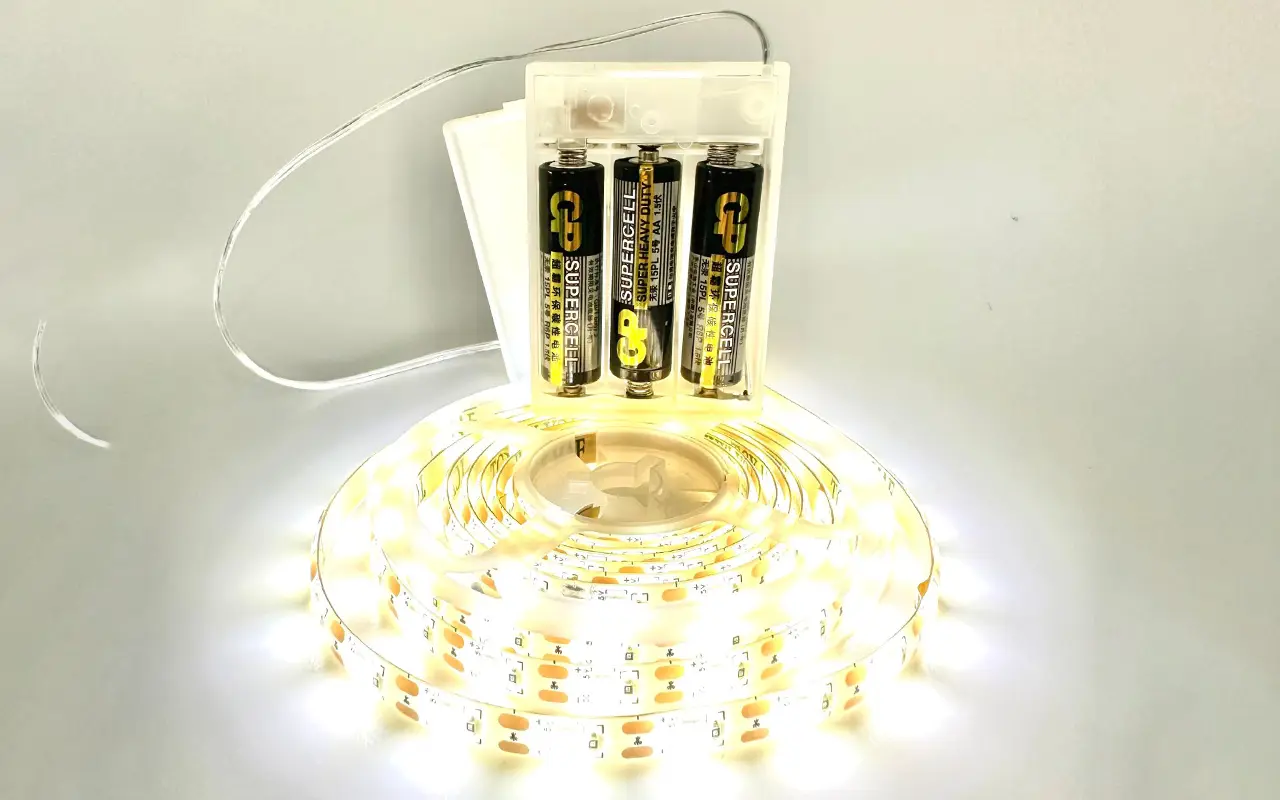
Використання акумуляторної батареї - це практичне та універсальне рішення для живлення світлодіодних стрічок без використання традиційної вилки. Цей метод особливо корисний для зовнішніх установок, тимчасових інсталяцій або в місцях, де немає легкого доступу до розеток. Ось детальний посібник, який допоможе вам налаштувати світлодіодні стрічкові світильники з батарейним блоком.
Виберіть правильний акумуляторний блок
Першим кроком є вибір відповідного акумуляторного блоку, який відповідає вимогам до напруги вашої світлодіодної стрічки. Більшість світлодіодних стрічок працюють на 12 або 24 В. Дуже важливо переконатися, що акумуляторний блок може забезпечити таку напругу, щоб уникнути пошкодження світлодіодів або недостатньої потужності. Крім того, слід враховувати ємність акумулятора, яка зазвичай вимірюється в міліампер-годинах (мАг). Чим вищий показник мАг, тим довше батарея може живити світлодіодні стрічки.
Наприклад, якщо у вас є 12-вольтова світлодіодна стрічка, шукайте 12-вольтовий акумулятор з ємністю, яка відповідає вашим потребам. Якщо ви плануєте тривале використання, наприклад, на заході або для довготривалої установки на вулиці, обирайте акумулятор більшої ємності, щоб уникнути частої підзарядки.
Підключіть світлодіодну стрічку
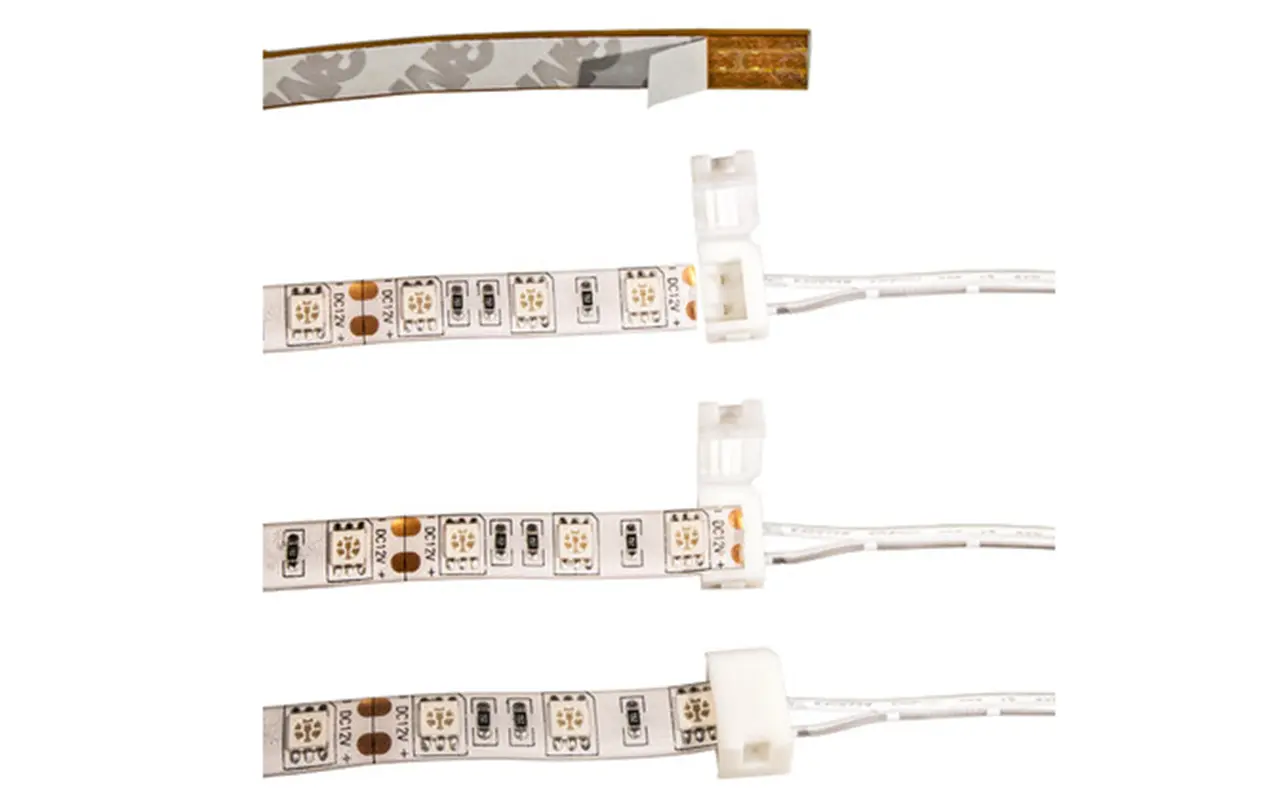
Після того, як ви придбали відповідний акумулятор, наступним кроком буде підключення світлодіодної стрічки. Більшість світлодіодних стрічок мають позитивну (+) і негативну (-) клему. Використовуючи сумісні роз'єми, з'єднайте ці клеми з відповідними клемами на акумуляторному блоці. Переконайтеся, що з'єднання надійні та надійно закріплені, щоб запобігти перебоям у подачі живлення.
Для більшої зручності ви можете використовувати швидкороз'ємні клеми або паяти з'єднання для більш постійної установки. Швидкороз'ємні клеми зручні для тимчасових налаштувань, оскільки вони дозволяють легко від'єднувати та під'єднувати, тоді як пайка забезпечує надійне та довговічне з'єднання, що ідеально підходить для довготривалого використання.
Захистіть з'єднання
Після підключення світлодіодної стрічки до акумуляторної батареї необхідно надійно закріпити з'єднання. Нещільне з'єднання може призвести до мерехтіння світла або періодичного відключення живлення. Ізоляційна стрічка щільно обмотує з'єднання, гарантуючи, що жоден оголений дріт не може спричинити коротке замикання. Для більш надійного та безпечного рішення припаяйте з'єднання і закрийте їх термоусадочною трубкою.
Перевірте налаштування
Перш ніж завершити інсталяцію:
Перевірте налаштування, щоб переконатися, що все працює правильно.
Увімкніть акумулятор і перевірте, чи рівномірно і послідовно світиться світлодіодна стрічка.
Якщо світло не вмикається, перевірте з'єднання і переконайтеся, що акумулятор заряджений. Якщо світлодіодна стрічка працює належним чином, можна приступати до її монтажу.
Регулювання та фіксація світлодіодної стрічки
Відрегулюйте розташування світлодіодної стрічки, щоб досягти бажаного світлового ефекту. Незалежно від того, чи ви підкреслюєте архітектурні особливості, чи створюєте навколишнє освітлення, чи прикрашаєте подію, правильне позиціонування є ключем до досягнення найкращих результатів. Використовуйте клейку основу, монтажні кліпси або канали для кріплення світлодіодної стрічки.
Переваги використання акумуляторної батареї
Акумуляторні батареї забезпечують значну мобільність і гнучкість, що робить їх ідеальними для різних застосувань. Вони ідеально підходять для ситуацій, коли традиційні джерела живлення недоступні або недоцільні. Наприклад, вони можуть освітлювати намети під час туристичних походів, прикрашати відкриті майданчики для проведення заходів або додавати акцентне освітлення в місцях, де немає розеток.
Використання акумуляторної батареї дозволяє насолоджуватися зручністю світлодіодних стрічок без прив'язки до розетки. Цей метод підвищує універсальність ваших світлових рішень і забезпечує надійне і портативне джерело живлення для широкого спектру застосувань.
Використання USB Power Bank
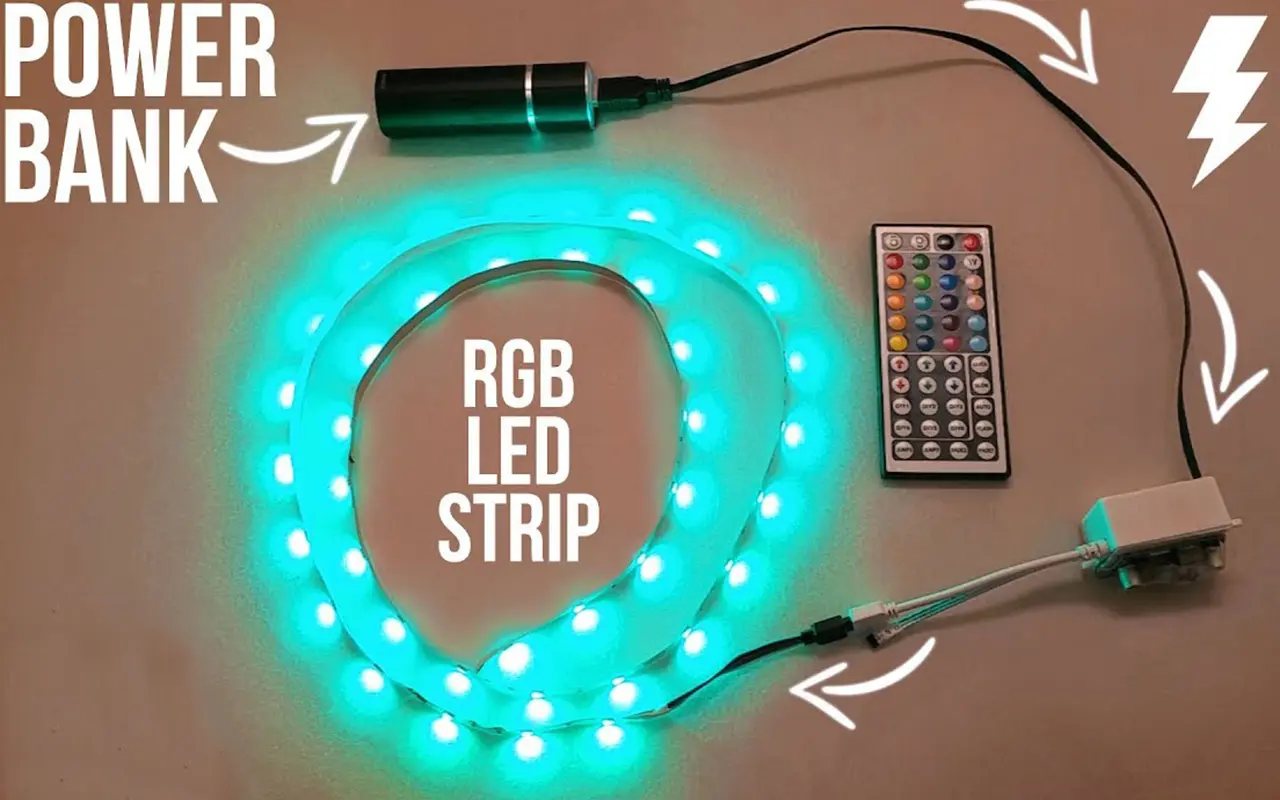
USB-павербанк - це зручне і портативне рішення для живлення світлодіодних стрічок без традиційної вилки. Цей метод особливо корисний для невеликих проектів, тимчасових установок або в місцях, де розетки не є легкодоступними. Ось детальний посібник з використання USB-павербанка для ефективного живлення світлодіодних стрічок.
Перевірте сумісність напруги
Насамперед переконайтеся, що ваша світлодіодна стрічка сумісна з вихідною напругою USB-павербанка, зазвичай 5 В. Більшість USB-павербанків призначені для заряджання таких пристроїв, як смартфони та планшети, які працюють на 5В. Тому ваша світлодіодна стрічка також повинна бути розрахована на 5 В, щоб уникнути потенційних проблем.
Якщо ваша світлодіодна стрічка працює на більш високій напрузі (12 або 24 В), вам знадобиться понижуючий перетворювач, щоб знизити напругу до 5 В. Однак для простоти і сумісності краще використовувати світлодіодні стрічки, спеціально розроблені для роботи на 5В.
Придбайте USB-адаптер
Щоб підключити світлодіодну стрічку до USB-павербанку, вам знадобиться адаптер USB до постійного струму. Цей адаптер перетворює вихід USB на роз'єм постійного струму, який відповідає вхідному роз'єму вашої світлодіодної стрічки. Ці адаптери відносно недорогі і легко доступні в Інтернеті або в магазинах електроніки.
Купуючи перехідник USB-DC, переконайтеся, що розмір роз'єму відповідає вхідному гнізду вашої світлодіодної стрічки. Більшість адаптерів постачаються з кількома наконечниками для різних розмірів, що полегшує пошук сумісного адаптера.
Підключіть світлодіодну стрічку до адаптера
Підключіть світлодіодну стрічку до USB-адаптера за допомогою відповідного адаптера. Вставте роз'єм постійного струму у вхідний роз'єм світлодіодної стрічки. Переконайтеся, що з'єднання щільно і надійно, щоб запобігти від'єднанню або втраті живлення під час використання.
Для більшої стабільності ви можете використовувати ізоляційну стрічку, щоб зміцнити з'єднання. Це особливо корисно, якщо установку часто переміщатимуть, наприклад, для портативних освітлювальних приладів або тимчасових інсталяцій.
Підключіть до Power Bank
Потім підключіть USB-адаптер до USB-порту павербанка. Більшість павербанків мають кілька USB-портів, що дозволяє підключити більше однієї світлодіодної стрічки, якщо це необхідно. Після підключення натисніть кнопку живлення на павербанку, щоб почати подавати живлення на світлодіодну стрічку.
Увімкнення живлення
Увімкніть павербанк і перевірте, чи світиться світлодіодна стрічка. Якщо світлодіодна стрічка не вмикається, перевірте підключення та переконайтеся, що павербанк повністю заряджений. Відрегулюйте розташування світлодіодної стрічки, щоб досягти бажаного світлового ефекту: декоративного, робочого або акцентного освітлення.
Ідеально підходить для портативних освітлювальних рішень
USB-павербанк ідеально підходить для невеликих проектів і портативних світлових рішень. Наприклад, ви можете використовувати його для підсвічування книжкової полиці, підсвічування під шафою на кухні або навіть як підсвітку для телевізора. Портативність павербанка дозволяє легко переміщати світлодіодні стрічки в різні місця, що робить його універсальним варіантом для різних застосувань.
USB-павербанки також можна перезаряджати, а це означає, що ви можете підтримувати роботу світлодіодної стрічки протягом тривалого часу без постійного джерела живлення. Перезарядіть павербанк, коли він розрядиться, і ви знову будете готові до роботи.
Сонячні панелі для сталого освітлення
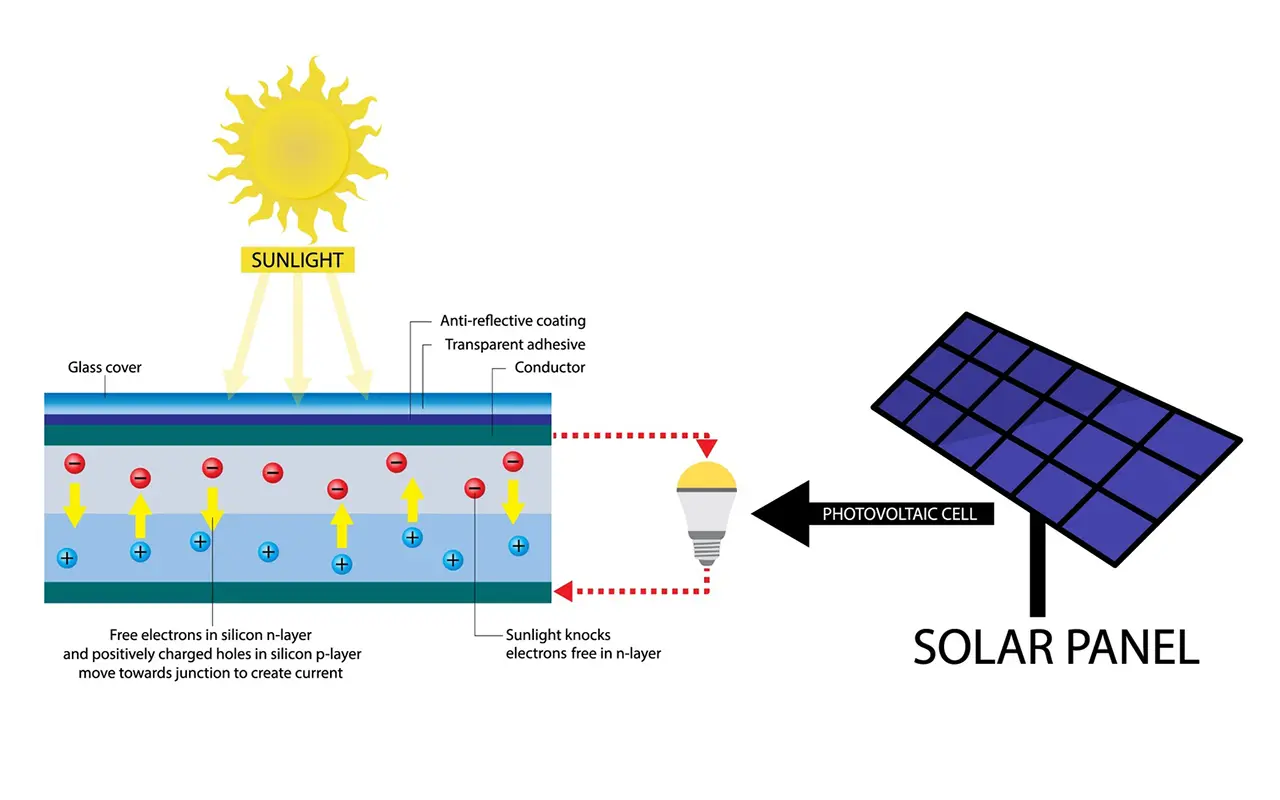
Використання сонячних панелей для живлення світлодіодних стрічок є екологічно чистим варіантом і дуже практичним для районів, де немає доступу до електричних розеток. Цей метод використовує відновлювану енергію, ідеально підходить для зовнішніх установок, віддалених місць або ентузіастів зеленої енергетики. Ось покрокова інструкція зі встановлення світлодіодних стрічкових світильників на сонячних батареях.
Виберіть систему сонячних панелей
Першим кроком у цьому процесі є вибір правильної системи сонячних панелей. Сонячна панель повинна відповідати напрузі та потужності ваших світлодіодних стрічок. Більшість світлодіодних стрічок працюють на 12 або 24 В, тому обирайте сонячну панель, розраховану на ці напруги. Крім того, переконайтеся, що сонячна панель має достатню потужність для підтримки енергоспоживання світлодіодних стрічок. Наприклад, якщо ваша світлодіодна стрічка споживає 10 Вт на метр і у вас є 5 метрів стрічки, вам знадобиться панель потужністю не менше 50 Вт.
Встановіть контролер заряду
Важливим компонентом у цій установці є контролер заряду сонячної батареї. Цей пристрій регулює потік енергії від сонячної панелі до акумуляторної батареї, запобігаючи перезарядці та забезпечуючи стабільне електропостачання. Підключіть контролер заряду між сонячною панеллю та акумулятором. Контролер заряду зазвичай має марковані клеми для сонячної панелі, акумулятора та навантаження (світлодіодні індикатори). Дотримуйтесь інструкцій виробника, щоб забезпечити правильну установку.
Підключіть світлодіодну стрічку
Далі підключіть світлодіодну стрічку до акумуляторної батареї через контролер заряду. На цьому етапі необхідно з'єднати позитивну та негативну клеми світлодіодної стрічки з відповідними клемами акумулятора. Переконайтеся, що з'єднання надійні, щоб уникнути перебоїв у подачі живлення. Належні роз'єми або пайка проводів допоможуть створити стабільне і надійне з'єднання.
Position the Solar Panel
Proper solar panel placement is essential for maximizing sunlight exposure and ensuring efficient energy collection. Position the solar panel in a location that receives maximum sunlight throughout the day, such as a rooftop, a garden, or an open field. The panel should be tilted at an angle corresponding to your geographical latitude to capture the most sunlight. Avoid placing the panel in shaded areas or where obstructions might block sunlight.
Test the System
It’s time to test the system after setting up the solar panel, charge controller, battery, and LED strip lights. Turn on the LED strip lights to check if they receive power and function correctly. If the lights do not turn on, recheck all connections and ensure the solar panel receives sufficient sunlight. Adjust any components as necessary to ensure optimal performance.
Ideal for Outdoor Installations
Solar-powered LED strip lights offer a sustainable and independent lighting solution for outdoor installations. Whether you’re lighting up a garden path, enhancing the ambiance of a patio, or providing illumination for a remote area, solar power provides a reliable and environmentally friendly option. This method eliminates the need for long extension cords and reduces reliance on traditional power sources, making it a cost-effective and green solution.
Hardwiring LED Strip Lights
Hardwiring your LED strip lights to an existing electrical circuit provides a reliable and permanent solution. This method is ideal for indoor installations where you want a long-term lighting setup without the hassle of plugging and unplugging. Here’s a detailed guide on how to hardwire your LED strip lights effectively.
Вимкніть живлення
Safety is paramount when dealing with electrical installations. Before you begin:
Ensure that the power to the circuit you’ll be working on is turned off.
Locate the appropriate circuit breaker in your electrical panel and switch it off.
Double-check by testing the circuit with a voltage tester to confirm that no power is running through the wires.
This precaution helps prevent electrical shocks and other hazards.
Prepare the Wiring
Once you’ve ensured the power is off, prepare the wiring for the connection. Start by stripping the ends of the LED strip wires and the wires from the electrical circuit. Use a wire stripper to remove about half an inch of insulation from each wire end. This exposes the conductive material, allowing you to make secure connections. Be careful not to damage the wires while stripping the insulation.
Make Connections
With the wires prepared, it’s time to make the connections. Connect the positive wire (usually red) from the LED strip to the positive wire from the electrical circuit. Similarly, connect the negative wire (usually black) from the LED strip to the negative wire from the circuit. You can use wire nuts to twist the wires together securely. Alternatively, solder the wires together for a more permanent and robust connection. Ensure that the connections are tight and secure to avoid any power interruptions.
Secure the Wiring
After making the connections, securing the wiring is crucial to prevent any short circuits or loose connections. Use electrical tape to wrap the wire nuts or the soldered joints thoroughly. This insulates the connections and adds an extra layer of protection.
Test the Lights
Once everything is secured, turn the power back on to test the LED strip lights. Go back to the electrical panel and switch the circuit breaker back on. Please turn on the LED strip lights to ensure they are functioning correctly. If the lights do not turn on, double-check the connections to ensure everything is wired correctly. Troubleshoot any issues by verifying that all connections are secure and that there are no breaks in the wiring.
Ideal for Indoor Installations
Hardwiring LED strip lights is particularly suitable for indoor installations where a permanent lighting solution is desired. This method is perfect for under-cabinet lighting in kitchens, accent lighting in living rooms, or illuminating hallways and staircases. Hardwiring eliminates the need for visible power cords, providing a clean and professional look. It also ensures that the lighting setup is stable and reliable, reducing the need for frequent adjustments or maintenance.
Using Portable Power Stations
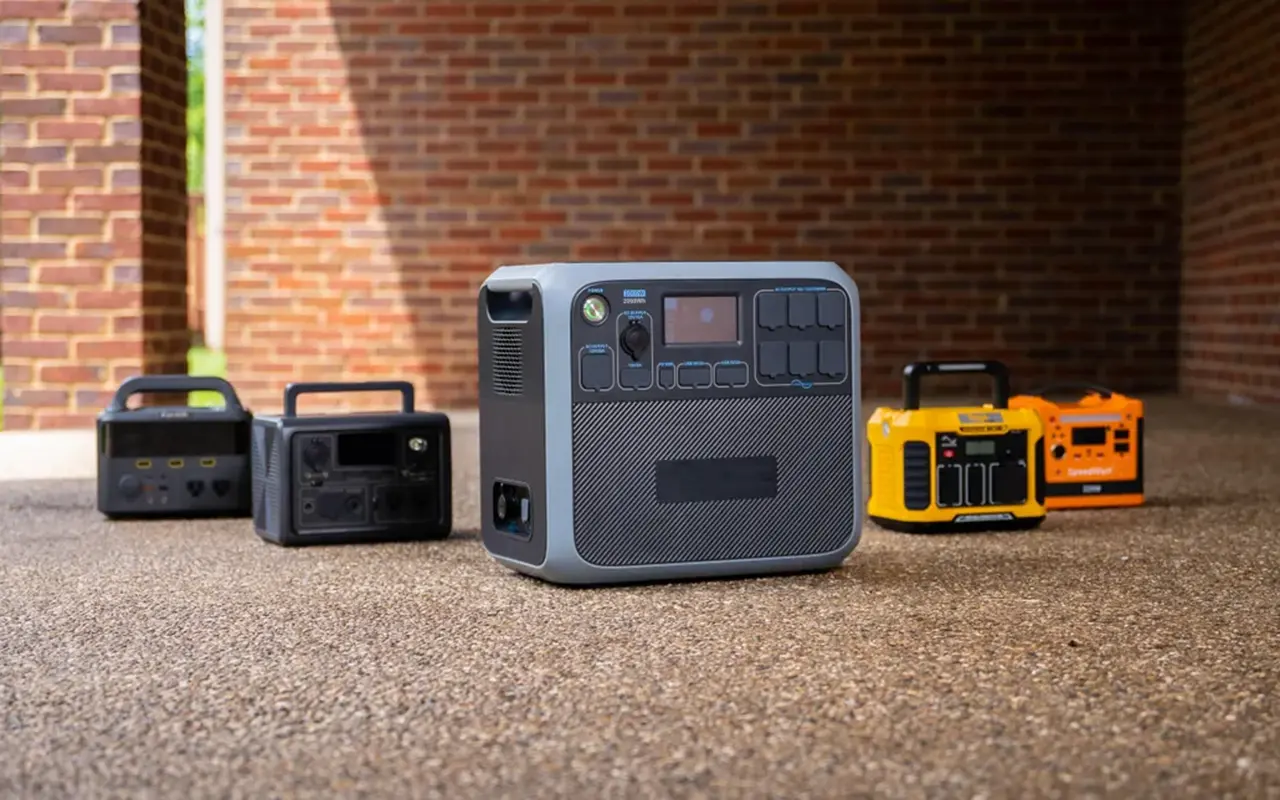
Portable power stations provide a flexible and reliable solution for powering LED strip lights without a traditional plug. These units are large, rechargeable batteries with multiple output options, making them perfect for various scenarios. Here’s how to use a portable power station to power your LED strip lights effectively.
Перевірте сумісність
Before using a portable power station, it’s crucial to ensure that it can supply the necessary voltage and current for your LED strip lights. Most portable power stations have multiple output options, including USB ports, DC outputs, and AC outlets. Check the specifications of your LED strip lights to determine their power requirements, typically indicated in volts (V) and watts (W). For example, if your LED strip lights require 12V and 24W, ensure the power station has a 12V output with sufficient wattage capacity.
Підключіть світлодіодну стрічку
Once you’ve confirmed compatibility, connect the LED strip to the power station. Use the appropriate connectors to link the LED strip’s power input to the power station’s output port. You’ll likely need a DC connector cable if your LED strip has a DC input. Plug LED strips with USB inputs into the power station’s USB port. Ensure all connections are secure to avoid any power interruptions.
Turn On the Power Station
After connecting the LED strip:
Turn on the power station.
Activate your output port—most power stations have buttons or switches to control each output individually.
Once activated, check if the LED strip lights up.
Double-check the connections and ensure the power station is adequately charged if it doesn’t. Adjust the placement of the LED strip to achieve your desired lighting effect, whether it’s for decoration, task lighting, or creating ambiance.
Ideal for Various Scenarios
Portable power stations are ideal for many applications, offering both portability and reliability. They are particularly useful for outdoor events, camping trips, and other scenarios where traditional power sources are unavailable. For instance, you can use a portable power station to light up a campsite, provide ambient lighting at a backyard party, or illuminate a remote worksite. The portability of these units allows you to move them easily and use them in different locations as needed.
Додаткові міркування
When using LED strip lights without a plug, several other important factors must be considered to ensure your setup is efficient, safe, and effective. These considerations include using battery adapters for voltage conversion, connecting with DC connectors, and calculating the expected battery life.
Battery Adapters for Voltage Conversion
If the available battery doesn’t match the voltage requirements of your LED strip, you can use a battery adapter to convert the voltage. Battery adapters come in two main types: step-up and step-down converters. A step-up converter increases the voltage, while a step-down converter reduces it. For instance, a step-up converter can increase the voltage to the required level if you have a 5V battery, but your LED strip requires 12V.
These converters ensure that your LED strip receives the correct voltage, which is crucial for its proper operation and longevity. The LED strip may only function correctly or be damaged with the appropriate voltage. Always ensure that the converter you choose matches the power ratings of your battery and LED strip to avoid compatibility issues.
Connecting with DC Connectors
Secure connections are essential for maintaining a stable power supply to your LED strip lights. DC connectors are commonly used to connect power sources to LED strips. These connectors ensure a reliable and safe connection, minimizing the risk of power loss or damage. It’s important to match the connector size and type with your LED strip and power source when using DC connectors to ensure compatibility.
Calculating Battery Life
Ensure your battery-powered LED strip lights last as long as needed; it’s essential to calculate the expected battery life. This involves understanding the power consumption of your LED strips and the capacity of your battery pack. Accurate calculations help you plan for an adequate power supply, avoiding unexpected power outages during use.
Key Factors in the Calculation
Two key factors determine the battery life of your LED strip lights: the total battery capacity and the power consumption of the LED strips. Battery capacity is typically measured in milliamp hours (mAh) or watt hours (Wh), while LED strip power consumption is measured in watts per meter (W/m). Knowing these values lets you calculate the battery’s length under specific conditions.
The Mathematical Model
To calculate battery life, use the formula:
Battery Life (hours) = Battery Capacity (mAh) / (LED Strip Power Consumption (W) / Voltage (V))
This formula estimates how long your LED strip lights will run on a fully charged battery.
Example Calculation
Let’s say you have a 12V LED strip with a power consumption of 24W and a battery pack with a capacity of 5000mAh. Using the formula, you can calculate the battery life as follows:
Battery Life (hours) = 5000mAh / (24W / 12V)
= 5000 / 2
= 2.5 hours
This means the battery pack can power the LED strip lights for approximately 2.5 hours before recharging. This calculation is crucial for planning your lighting setup, especially for events or applications requiring continuous lighting.
FAQs: Your Questions Answered
Q: What are the different methods to power LED strip lights without a plug?
A: You can power LED strip lights without a plug using a battery pack, USB power bank, solar panel system, hardwiring to an electrical circuit, or a portable power station. Each method offers unique benefits depending on your setup and requirements.
Q: Can I use a battery pack to power my LED strip lights?
A: A battery pack is a popular and portable solution. Ensure the battery pack matches the voltage requirements of your LED strip, and securely connect the positive and negative terminals. This method is ideal for temporary or outdoor installations.
Q: How do I connect LED strip lights to a USB power bank?
A: To connect LED strip lights to a USB power bank, ensure the LED strip operates at 5V. Use a USB to DC adapter that matches the connector of your LED strip, and plug it into the power bank. This setup is perfect for small projects and portable lighting needs.
Q: Is it possible to power LED strip lights with solar panels?
A: Absolutely. Solar panels can provide a sustainable power source for LED strip lights. You’ll need a solar panel, a charge controller, and a rechargeable battery. Connect the components, place the solar panel in a sunny location, and enjoy eco-friendly lighting.
Q: How can I hardwire LED strip lights to an electrical circuit?
A: Hardwiring LED strip lights involves connecting the strip directly to an electrical circuit. Ensure the power is off, strip the wire ends, connect the wires securely using wire nuts or solder, and then turn the power back on to test the lights. This method is suitable for permanent indoor installations.
Q: What are the benefits of using a portable power station for LED strip lights?
A: Portable power stations offer versatility and reliability for powering LED strip lights. They are ideal for events, camping, or any scenario where portability is crucial. Ensure the power station matches your LED strips’ voltage and current requirements for optimal performance.
Q: How do I ensure the longevity of my battery-powered LED strip lights?
A: Match the battery pack’s capacity with the LED strip’s power consumption to maximize battery life. Secure connections to prevent power interruptions, and use voltage converters if necessary to match the strip’s voltage requirements.
Q: What should I consider when choosing a battery pack for my LED strip lights?
A: When selecting a battery pack, ensure it matches the voltage requirement of your LED strip (typically 12V or 24V) and has sufficient capacity to power your lights for the desired duration. A higher mAh rating indicates longer battery life.
Q: Are there any eco-friendly options for powering LED strip lights?
A: Yes, solar panels are an excellent eco-friendly option. They harness sunlight to power LED strip lights, reducing reliance on traditional electricity sources. This setup is perfect for outdoor areas or locations without easy access to power outlets.
Q: What additional accessories might I need to set up LED strip lights without a plug?
A: Depending on your chosen power source, you might need USB to DC adapters, solar charge controllers, rechargeable batteries, and DC connectors. These accessories ensure secure and efficient connections for uninterrupted power to your LED strip lights.
Висновок
In conclusion, powering LED strip lights without a traditional plug opens possibilities for creative and functional lighting solutions. Each method offers unique advantages tailored to your specific needs, from battery packs and USB power banks to solar panels, hardwiring, and portable power stations. Whether you’re aiming for a temporary setup, an eco-friendly solution, or a permanent installation, the options provided in this guide will help you achieve the perfect lighting ambiance. By understanding and leveraging these alternative power sources, you can enjoy the versatility and convenience of LED strip lights in any setting, indoors or outdoors.
For those seeking reliable and high-quality Світлодіодні стрічкові світильники і Світлодіодний неоновий флекс, Unitop stands out as a top choice. As one of China’s leading manufacturers, Юнітоп has built a strong reputation for innovation, quality, and expertise in the LED industry. Our advanced products are designed to meet the highest standards, ensuring durability and superior performance. We encourage you to зв'яжіться з нами immediately if you have further questions or specific lighting requirements. Our dedicated team is ready to provide expert advice and support, helping you find the best solutions for all your lighting needs. Trust Unitop to light up your world with excellence and reliability.

Зараз Том є менеджером з продажу в Unitop (China) Co., Limited. Він був у Світлодіодне освітлення з 2005 року. Він є експертом у сфері продажів та маркетингу, а також в управлінні заводом. Захоплюється бодібілдингом, а ще він шалений фанат Apple! Він працьовитий хлопець, любить вчитися і пробувати щось нове.
Електронна пошта: tom@unitopledstrip.com Ватсап: +86-18680307140


Залишити відгук
Хочете приєднатися до дискусії?Не соромтеся робити свій внесок!